Tools to Measure Angles
Last updated September 7, 2023
If you do a lot of woodworking projects, then you’re probably very familiar with angles. When it comes to angled cuts, it’s wise to follow the old adage of “measure twice, cut once.” Tools can help you measure angles precisely.
Though angled cuts can be a challenge, this guide will show you tools to measure angles, no geometry textbooks needed.
Table of Contents
Types of Angles
Parts of a Triangle
Protractors
Hand Squares
Compasses
Carpenter Squares
Types of Angles

In geometry, an angle is the space between two lines, rays or planes intersecting each other. Angles are measured in degrees. The five main types of angles are:
- Acute: An angle between 0 and 90 degrees.
- Right: A 90-degree angle.
- Obtuse: An angle between 90 and 180 degrees.
- Straight: A 180-degree angle or straight line.
- Reflex: An angle greater than 180 degrees but less than 360 degrees.
- Full: An angle that is 360 degrees.
Parts of a Triangle

Before you can accurately measure angles, you need to understand the different parts of a triangle. Knowing the parts will help you determine where to line up your tools to measure angles. A triangle has three sides and three corners (angles).
Here are some useful terms associated with triangles:
- Adjacent: The two sides of a triangle which form a particular vertex.
- Opposite: The side of a triangle which is not one of the sides adjacent to a particular vertex.
- Base: For a given triangle, one of the sides can be distinguished as being the base.
- Apex: The opposite vertex to the base.
- Height: The length of a perpendicular from the apex to the base.
- Vertex: The point where two sides of a triangle meet.
Note: In a right triangle, the hypotenuse is the longest side, an "opposite" side is the one across from a given angle, and an "adjacent" side is next to a given angle.
Protractors

The types of tools to measure angles fall into one of three categories: protractors, squares and compasses. There are many variations of these basic tools.
A protractor is one of the most common tools to measure angles. When you know how to use a protractor, you can measure both small and large angles.
Protractor types are categorized according to their tasks. The most common kind of protractor is found in the school supply section of big box retailers. Typically, it is a plastic half circle with marked degrees from 0 to 180. Mechanical protectors, like bevel or round protractors with 360 degrees, are used by professionals, like engineers and architects.
A protractor has two sets of numbers. On the outer rim, one set goes from 0 to 180. On the inner rim, the other set goes set from 180 to 0. The one you read depends on where you put the protractor. Always place the protractor so that one side of the angle lines up with one of the zeros.
- Place the midpoint of the protractor on the vertex of the angle.
- Line up one side of the angle with the zero line of the protractor.
- Read the degrees where the other side crosses the number scale.
Hand Squares

Hand squares are used to measure right angles. They have degrees from 0 to 360 and are usually L-shaped. As you figure out how to measure angles for the construction of stairs, frames and rafters, they are very useful. Hand squares are also used to calculate square feet.
Like protractors, hand squares come in a variety of styles. The tools are not the four-sided squares you might expect, though. Instead, they are half squares or right triangles. Set squares, mostly used by students, are a right-angled triangular plate for drawing lines, especially at 90, 45, 60 or 30 degrees.
Compasses

A compass is a measuring tool with a hinged set of arms. One arm has a pointed end and the other holds a pencil. Most people have only used this tool to draw circles, but it can also be used as a tool to measure angles. A protractor is technically also a type of compass, but it has only 180 degrees, while a compass has a 360-degrees rotation.
Carpenter Squares

Carpenters may use miter saws and table saws to get angled cuts, but knowing how to use hand tools to measure angles will ensure walls, stairs, rafters and more are level.
Carpenter squares are a category of tools that cover all hand squares used by carpenters. They often have multiple functions and can be used in a number of ways for carrying out simple carpentry activities.
Speed Square

A speed square is a right-triangle-shaped ruler with a lip on one of its sides. The lip allows you to place it up against the edge of a board or other piece of material for accurate measurements. A speed square has a pivot point (the vertex where the two short legs form a right angle) on one of the corners on the lipped edge. The pivot point is the starting point where all measurements are determined. The long edge of the right triangle (the hypotenuse) is where the degree measurements are located.
How to measure an angle with a speed square:
- Place the speed square along the top edge of the object you are measuring.
- Hook the speed square lip over the edge.
- The straight edge is where the pivot point begins and where you will compute and determine angles.
- Pivot the speed square along the pivot point, towards the lipped edge of the square.
- Stop the pivot point at the degree mark (on the hypotenuse) you are trying to obtain.
- Draw a line down the pivot point edge of the speed square. The line should be the angle you just measured.
Framing Square

A framing square is basically a large, L-shaped piece of metal. It has several scales, including a diagonal scale, a board foot scale and an octagonal scale. It's primarily used to cut angles for rafters and staircase stringers.
A framing square has two legs that are perpendicular to each other. The skinny length is called the tongue and the thicker, longer section is called the blade. The corner of the framing square is called the heel. On the face (top) side, the tongue reads the eight square scale and the blade reads the rafter tables. On the back side of the framing square, the tongue reads brace measurements and the blade reads essex board measurements.
Tip: You will need a scientific calculator or tangent chart to calculate the proper length of each line to match your desired angle.
How to use a framing square for angles:
- Determine the angle of the line you want to cut. For example, a 30-degree line.
- Determine the desired length for one side of the angle. For example, let’s use 10 inches.
- Measure and mark that length on one side of the wood.
- To find the length of the adjacent side, you’ll need to do a bit of math.
- Assume the tongue of the framing square runs along your first marked line (the 10 inches), and the heel outlines the right angle.
- The formula: tangent of (angle measurement) X rise (the length you marked on the tongue side) = equals the run (on the blade).
Using the example measurements:
tangent of 30 degrees = 0.57735026919
rise = 10 inches
0.57735026919 X 10 = 5.77
So, the length of the adjacent side (run) is 5.77-inches
- Mark the opposite side with the calculated run length.
- Draw a straight line from the first marked line (the rise) to calculated line (the run).
- The angle of the line should be the same measurement as the degree you calculated in the beginning. In this example, it’s 30 degrees.
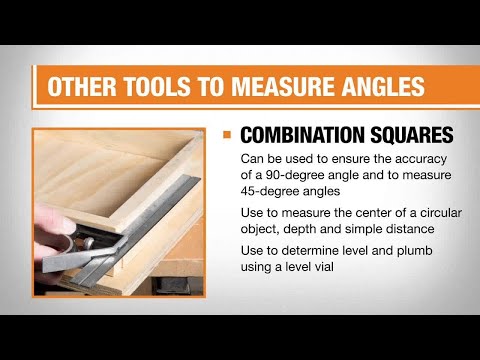
Combination Square

A combination square is primarily used for ensuring the accuracy of a 90-degree angle, measuring a 45-degree angle, measuring the center of a circular object and finding depth and simple distance measurements. It can also be used to determine level and plumb using a level vial.
How to use a combination square to draw a 45-degree angle:
- Place the shoulder of the square along the edge of the surface you wish to cut.
- Draw a line along the blade edge to the shoulder of the combination square.
- The result should be a perfect 45-degree angle with the edge of the working surface.
Try Square

Similar to framing squares, try squares are dedicated right angles. They feature a metal blade fastened into a wooden handle rather than single-body construction. Try squares are good for measuring short distances and to check surfaces for straightness (square) or its correspondence to an adjoining surface.
How to check if a board is square with a try square:
- Place the try square blade across the wood you want to measure.
- The thicker part of the handle should extend over the edge of the material, allowing the blade to lie flat across the surface.
- Hold the handle against the edge of the material. The blade should be perpendicular to the edge.
- Align the blade with the end of the material.
- Be sure the corner of the material lines up with the corner of the try square.
- If you see a gap between the try square and the material, the material isn’t square.
Sliding T-Bevel

A sliding T-bevel is used for both laying out and transferring angles. It is composed of a handle with a metal blade attached to it. One end of the blade is rounded off, while the other is cut at a 45-degree angle.
How to make a new angle with a T-bevel:
- Loosen the wing nut on the blade.
- Using a protractor, swing the blade until the desired angle between the handle of the bevel and the blade matches the angle you want. Use a protractor to check the angle.
- Tighten the wing nut to lock the angle in place.
- Lay the T-bevel on your working surface. Trace along the inside of the T-bevel blade and handle.
How to transfer an existing angle with a T-bevel:
- Loosen the wing nut adjustment.
- Lay the T-bevel against the surface of the angle you want to transfer.
- Rotate the inside edge of the blade to the existing angle until it matches the angle.
- Tighten the wing nut to lock the angle in place.
- Place the T-bevel on the working surface and trace along the inside of the T-bevel blade and handle.
Drywall T-Square

A T-square has two components: the long shaft called the "blade" and the short shaft called the "stock" or "head." T-squares are only used for straight horizontal lines or right angles, but you can use set squares with them to draw vertical and angled lines. In home improvement projects, a drywall T-square is made to help cut straight horizontal lines in drywall or other plasterboard. It’s larger than a regular T-square.
How to use a drywall T-square:
- Align the stock of the T-square with the edge of the drywall board. The blade should run down the surface vertically.
- Measure where you want to cut. Mark it using the hash marks along the blade.
- Holding the T-square firmly, cut along the edge of the blade.
For most home improvement applications, you will only need to know how to use a protractor or how to use a square to measure and draw angles. Learning how to measure angles may seem intimidating at first, but once you understand the terms and parts for each tool, the task will be easier.
Tape measures and construction calculcators can also come in handy as you measure angles.
With the right tools to measure angles, you can take your DIY projects to the next level. The Home Depot delivers online orders when and where you need them.