DIY Grill Station
Last updated September 7, 2023
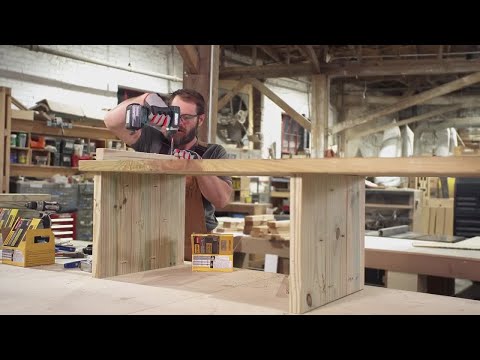
Learn how to build an outdoor grill station to take your grilling to the next level. This versatile grilling station has plenty of countertop space. A Kamado-style grill fits right in, with room for food prep around it. You’ll enjoy storage space for your grilling utensils as well. For maximum convenience, store charcoal below for quick access.
This guide will outline how to create this new home for your grill. You’ll need some basic tools and pressure-treated lumber. When it’s done, add some nearby seating for a dining area. Make outdoor entertaining fun and convenient by following these steps.
Difficulty:
Intermediate
Duration:
2-4 hours
Table of Contents
Materials and Cutlist for DIY Outdoor Grilling Station
Measure and Cut Wood
Build Shelves
Build Panels
Attach Feet
Attach the Bottom Panels
Materials and Cutlist for DIY Outdoor Grilling Station

To build this DIY grill station, you’ll need the following supplies:
Tools and Materials:
- Six 2- x 12-inch x 8-foot pressure-treated lumber
- Three 2- x 8-inch x 8-foot pressure-treated lumber
- 1/2- x 4-inch x 8-foot sheet of pressure-treated plywood
- Box of 1-5/8-inch exterior screws, rated for use in pressure-treated lumber
- Box of 2-1/2-inch exterior screws, rated for use in pressure-treated lumber
- Box of 2-1/2-inch pocket hole screws, exterior rated
- Pocket hole kit, including jig, drill bit and driver bit
- Exterior wood glue or construction adhesive
- Clamps
- Power drill
- Paint scraper
- One nail
- Twine or string
- Pencil
Cutlist:
- Rip the three 2-inch x 8-foot boards to 6-1/2 inches wide. Use a table saw if possible.
- From each of the newly made 2-inch x 6-1/2-inch boards, cut three 14-inch and three 16-inch pieces.
- Cut six 72-inch boards from the 2- x 12-inch boards.
- Cut three pieces, each 1-1/2- x 1-1/2- x 19-1/2-inches long.
- Cut the sheet of plywood to 69 inches long.
- From the 69-inch piece of plywood, cut two pieces. Make one 14 inches wide and the other 16 inches wide.
Measure and Cut Wood

Begin by reviewing the cutlist and gathering the tools you'll need. Having everything in one place makes the building process smoother.
Next, complete the cutlist for this project. Measure twice and cut once:
- Measure and mark the cuts listed above with your measuring tape and pencil.
- Make ripcuts with a table saw.
- Then, cut crosscuts on the marks with a miter saw.
If you don't have access to a table saw, use a circular saw. A saw guide helps make long, straight cuts.
Build Shelves

Now that your wood is cut for this project, glue the shelves together:
- Drill three pocket holes in one edge of each board. Offset them from each other. You want to make sure they don't interfere with the driving of all six screws.
- Align two of the 2- x 12- x 72-inch boards together. Match up the edges where the pocket holes were drilled.
- Use wood glue or construction adhesive and clamps.
- Drive the pocket hole screws.
This forms the top of your grill station. Repeat with the remaining 2- x 12- x 72-inch boards. You'll have three shelves assembled.
Build Panels

Assemble the panels next. They’re put together just like the shelves. You’ll be using pocket hole screws, glue or adhesive and clamps again.
- Drill two pocket screw holes in one long edge of two boards.
- Drill two pocket holes in both long edges of the center board.
- Attach three of the 2- x 6-1/2- x 16-inch cuts with wood glue and clamps. This creates one panel.
- Fasten the boards together using pocket hole screws.
- Repeat with the remaining 2- x 6-1/2- x 16-inch cuts. These are your bottom panels.
- Repeat this step with the 14-inch boards. These are your top panels.
- Let the glue dry.
- Use a paint scraper to chip away excess dried glue.
- Drill three pocket holes at one end of each panel.
Attach Feet

Your grill station needs feet to keep it off your patio or deck. Pre-drill holes before drilling in the screws. This keeps the wood from cracking.
Add wooden feet as follows:
- Using the 2-1/2-inch screws, attach the 2- x 2- x 19-1/2-inch feet pieces to the bottom of the 72-inch board.
- Attach two of the feet 1-1/2 inches in from each end.
- Center the middle piece between the end pieces at 34-1/2 inches.
Attach the Bottom Panels

Follow these tips for the bottom panels:
- Attach all the panels with pocket hole screws and glue.
- Install them with the pocket hole end of the boards pointing down.
- Glue and clamp them in place.
- Once they're secured, drive in the pocket hole screws.
Add the bottom panels. Glue them in like the others:
- With wood glue and clamps, attach the 16-inch panels to the bottom 72-inch board.
- Align one panel with the corresponding foot, 1-1/2 inches in from the side.
- Add another panel to match the other foot. It goes 1-1/2 inches in from the other side.
- Add the last panel in the middle. Center it between the other two.
- Allow the glue to dry before moving on to the next step.
- Use a paint scraper to remove excess cured glue.
Attach the Middle Shelf

You’ll need your drill and 2-1/2-inch exterior screws for this step:
- Fasten the middle 72-inch board in three places.
- Drill 2-1/2-inch exterior screws into each 16-inch panel.
Attach the Top Panels

All of these panels will be attached with pocket hole screws in addition to glue. Install them with the pocket hole end of the boards pointing downward. Once glued and clamped in place, drive the pocket hole screws:
- Align three 14-inch top panels to the middle board.
- Fasten each panel with wood glue and clamps.
- Chisel away excess cured glue with a paint scraper.
Add the Top Shelf

Complete the frame by drilling in 2-1/2-inch exterior screws:
- Wait until glue has dried.
- Screw the top board into the three 14-inch panels.
- As before, chisel away excess cured glue with a scraper.
Cut a Hole for the Grill

Your grill needs a hole to drop into. Adjust the measurement to fit your grill if it’s more than 24 inches in diameter. The circle you will trace will be your cutting template.
If you'd like to estimate the circle first, use the grill lid. The lid will likely be slightly bigger than the grill width.
Use a nail and twine to draw a circle:
- In the middle of the circle, lightly hammer in the nail. It should stand up without support.
- Cut a 13-inch piece of twine.
- Loop one side of the twine around the nail.
Knot it tight. - Add a pencil to the other end of the twine. Make sure it’s 12 inches out.
- Pull the twine taut and draw a circle around the nail. Keep the pencil straight up and down.
- Verify your grill will fit inside that circle. If it doesn’t, adjust the size of the circle.
- Use a jigsaw to cut out the marked circle.
Attach the Back Panels

Glue in back panels and fasten them with screws for extra security:
- Attach back panels with the 1-5/8-inch screws and glue.
- Cover screw holes with wood patch.
- Allow the wood patch to cure as directed on the package.
Tip: Check to see that the wood patch you’re using is for exterior use. Wood putty tends to crack on exterior projects.
Sand and Stain the Wood

Finish your DIY grill station by making it smooth and shiny:
- Use a sanding block or electric sander to smooth rough edges.
- Wipe off sawdust with a tack cloth.
- Paint or stain the structure as desired. Use exterior stain or paint for better weather resistance.
- Allow the station to dry. Then, proceed to the next step.
Place the Grill

The last step requires heavy lifting. Ask a strong friend to help to avoid injury:
- Place a paving stone directly under the grill hole.
- With a partner, lift the grill.
- Carefully fit it into the hole in the grill station.
- Set the grill on top of the paver.
This step may seem unnecessary, but don't skip it. The paver raises the grill to the appropriate level in the station. It also protects the ground from any debris that comes off the grill.
Complete Grill Station

You've now made your very own DIY girll station. Once the grill and other necessary accessories have been added, grilling out will be a breeze.
Now that you know how to build an outdoor grill station, it’s time to get started. If you’d like to build this but don’t own all the required tools, we’ve got you covered. Use our tool rental to use a table saw for this project. When you’re buying supplies in person, locate products and check inventory with The Home Depot Mobile App. We'll take you to the exact aisle and bay.