Build a DIY Kids Sprinkler
Last updated September 7, 2023
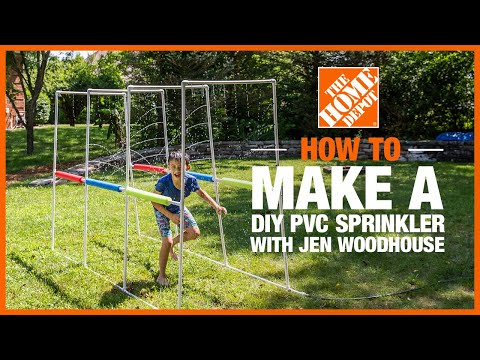
A DIY kids sprinkler is the perfect hot weather project for the whole family to work on. With PVC pipe and connectors and a few tools you can build a working kid-sized sprinkler and turn your lawn into a home water park.
Read on to see how to complete this fun DIY project.
Difficulty:
Beginner
Duration:
Under 2 hours
Table of Contents
Gather Materials
Measure and Cut PVC Pipe
Lay Out a Design
Connect Pipe Sections With Fittings
Mark Sprinkler Holes
Drill Sprinkler Holes
Gather Materials

To complete the project, you need eight 10-foot lengths of 1/2 -inch PVC pipe and an assortment of PVC pipe connectors. For the pictured configuration, you’ll need 10 elbows, 10 tees, 4 4-way connectors, a hose adapter, PVC cement, misting spray jets and pool noodles.
You’ll use a power drill and a PVC cutter or hacksaw in the build.
Don’t forget to put on protective eyewear as you work with the tools.
Measure and Cut PVC Pipe

- Use a tape measure and mark off 30-inch sections on each PVC pipe.
- Use a ratcheting PVC pipe cutter or a hack saw and cut the pipe at each mark.
- You will wind up with 32 30-inch long pieces.
Lay Out a Design

Lay out a configuration for the two side walls of the structure. This makes it easy to see which connectors to use to join the various parts. Let the kids help with the design.
Tip: Remember that the designs of the two sides will have to match and to leave the bottom corner of one side open to connect to the hose.
Connect Pipe Sections With Fittings

- In a well-ventilated area, use all-purpose PVC cement to join the side wall parts together with the elbows, tees and 4-way connectors.
- Apply the PVC cement to the inside of the connectors and push the pipes in.
- Let the cement dry for 15 minutes.
Mark Sprinkler Holes

Decide where the holes in the pipes should be. Then, use a tape measure to mark off a hole at about every 6 inches along the pipe.
Drill Sprinkler Holes

Use a drill to drill into the pipe at each mark. Be careful not to drill all the way through the pipe.
Add Misters (optional)

As an option, you can add misters in some places along the pipe.
Position the mister head into a drilled hole.
Tap gently with a mallet until the mister is securely in the hole.
Tip: Misters will work better if you have high water pressure or you are creating a small structure.
Complete the Top Section

- Once the side walls are assembled, stand them up and join them together with the top bars and elbow fittings.
- Use the drill to add sprinkler holes overhead to the top bars. Be careful not to drill all the way through the pipe.
Tip: Do not use cement to join the top bars with the side structures. This will make it easy to dismantle the sprinkler and store it flat at the end of the season.
Attach Pool Noodles (optional)

Use pool noodles to make decorative bumpers on the sides of the sprinkler.
- Cut down the middle of one side of a pool noodle to make a pipe sleeve. Repeat as desired.
- Slip the noodles around the pipes in various spots. Be sure not to block the holes.
Anchor to Lawn

Using U-straps, anchor the sprinkler to the lawn at several places along the bottom pipe on both sides.
Just Add Water!

Add the hose adapter to the hose and connect the water hose to the open corner of the sprinkler. Then turn on the water and have a blast beating the heat!
A DIY Sprinkler makes a great project for the family to tackle together. It is easy to do, helps teach great tool skills and when you are done, the kids can enjoy afternoons of water fun.
Ready to start your project? The Home Depot delivers online orders where and when you need them.