DIY Tank Cover
Last updated April 4, 2025
If you have an unappealing area or unsightly fixture in your otherwise well-manicured landscape, don’t let it ruin your view – cover it up.
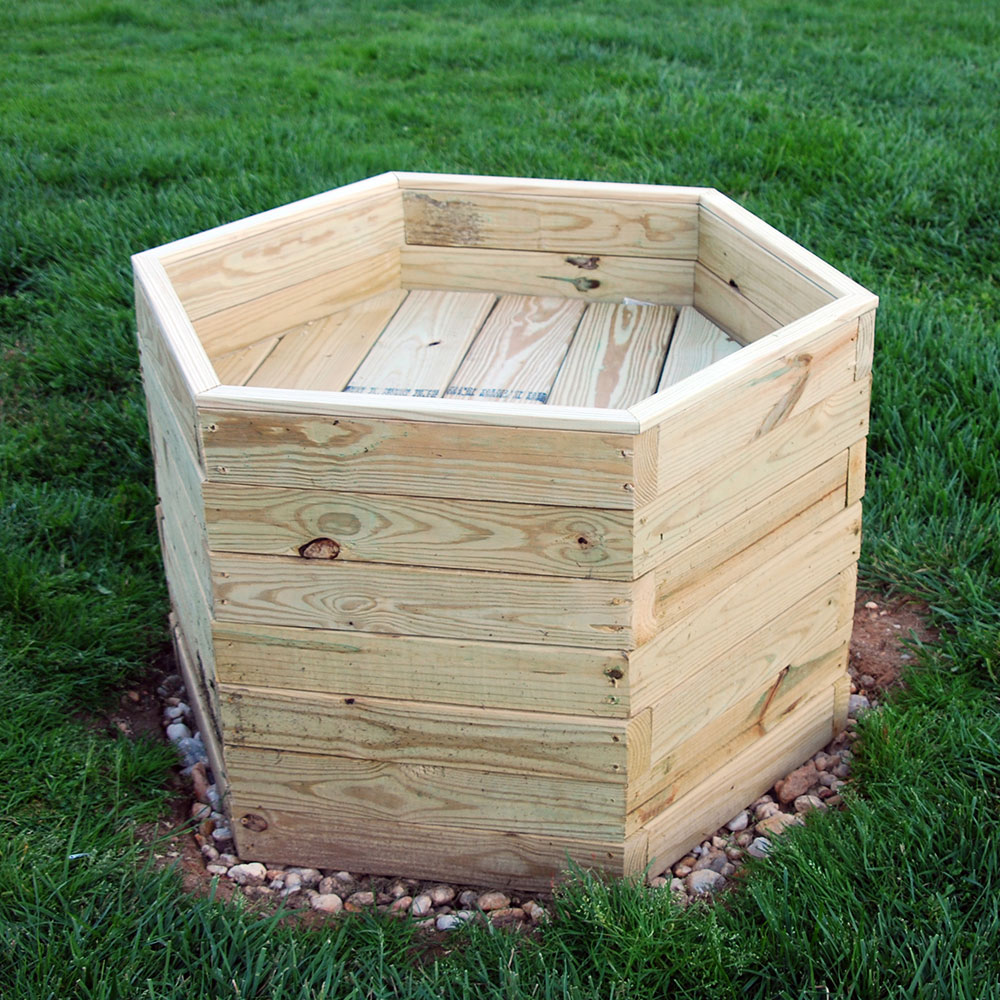
Whether short or tall, a raised planter can be customized to suit your needs and conceal a vent pipe, water meter, septic cover and more. The possibilities are endless.
These DIY directions are for a 26-inch high by 32-inch wide decorative raised planter designed to hide a septic tank cover. It can do double duty if you remove the flowers and add a tarp and some ice for a backyard drink station.
Difficulty:
Intermediate
Duration:
2-4 hours
Table of Contents
Mark and Cut Wood
Create the Base
Create the Next Layer
Secure the Layers Together
Stack and Repeat
Prepare the Site
Mark and Cut Wood
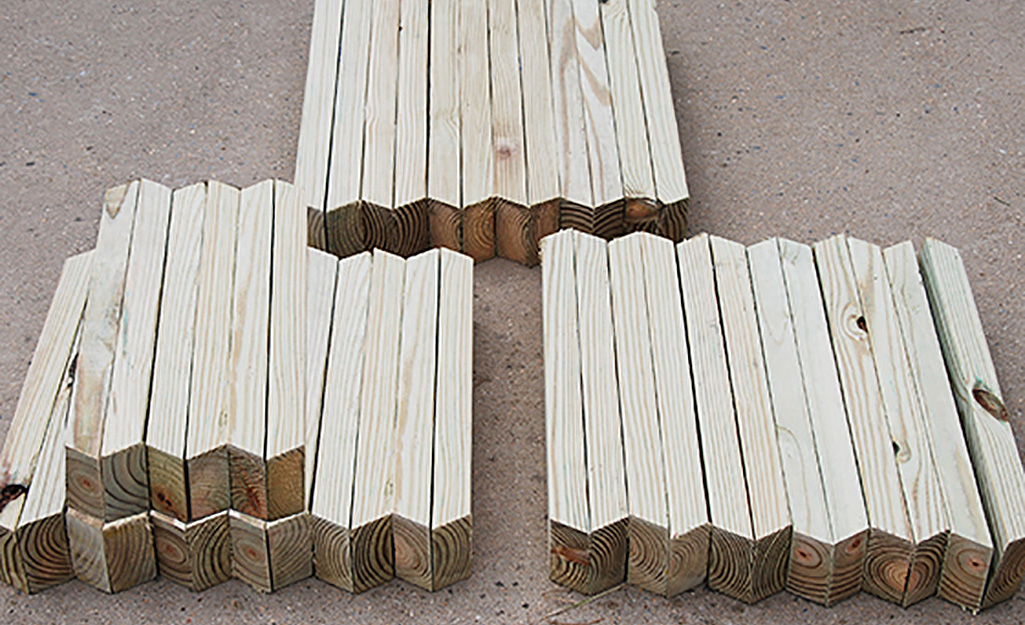
Measure twice, cut once. Using a miter saw, cut one end of the 2- x 4-inch x 8-foot piece of lumber at a 30-degree angle. Flip the board over, measure, mark and cut a 20-inch long piece. Flip the board over again and cut another 20-inch long piece.
Repeat the process of flipping, measuring and cutting until you have 18 – 2- x 4- x 20-inch pieces, 12 – 2- x 4- x 18 ¼-inch pieces, 12 – 2- x 4- x 21 ¾-inch pieces and six – 2- x 4- x 16 ½-inch pieces. Set the 16 ½-inch pieces aside for Step 8.
With straight cuts, cut the 1- x 6-inch x 8-foot pieces into six 1-x 6-x 31-inch pieces and 2 – 13 ½-inches pieces. Set aside for Step 7.
Create the Base
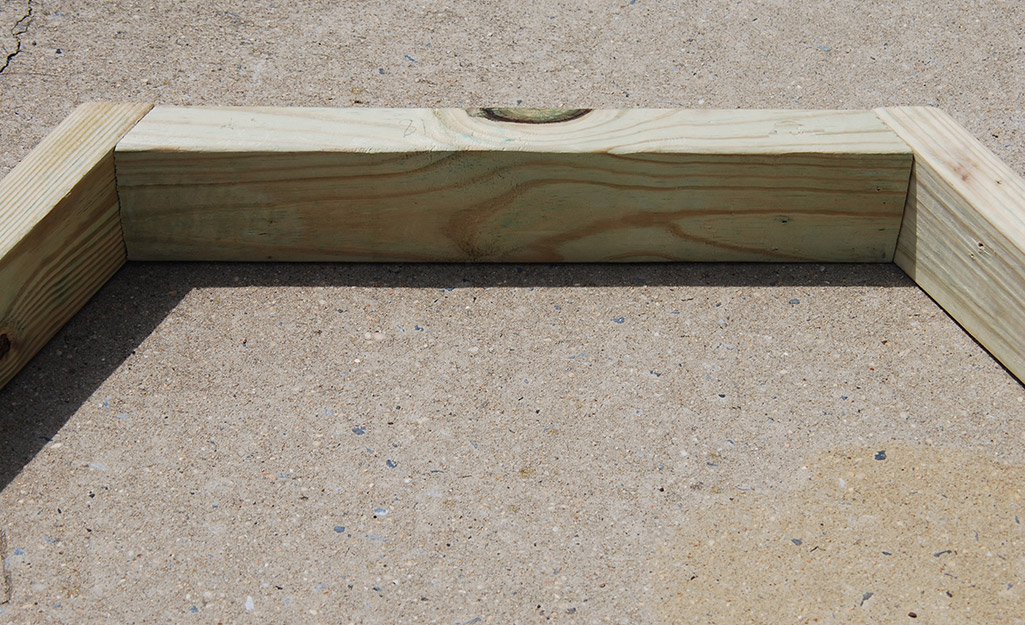
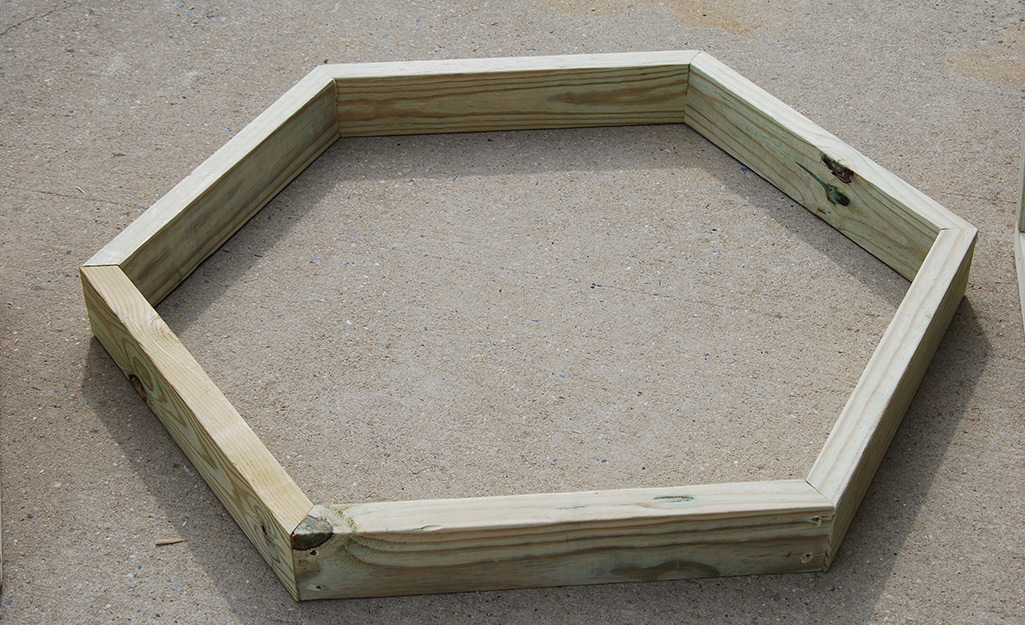
Form a hexagon by using three each of the 18 ¼-inch and 21 ¾-inch pieces. The 18 ¼-inch pieces will sit between the ends of two 21 ¾-inch pieces to form tight 60-degree angles.
Using a 1/8-inch drill bit, drill two pilot holes one inch from both ends of the 21 ¾-inch pieces and angled into the ends of the 18 ¼-inch pieces. Secure together using 12 – 2 ½-inch decking screws.
Create the Next Layer
Lay six 20-inch pieces on top of the base form. The ends will be flush with one another. Drill two pilot holes one inch from both ends of the three pieces lined up with the shorter base pieces. Secure together using 12 – 2½-inch decking screws.
Secure the Layers Together
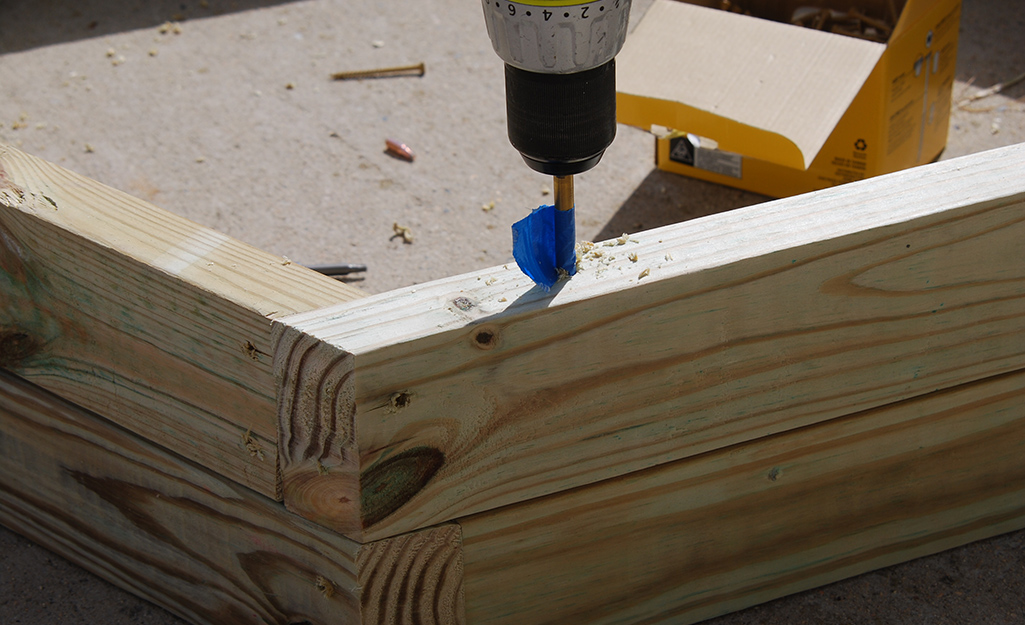
Now that you have two layers, drill two holes using a ½-inch drill bit on the top edge of each board making up the top layer. Each hole should be 3 to 4 inches from the end and 1 ½-inch deep. Alternate the location as you add each layer so you do not hit the same spot as the lower layer.
Once you have the holes bored out, secure the layers together using 12 – 2 ½-inch screws. Use wood glue between the layers for added support.
Tip: Wrap a piece of painter’s or masking tape on the drill bit where you should stop drilling as a guide.
Stack and Repeat
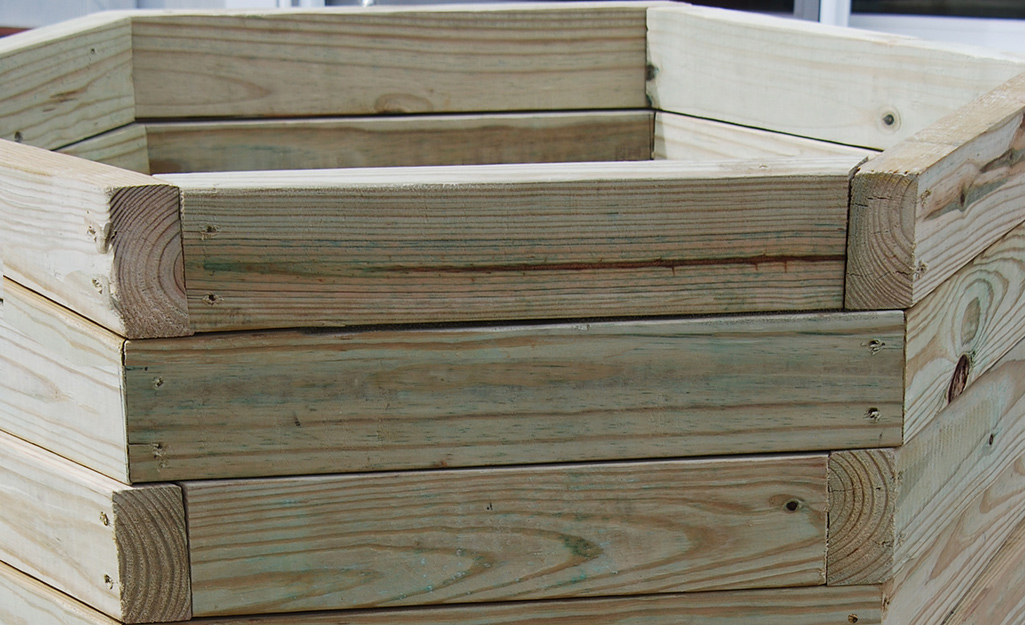
Repeat steps 2, 3 and 4 until you reach the desired height. Do not fasten the final layer yet. Use this layer as a form for Steps 6 and 7, and then secure it to the other layers.
Prepare the Site
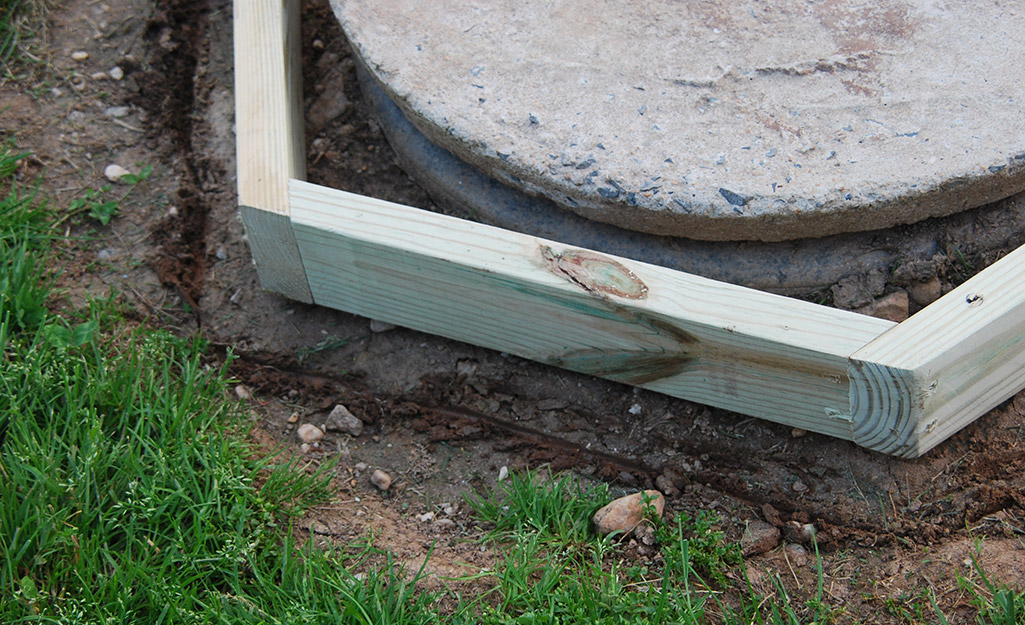
Center the hexagon form around the area you are covering. Use a shovel to mark a perimeter. Remove the form and dig a 4 to 5-inch deep trench around your mark. Dump two to three bags of pond pebbles into the trench for drainage and then rake level.
Build the Floor
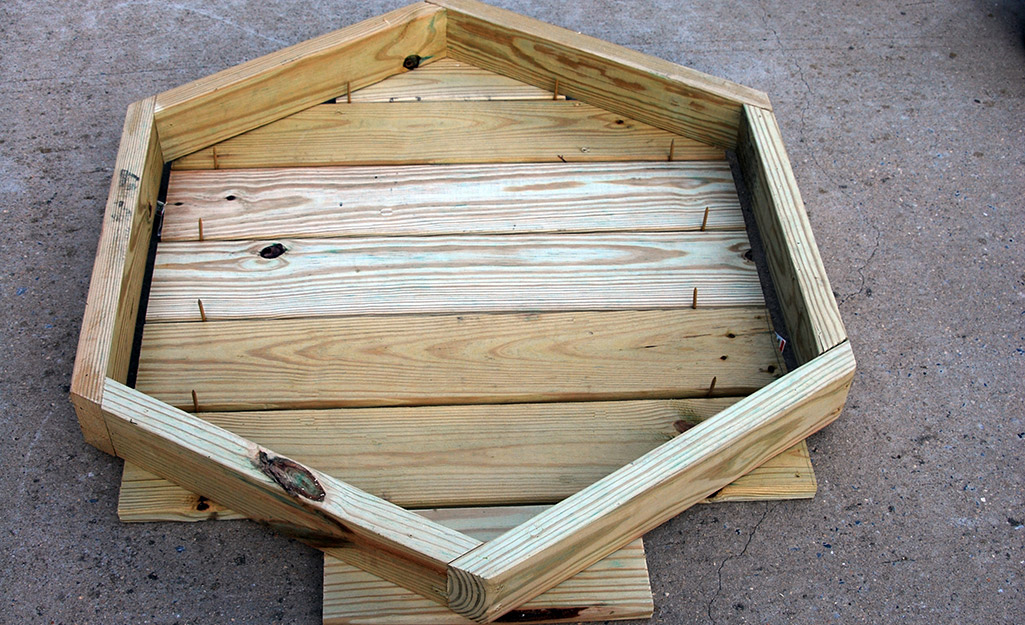
Lay five 1- x 6- x 31-inch pieces side by side and two 1- x 6- x 13 ½-inch pieces on either end on a flat surface. Leave one-quarter inch between each slat to allow for expansion from moisture. Use decking screws as spacers.
Place the last hexagon form centered on top. Trace the inside of the hexagon onto the 1- x 6-inch boards, leaving about a one-quarter to one-half-inch gap for easier removal.
Trim the pieces you’ve traced, using a circular saw. Once the boards are cut, reassemble, again leaving one-quarter inch between each slat. Check to make sure they all fit nicely within the hexagon form.
Secure the boards using the final 1- x 6- x 31-inch board set across and centered over the seven slats. Drill two pilot holes for every slat and secure using 14 – 1 ½-inch decking screws.
Build a Ledge
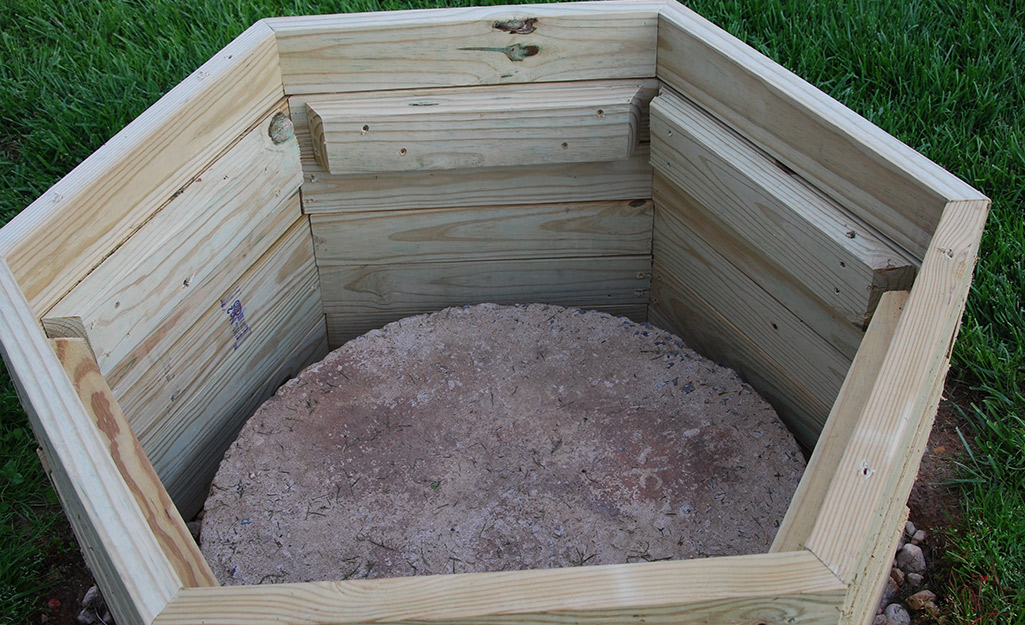
Once you’ve secured all the hexagon layers together, drill four pilot holes in each of the six 16 ½-inch pieces, about one inch from the outer corners. Attach the pieces to the inside of the hexagon two layers down using 2 ½-inch decking screws. Rest the floor you built in Step 7 on top of the ledge.
Top It Off
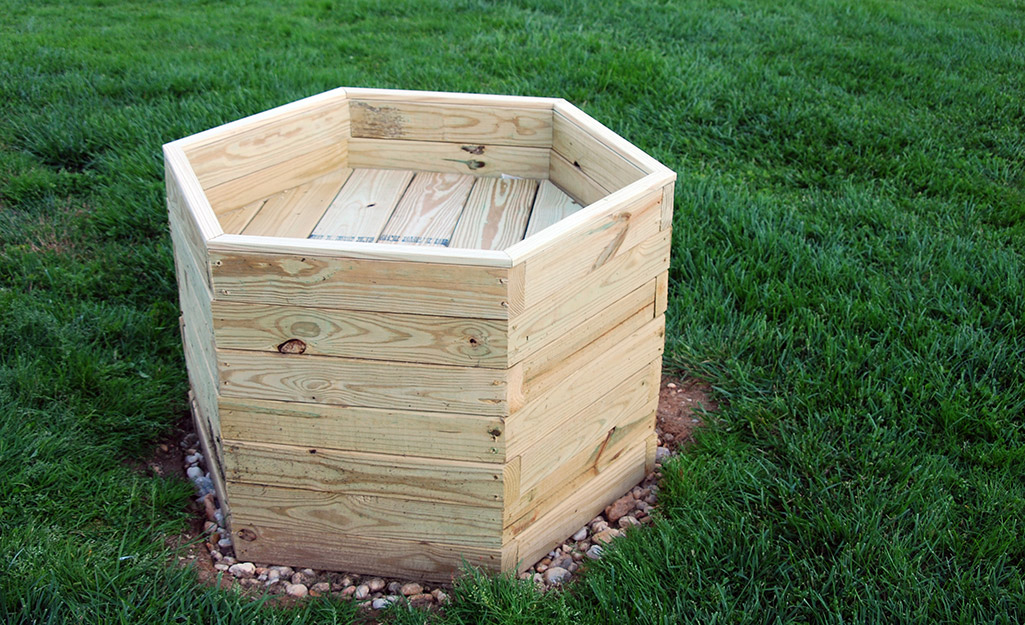
Place the unit on top of the prepared site and level. Cutting at a 29-degree angle, cut the 1- x 2-inch x 8-foot pieces of lumber into six 20-inch long pieces. Repeat the process of cutting and flipping the board over. You may need to adjust the angle slightly to get a tight fit.
Use wood glue to secure the 1-inch x 2-foot pieces to the top of the hexagon flush with the outer edge. Let glue set according to directions. If you do not use 1-inch x 2-foot pieces as a top edge, fill exposed holes with exterior wood putty.
Tip: Before you stain your new cover, wait several rains so the waterproofing stain will soak into the wood.
Now that you've learned how to create a DIY tank cover, you can cover unsightly features in your landscape. You can modify the measurements to cover vent pipes, water meters, septic tanks and more. Download the Home Depot Mobile App and find products fast with image search. Snap a picture of an item you like and we’ll show you similar products.


