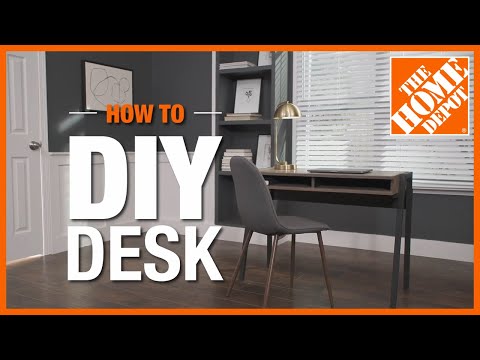
DIY Desk
Last updated September 7, 2023
A desk is one of the most useful pieces of furniture you can add to your home. When you build a desk, you can customize it depending on how and where it will be used. For example, if you want to add a DIY desk to a child’s room, you might want to paint it their favorite color. If you’re transforming a closet into a small office, you can build a more compact DIY desk to fit the space.
This step-by-step guide will show you how to build a desk, from getting your materials together to setting up the finished piece.
Difficulty:
Intermediate
Duration:
Over 1 day
Table of Contents
Gather Materials and Tools
Plywood Cut List
2x2 Cut List
Drill Pocket Holes
Assemble the Top of the Desk
Continue to Assemble the Top
Gather Materials and Tools

The basic version of this DIY desk project calls for plywood project panels and framing lumber. Wood is a natural product and is subject to move, warp, or twist due to natural stresses in the grain and the environmental conditions of the area where it is stored. Wood can be damaged in transit or on the shelf in the store. And, finally, wood is used for many different applications. A board that would be suitable for framing behind sheetrock might not be suitable for a furniture project.
With that in mind, examine each piece of wood for surface or edge damage and straightness before adding it to your cart. The longest leg section will be around 32 inches so a 2x2 doesn’t have to be perfectly straight along its entire length. Imagine the board cut into several pieces and make sure those parts will be straight.
Here’s what you’ll need to build a desk:
PPE: Safety glasses, ear plugs or muffs and a dust mask. Nitrile gloves may be useful depending on the finish you choose.
Two 24x48x3/4-inch plywood project panels
Three 2x2x8
1 inch pocket hole screws
1-1/4 inch pocket hole screws
2 inch pocket hole screws
Wood glue
Wood putty or filler
Sandpaper
Paint or stain
Polyurethane spray
Pocket hole jig set with drill and driver bits
Drill
1/8 inch drill bit
Countersink drill bit
Circular saw with smooth finish plywood blade
Table saw with smooth finish plywood blade (optional)
Miter saw (optional)
Speed square
Sander
Paint and finish equipment
Plywood Cut List

For your DIY desk, make the following cuts from the plywood project panels:
- Cut two 2-3/4x48” strips from one project panel
- Cut one of these pieces into three pieces, each 2 3/4x15-3/4”
- Cut the other piece to 2-3/4x38”
- Cut the remainder of the first panel to 18x38”
- Cut the second panel to 18x48” and save the offcut 5 7/8 x 48” piece for later in the build.
- Cut the remainder of the second panel to 18x38”
2x2 Cut List

As you learn how to build a desk, you will become very familiar with 15-degree angles. To find and cut this angle, you can use a power miter saw, the protractor on your speed square or a table saw with a crosscut guide. If cutting on a table saw, remove the fence, tilt the blade and use a crosscut guide or sled to make the cuts. It is extremely dangerous to make crosscuts on a table saw against the fence.
First, cut a 15-degree angle at the end of a 2x2. Measure from the long point of the angle and mark a line at 7-1/4 inches then make a square cut at that point. Repeat this to produce two pieces.
Next, repeat the procedure above, except the pieces will be 11-1/2 inches long.
Now, cut a 15-degree angle at the end of a piece. Measure 31-1/8 inches from the long end. Starting at that point, mark a 15-degree angle that is parallel with the first angled end. Cut, and repeat to make two legs with parallel angles.
Finally, cut two legs, 30 inches long that are square on the ends.
Drill Pocket Holes

Along one long dimension of each 2 3/4
x 15 3/4 inch plywood piece, use a drill to make three pocket holes.
Close attention is important here. One of the small plywood pieces will look different than the other two. On one short dimension of two 15 3/4 x 4 inch pieces, drill one pocket hole. This hole should be on the same face as the other holes. On the third piece, the hole will be on the same face as the other holes but should be on the opposite end from the other two. This is because they will all need to attach to the top, bottom, and rear of the box with the screws facing the inside.
Along one long dimension of the 2 3/4 x 38 inch plywood piece, drill six pocket holes. Don’t put one in the center because a divider will be going there.
You’ll be drilling more pocket holes later, so don’t put the tools away just yet. The 5 7/8 inch plywood piece will be cut to length closer to the end of the project. It will need five pocket holes.
Assemble the Top of the Desk

Remove any splinters or “fuzzy” edge from the plywood with sandpaper. At this point, you shouldn’t round the edges or corners on the large pieces at this point. If there are any voids in the plywood edges, fill with wood putty and allow them to dry.
Round the edges only on the short ends of the 15 3/4 x 4 inch pieces that don’t have pocket holes in them. These will be difficult to round later. Leaving all the other edges crisp and sharp will make assembly easier. Plus, some edges will not be rounded at all.
Decide which face of the 18x38 inch plywood piece is your favorite and will be the desktop surface. Turn that piece face down. Measure and mark a line 19 3/8 inches from one edge. This line will be slightly off-center and will run along one edge of the center support piece.
Arrange the 2-3/4-inch pieces on the underside. The long edges with the pocket holes should be against the top with the holes facing into the desk. Place the central support piece along the line so that it’s in the center of the desktop. Place the other pieces flush with the outer edges.
Once you’re satisfied with the arrangement, carefully join the pieces with wood glue and pocket hole screws. Driving the screws often forces the piece to move about 1/16 inch in the direction of the screw point, so plan accordingly. Your best bet is to use clamps. If you don’t have sufficient clamps, cheat the edge of the board about 1/16 inch so that the screw will pull it into place. Wipe away any excess glue with a damp cloth or paper towel.
Use plugs and glue to fill the pocket holes, if desired. They can also be filled with wood putty. Smooth the putty with a putty knife and allow to dry. A second application may be needed if the putty shrinks.
Continue to Assemble the Top

Align the second 18x38 inch piece on top of the assembled portion. The back and side edges should be flush with the 2-3/4 inch wide pieces. Using a square and pencil, lightly mark the location of the center of the center divider to aid in screw placement.
Once you're satisfied with the fit, use a countersink bit to drill pilot holes, drill the countersink a little deeper than normal to accommodate 1 1/4 inch pocket hole screws or use flat head screws and normal countersinks. Don’t drive any screws yet. You will permanently attach the bottom in a later step.
Assemble the Legs

With the box upside-down on a level work surface and the bottom off, use a square and pencil to lightly mark a line on one side, 1 inch from the back of the box. This line will be parallel to the back of the box. Stand one of the 30-inch legs on end and align to the line. Using the leg as a guide, mark a line on the other edge and move the leg out of the way.
Drill three 1/8-inch holes through the plywood between the lines in a staggered pattern. These holes should all be in the face of the plywood side, not into the edge of the plywood top. Put the leg back into place and clamp it solidly. Secure the leg into place with three 2-inch pocket hole screws from inside the box into the leg.
Take the 7-1/4 inch piece, with the square edge towards the back. Lay it on the table with the short side of the angle down on the work surface. The square edge should be tightly against the first leg. Draw a line across the top and down the angled end of this piece. Remove the piece and drill three holes as with the leg. Clamp the piece back in place and secure it with 2 inch pocket hole screws. Repeat the process on the other end of the box.
Take the 32-inch leg, with the angled ends. Place it against the angled end of the 7-1/4 inch piece with one angled end flush to the work surface. Lightly mark lines to guide drilling pilot holes. Clamp the leg firmly in place and attach the leg with three 2-inch pocket hole screws from the inside of the box. Repeat the procedure with the other angled leg.
Put the bottom of the box in place. Using only 4 screws, two on each end, attach it to the box. Lay the 11-7/8 inch piece on the bottom, short side down, against the inside of the leg that was just installed. The square end should be flush with the back of the rear leg as the pieces overlap. The angled end should be flush with the angled front leg. One long edge of this piece should be flush with edge of the plywood bottom. Drill three countersunk pilot holes through this piece, into the bottom of the box. Then drive three screws to secure it into place. Do the same on the other set of legs.
Drill two countersunk pilot holes through the 11-7/8 inch piece into the side of the each leg and secure them together with 2-inch screws.
Make Freehand Pocket Holes

On the bottom of each 7-1/4 inch leg piece, from a point about 3/4 inch from each leg, start drilling a hole with the countersink bit. Once the surface of the wood is pierced, tilt the drill to about 45 degrees and drill an angled hole into the leg. Let the countersink cutter make a pocket just deep enough to hide the head of a screw. Screw in a 1-1/4 inch pocket hole screw. Do this to each leg.
Cut and Attach Rear Support

Take the 5-7/8x48 inch piece of plywood and place it behind the straight leg, with a long edge against the bottom of the box. Make it flush with the outer edge of one straight leg and mark a line at the outer edge of the other straight leg. Cut the piece to that length.
Drill five pocket holes, evenly spaced along the long edge that is meant to touch the underside of the box.
Lay the board in place and drill three countersunk pilot holes through the face of the board near each end, drive 1-1/4 inch screws into the back of the straight legs.
Take the Desk Apart to Sand and Finish It

As you learn how to build a desk, note where all the parts meet each other, which is where you will be applying wood glue. Disassemble the leg parts and remove the bottom of the box. Sand all visible parts to smooth using a random orbital sander. Round the outside edges of the desktop and box bottom, and the lower portions of each leg.
If you intend to finish the entire DIY desk with one color, apply glue to all mating surfaces and drive the screws back into their original places.
If you intend to finish the legs and box differently, use masking tape to cover the mating surfaces, where glue will be applied before applying finish. Glue doesn’t adhere to finish as well as it does to raw wood. The making tape doesn’t have to perfectly cover the entire surface. Just covering as much area area around all the screw holes as possible will be sufficient, while still getting good finish coverage around the corners.
As you build a desk, the box can be left its natural color. If you'd prefer, you can choose a stain or paint that goes nicely with the legs. The entire piece will be sprayed with polyurethane once it is reassembled permanently.
Assemble Permanently

Once the finish has cured all the way through, remove the masking tape and reassemble the parts of the DIY desk. Use wood glue on the unpainted mating surfaces.
Use a spray polyurethane in a well-ventilated area to protect and seal the entire project. Follow the manufacturer’s directions to apply multiple coats to the desktop and the front edges, as they will receive the majority of wear over time.
Level the Desk

Put the DIY desk where you intend to use it. Check to see if all four feet sit on the floor. If there is a variation, use different thicknesses of felt or rubber pads to make up the difference.
Once you learn how to build a desk, you can really make this project your own. You can create a DIY desk to meet the work needs or study specifications of everyone in your household. With a little paint or stain, the desk can match any room in your home.
Need tools, wood and other materials to build a desk? The Home Depot delivers online orders when and where you need them.