How to Frame a Door

Last updated March 13, 2025
If you’re building a new partition wall that includes interior doors, you’ll need to learn how to frame a door opening properly. Save yourself time and money by purchasing the pre-hung door you want to install before you begin framing. That way, you can be sure the opening is wide enough. This guide will show you how to frame a pre-hung interior door.
Difficulty:
Intermediate
Duration:
Under 2 hours
Table of Contents
Choose Your Materials
Nail the Top Plate
Mark and Nail the Sole Plate
Cut and Attach the King Studs
Mark and Cut the Jack Studs
Construct the Header
Choose Your Materials

Before you begin, select the pre-hung door you’re going to use. It will allow you to know the dimensions to work with during your project. It will also require less skilled effort than hinging a door.
Next, determine which type of framing lumber will work best for your door frame. Focus on the structural qualities of the wood as well as the visual appeal of the finish. Look for lumber that is free of knots and cracks. You should also avoid twisted, cupped, bent or bowed lumber. Your door frame will be made with studs and covered with trim later on. The following are the most common types of wood used for interior door frames:
- Pine: This wood is the most popular since it’s easy to source and widely available throughout the country. It’s a softer, lightweight wood resistant to swelling and shrinking.
- Alder: This wood features a uniform and moderately fine texture, making it great for interior use. It’s a versatile wood that sands easily and has virtually no odor.
- Fir: This type of lumber is known for its superb durability and strength. It can feature a wilder and more distinct grain pattern with a coarser texture.
- Birch: This wood features a uniform, fine-grain finish. It's popular for interior trim, paneling and furniture pieces.
Nail the Top Plate

Begin by securing the top plate:
- On the ceiling, snap a chalk line to indicate where you're installing the top plate of the new wall.
- Cut the material for the top plate to length.
- Use nails or screws to secure the top plate through the ceiling into the ceiling beams or blocking.
Mark and Nail the Sole Plate

Next, mark and nail the sole plate:
- Use a marker to mark the floor where you're installing the sole plate with a plumb bob.
- Secure the sole plate with a few screws.
- Double check that the sole plate and top plate are parallel and make any adjustments needed.
- Nail the sole plate to the floor by driving the nails into the floor joists or blocking.
Don’t nail the sole plate to the floor between the jack stud locations. This portion of the plate will be removed before the door is installed.
Cut and Attach the King Studs

Measure and cut king studs:
- Refer to your pre-hung door frame instructions for proper spacing of king studs.
- Confirm the thickness of your studs.
- Make markings where your king studs will be inserted. Remember that jack studs will be placed inside them and space them accordingly.
- Position them at the markings.
- Drive nails at a 45-degree angle to make a toenailed joint, or attach the studs with metal connectors.
Tip: It’s very important to cut your king studs correctly. If they are too short, they are prone to movement. If they are too long, they can twist and bow.
Mark and Cut the Jack Studs

Next, prepare the jack studs:
- Confirm the dimensions specified by the manufacturer's instructions.
- Use a tape measure to measure the length of the jack studs to 80-7/8 inches.
- Mark and cut them to size.
- Place the jack studs against the inside face of the king studs and make sure the edges align.
- Secure them with screws or nails to the king studs.
- Toenail them into the sole plate.
Construct the Header

Begin constructing the header:
- Make a header by fitting two 2x8s around a 1/2-inch piece of plywood.
- Secure the 2x8s to each other with construction adhesive and nails.
- Cut the header to fit between the king studs.
- Check the thickness of the studs to determine the best thickness spacer to use.
- Install a cripple stud between the header and the top plate, halfway between the king studs.
- Toenail the cripple stud to the top plate and the side of the header.
- Make sure the faces of the horizontal studs are co-planer with the edge of the king and jack studs.
Nail the Jack Studs into Place

Nail the jack studs into the header:
- Position the jack studs against the inside of the king studs and nail them into place.
- Use a hammer or nailer to nail through the king studs into the header.
It’s very important to make sure the joints are co-planer. If an edge sticks out, it can result in uneven drywall and gaps in the trim of the doorcase.
Tip: Use construction adhesive when assembling the door frame. It will result in a more rigid frame that will prevent squeaking or twisting.
Cut a Portion of the Sole Plate

Finally, cut a portion of the sole plate:
- Make sure framing is securely fastened to the floor adjacent to the king stud.
- Saw through the 2x4 sole plate at the inside edges of the jack studs.
- Remove the cut portion of the plate.
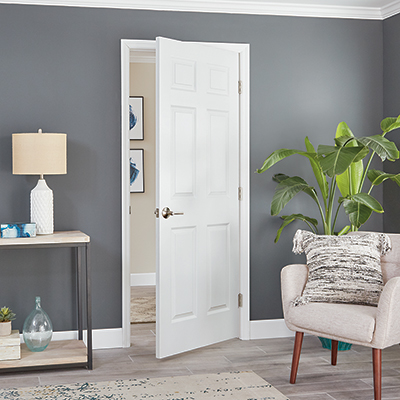
Your frame is now finished. Complete your doorway by installing the pre-hung interior door.
Now that you know how to frame a door opening, you can outfit rooms on your own. With some common tools and a little patience, you can complete this job in no time. Use The Home Depot Mobile App to locate products and check inventory. We’ll take you to the exact aisle and bay.