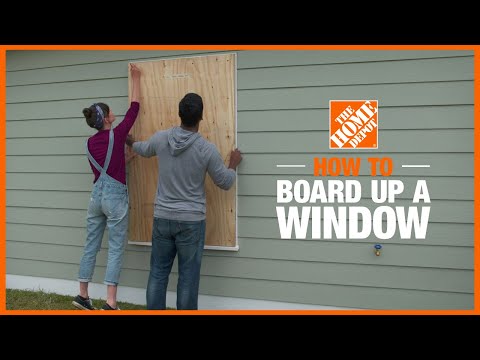
How to Board Up Windows
Last updated September 7, 2023
Boarding up windows with plywood can prevent dangerous debris from smashing into your home during a tropical storm with violent winds. If a storm is forecast for your area soon, now is the time to learn how to board up windows – it might take an hour to measure, cut, build and install each storm shutter.
This Home Depot guide will teach you how to board up windows before a hurricane brings damaging high winds to your home. It also lists the tools and supplies for boarding up windows.
Difficulty:
Beginner
Duration:
Under 2 hours
Table of Contents
Board Up Windows on a Wood Frame House
Board Up Windows on a Masonry House
Other Products for Boarding Up Windows
Board Up Windows on a Wood Frame House

- Select 5/8-inch or 3/4-inch plywood – anything thinner won't endure the impact of projectiles blown by strong winds. Protection is limited if hurricane shutters aren’t constructed with the right material and installed properly.
- From the exterior of the home, measure each window from the inside of the trim to get the width and height of the opening.
- Add 8-inches to the measurements to allow your plywood shutters to overlap the window by 4-inches on each side. (If the window sill extends beyond the rest of the trim around the window, add only 4-inches to the height measurement.)
- Use a circular saw to cut plywood panels to the dimensions (including the overlap) you recorded for the opening.
Tip: If you need to board up doors or large windows that are bigger than a single piece of plywood, use a 2-inch x 4-inch board to connect and brace two pieces together. Cut the 2-inch x 4-inch board to length and use 2-inch long deck screws in 4-inch intervals to attach the board to the plywood along the seam of the two pieces.
- Label each piece you cut to indicate which window it will cover and mark an arrow to show which edge faces up.
- Make a reference line around the panel 2-inches from the edge using a carpenter’s level or other straight edge. Mark the locations for holes to drill along this line – in each corner and along the lengths at 12-inch intervals.
- If the bottom sill extends beyond the rest of the trim around the window, don’t drill along the bottom edge of the panel.
- To make these holes, use a power drill with a drill bit that is slightly larger than the fasteners you’ll use to install the plywood. Windows measuring 3-feet x 4-feet and smaller will use 1/4-inch lag screws, 2-1/2-inches long. Use thicker 3/8-inch lag screws, 3-inches long, around large windows.
- Have a helper hold the plywood in place at the window to be covered. Make a mark on the home exterior through each of the holes you drilled to show the locations for the lag screws. Remove the plywood.
- Drill pilot holes for the lag screws at each reference mark. For small and medium windows, the screws should penetrate the home's frame 1-3/4-inches deep. The lag screws used around windows larger than 3-feet x 4-feet should penetrate 2-1/4-inches deep.
- Reposition the panel to align its holes with the pilot holes in the siding. Slip a washer onto a lag screw and use a power drill to securely install the hurricane shutter over the window. The washers will prevent the fastener from boring into the plywood, which could weaken the panel.
Tip: These storm shutters are reusable. When time permits, weatherproof them with a wood sealer or exterior paint. Be sure to label them clearly and store them to use during the next storm.
Board Up Windows on a Masonry House

- Boarding up windows on different types of homes involves different installation methods.
- On a masonry or brick house, measure the width and height of the inset for each window on the exterior of the home. The inset should be at least 2-inches deep.
- Use a circular saw to cut plywood to the dimensions of the opening so that it fits snugly into the inset. Label each piece to indicate which window it will cover and mark an arrow to show which end goes up.
- Attach one 3-inch - 4-inch barrel bolt onto each edge of the panel. While most windows will require four bolts, larger windows will need more. Place them at 18-inch intervals on those longer edges.
- When installing the bolts, be sure they are positioned square to the edge of the storm shutter.
- With the barrel bolts attached, place the panel in the window recess. Mark the location where the bolt slides to meet the inset. Use an appropriate masonry bit and a hammer drill to bore a hole just wide enough for the bolt to slide into the masonry for a secure fit.
Tip: When boring the holes to receive the barrel bolt, be sure that the bit s going into the brick and not grout. Also, be careful to aim the drill bit straight in to correspond with the bolt when it is extended. If the hole is angled away, the bolt might not be ab ke tio fully extend.
- Another way of boarding up windows or doors on a brick house (or other type of masonry) is to follow the wood frame house method to overlap the window opening but use different fasteners when installing the storm shutters. If you choose this method, use 1/4-inch expansion bolts with corrosion-resistant expansion anchors 1-1/2-inches deep.
Other Products for Boarding Up Windows

When considering how to board up windows, know that there are options for hurricane shutters other than DIY plywood panels. The biggest difference is in the cost of materials and, because they aren’t generally off-the-shelf products, the time necessary to place an order.
A high-tensile fabric is available that can deflect debris thrown about by strong winds. The impact-resistant material is cut to the dimensions of your doors and windows and then fastened to the home with brackets anchored into exterior walls.
Metal or polycarbonate barricades offer sturdy protection and can withstand impact. The panels are attached on a track fixed along window openings.
Another product offers a different method to secure plywood into masonry window recesses. These clips fit around the edge of plywood panels that have been cut to size. The opposing ends of the clips provide strong tension that keep the plywood in place within the widow inset with no drilling required.
Be prepared if you live in an evacuation zone.
Get the supplies you need and rent the tools at The Home Depot.