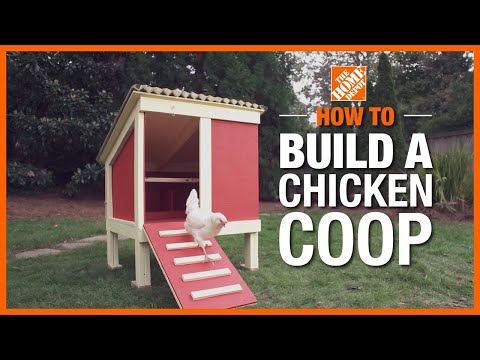
How to Build a Chicken Coop
Last updated September 7, 2023
Raising chickens guarantees that you'll have fresh eggs at the ready. This guide details how to build a chicken coop for up to four chickens. It includes a roost where birds will sleep and a removable nesting box for laying eggs. The front door also features a ramp so that the chickens can go in and out with ease, while the back opens for easy access for cleaning and egg gathering.
Learn what you need on how to build a DIY chicken coop from this guide.
Difficulty:
Advanced
Duration:
Over 1 day
Table of Contents
Gather Tools and Materials
Cut Chicken Coop Pieces from Plywood
Paint Plywood for the Chicken Coop
Cut the Square-End Lumber
Cut 20-Degree Angled End Lumber
Build the Frames
Gather Tools and Materials

Building a chicken coop begins with gathering the supplies and tools you need for the job. This includes:
- Personal protective equipment
- Circular saw
- Power miter saw
- Drill with 3-inch hole saw or jigsaw
- Drill or driver with bit for screws
- Pocket hole jig set
- Center drilling bit
- Clamps
- Speed square
- Tape measure
- Level
- Pencil
Materials:
- Two 4- x 8-foot sheets of 3/8-inch exterior rated plywood (BDX, CDX, RTD, or Pressure Treated)
- One 4- x 8-foot sheet of foam board for cutting plywood
- Three 1- x 2-inch x 8-foot pressure treated lumber pieces
- One 1- x 4-inch x 8-foot pressure treated lumber piece
- Two 2- x 2-inch x 8-foot pressure treated lumber pieces
- Ten 2- x 4-inch x 8-foot pressure treated lumber posts, rated for ground contact
- One box of 1-inch exterior screws
- One box of 1 1/4-inch exterior screws, rated for treated wood, wafer head
- One box of 3-inch exterior screws, rated for treated wood, wafer head
- One box of 1-inch metal roofing screws
- Two galvanized barrel bolts (window bolts)
- Two stainless steel hook and eye latches
- Two 3 1/2-inch galvanized heavy duty tee hinges
- Two 2 1/2-inch galvanized utility hinges
- Two galvanized door pulls
- One 8-foot galvanized roofing panel
- Two 3-inch soffit vents
- Six pavers or bricks
- Two complimentary colors of exterior paint
- Roller frames, roller covers and trays or paintbrushes
Cut Chicken Coop Pieces from Plywood

To start your DIY chicken coop project, carefully measure and cut all plywood pieces from two 4 x 8 sheets. Measure and mark the layout on plywood before cutting to ensure efficient use of the material.
Check out layout images for Plywood Sheet 1 and Plywood Sheet 2 so that you maxmize wood. It’s best to mark and cut each piece individually. This makes it easier to account for the width of the saw blade. The one exception to this rule is on the two angled sides. There is an extra 1/8 inch included in the measurements.
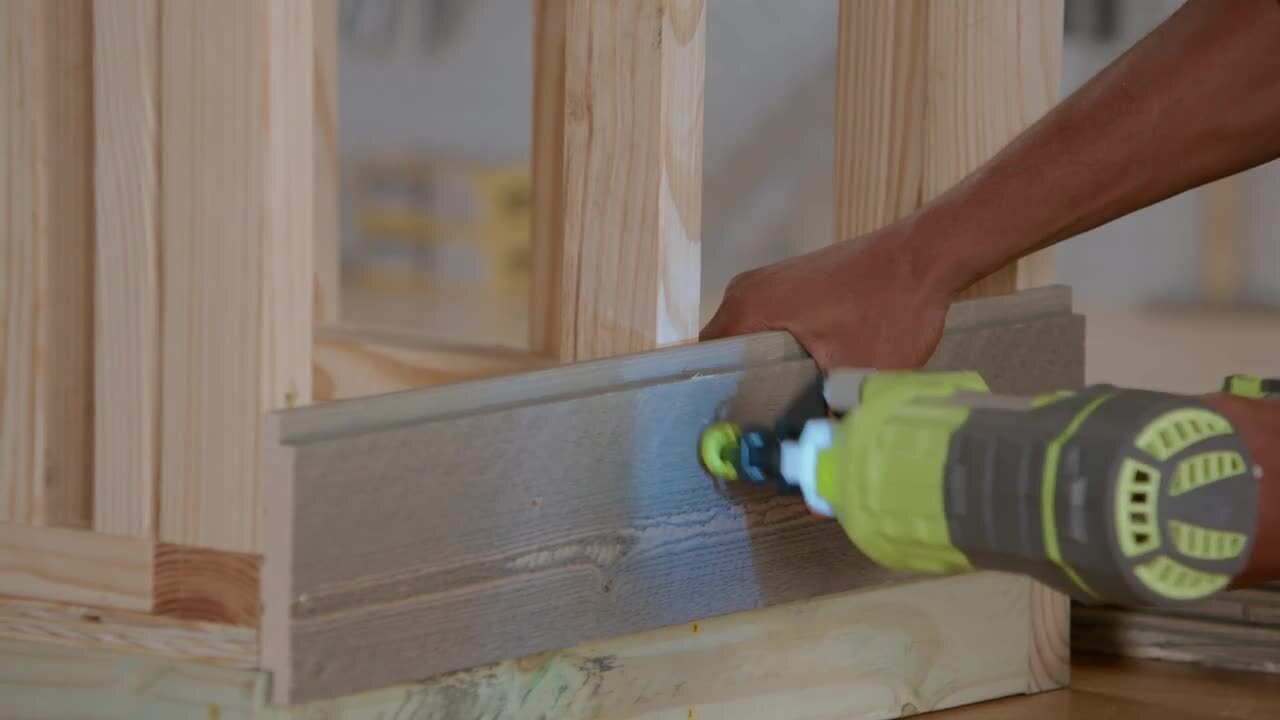
The easiest and safest way to cut plywood for building a chicken coop is to lay a sheet of foam insulation board on the floor or large work area, place the plywood on top of it and set your blade depth to just barely cut through the plywood. The blade should barely score the surface of the foam. (A 1/2-inch thick sheet of foam will work if you are careful, but a 2-inch thick sheet is preferred and will last longer.) Be sure that the wood is supported equally on both sides for more accurate cuts. Also, avoid the kickback that occurs when the blade is pinched by sagging material. Setting the depth carefully is important because if you set it too deep, you will cut all the way through and damage the floor or work table beneath.
A saw guide is helpful for making straight cuts. A straight 1 x 4 x 8 makes a good guide. There are several commercially made edge guides. A table saw or a track saw are also good options.
- On the first sheet of plywood, mark a line 17 1/4 inches across one end of the sheet. Cut this line to give you a piece that is 17 1/4 x 48 inches.
- On that piece, mark a line at 39 inches and cut to make a piece that is 17 1/4 x 39 inches. This will be the back door.
- Next, mark a line from one end of the sheet to the other at 36 inches. This will make two pieces, one that is 36 x 78 5/8 inches and another that’s roughly 12 x 78 5/8 inches.
- From the 36-inch wide piece, mark a line across the sheet at 35 3/8 inches and cut it. This will be the bottom of the coop.
- From the remainder of the 36-inch wide piece, mark out a rectangle 18 1/4 x 31 inches wide and cut it. This will be the part of the front that doesn’t open.
- Next, mark a 17 3/4 x 31-inch rectangle and cut it. This will be the front door that becomes the ramp when opened.
- From the 12-inch piece, cut three 12 x 9-inch rectangles to be the sides and divider of the nesting box. Then, mark and cut two 24-inch long rectangles to be the back and bottom of the nesting box. The strip that goes across the front will come from the other sheet of plywood.
- Moving on to the second full sheet of plywood, measure and mark a 43 x 48-inch rectangle, then cut it.
- From that piece, measure a 2 x 48-inch piece and cut it, then cut it in half to make a 24-inch piece to be the front of the nesting box.
- Now mark and cut a 43-inch square. This will be the roof.
- From the large piece that is left, mark and cut a rectangle measuring 51 1/8 x 36 inches.
- Measure 19 1/2 inches down one long side and make a mark. Starting at the adjacent corner on the same end, measure 32 1/2 inches down the other long side and make a mark.
- Connect these marks to make a diagonal line across the piece. Check before cutting to ensure that you will end up with two identical pieces that will be the sides of the coop. Measuring this way and following the old rule to “always cut on the waste side of the line-inch" will make up for the thickness of an average saw blade.
Set aside any plywood scraps for later use.
Paint Plywood for the Chicken Coop

Paint plywood pieces as desired for your DIY chicken coop. Pay special attention to all edges, making sure paint seeps into any voids or openings. Red is a traditional color for a coop but use any color you like.
Cut the Square-End Lumber

Use a miter saw to make the next set of lumber cuts. This image illustrates the cuts you'll need from the 1x2 lumber and the 2x4 lumber. Use pressure treated lumber to help the coop weather the outdoors.
- Six 1- x 2-x 4-inch ramp rungs
- Two 1- x 2- x 29-inch side wall retention pieces
- Three 1- x 2- x 31-inch front trim and ramp supports
- Two 1- x 2- x 39-inch back door trims
- Four 1- x 2- x 15 7/8-inch door support trims
- One 1- x 4- x 31-inch front wall divider
- Four 2- x 4- x 12-inch lower leg sections
- Two 2- x 4- x 29-inch side central cross pieces
- Three 2- x 4- x 33-inch front and rear inner rails and center floor support
- Two 2- x 4- x 36-inch side inner cross pieces
- Four 2- x 4- x 39-inch front and rear outer cross pieces, upper and lower
Cut 20-Degree Angled End Lumber

All of the angles in this section are 20 degrees. The image illustrates the cuts you'll need from the 2x2 lumber and the 2x4 lumber. The angle can be found using the protractor on a speed square or by using the 20-degree setting on a power miter saw.
To cut the legs, take a 2 x 4 and cut a fresh square end on it. Measure 50 inches from this new end and make a mark on one edge. This is the long edge, draw a 20-degree angle back towards the end. Cut this piece, then measure 38 1/4 inches from the long edge and mark a square line. Cut this piece. Repeat this process on the next 2 x 4 to make:
- Two 2- x 4- x 38-1/4-inch rear legs, angled on one end
- Two 2- x 4- x 50-inch front legs, angled on one end
For pieces with parallel angles on each end, it will help to visualize each piece as it will fit on the coop. All of these pieces will have angles cut in the same way. When the piece is in place, the angled cut will be flat against square pieces and the long edges will follow the roofline.
- Two 2- x 2- x 38-1/2-inch pieces with parallel angles on each end – inner top side pieces
- Two 2- x 4- x 31-inch pieces with parallel angles on each end – side top rails
- One 2- x 4- x 38-1/2-inch piece with parallel angles on each end – center roof support
Build the Frames

To build the chicken coop, you'll build the sides first then connect them with several crosspieces. All of these pieces are from the treated 2 x 4 boards.
Each side consists of one 50-inch and one 38 1/4-inch leg, 29-inch and 36-inch square pieces, 31-inch and 38 1/2-inch angled pieces and two square 12-inch pieces. We’ll do a dry fit to make sure it all goes together properly.
When laid out on the work surface, these side assemblies should be the mirror image of each other. When you’re working, be mindful that the interior of the frame is facing up. Lay out both sides before driving screws.
- Lay the legs on a work surface, outer face down with the angles pointing in the same direction and the feet aligned. What will be inside of the coop should be facing upwards.
- Place a 12-inch lower leg piece to the face of each leg. The lower leg and full legs should be flush on the edges and at the foot end. Place a 29-inch board between the legs, even with the tops of the lower leg section.
- Place a 33-inch board, face to face, on top of the 29-inch board, across the upper end of the lower leg pieces, leaving a 1 1/2-inch space at each end.
Finish the Frame

- Place the 31-inch piece (with the angles cut on the ends) between the angled ends of the legs so that they form one complete diagonal line. Lay the 2 x 2 x 38 5/8 on top of it, with top edges and angled ends aligned.
- Repeat this process to construct the other side.
- When everything is aligned, secure the pieces together with 3-inch screws. Pilot holes are a good idea when working close to edges or ends, even if using self-drilling screws.
Connect the Sides

- Lay two 39-inch boards on the work surface. Center a 36-inch board, face to face, on each, so that there is 1 1/2-inch left extended past each end. Use four screws to join these boards together.
- Stand the sides on a level surface and connect them front and back with the 36 and 39-inch board combinations you just made. (The 36-inch section will nest in the gap left near the top of each lower leg section.) Secure with four 3-inch screws on each end.
- Use the remaining 2 x 4 x 39-inch boards to cross the top, on the front and back of the coop. Align the rear board 1/2-inch below the top edge. This will allow clearance for the roof to extend to the far edge of the crossmember. Attach with four 3-inch screws.
Install Sides and Floor

- Stand plywood sides in place inside the frame. Align the front (long) edges of the sides with the upright 2 x 4 legs. There will be a gap at the top, between the plywood and the 2 x 2.
- The 35 5/8 x 36-inch piece of plywood is the bottom of the coop. Lay it in the frame. It should fit tightly between the side pieces and be flush with the edge of the inner 2 x 4 rail.
- Place a 1 x 2 x 29-inch piece along the bottom edge of each side piece of plywood on the outside, on top of the frame. This will reinforce and seal the base of the sidewalls.
- Attach the floor, sidewalls and 1 x 2 support strips with 1 1/4-inch screws.
- Use the hole saw to make holes for the vents. There should be one in each side, close to the peak. Leave ample space around the opening to support the vent flange.
Build the Roost

Chickens prefer to sleep on a roost, which is an elevated bar where they can perch. This image illustrates the cuts of lumber needed to build the roost .
- Cut two pieces of 2 x 2 to 6 inches long, then cut one piece to 36 inches long.
- Measure up 14 inches from the floor and 12 inches back from the front edge.
- Attach a 6-inch piece to the center of each side wall by using 1 1/4-inch screws from the outside. These pieces should be level.
- Next, lay the 36-inch piece across them and attach each end with a screw into the brace.
Install the Front Wall

The fixed front panel will be installed opposite of the door to the coop.
- Measure and mark the center of the top and bottom of the front frame.
- Decide if you want the door on the left or right, then install the 31 x 18 1/4-inch panel on the opposite side. It goes on the inside of the 2 x 4 frame, just like the bottom and sides. The 1 x 4 x 31 should overlap it by 1/4 inch.
- Center the 1 x 4 x 31 piece to the mark on the top and bottom of the frame. Clamp it in place.
- Using 1 1/4-inch pocket hole screws, attach the center support to the frame from the inside. Use 1 inch screws to attach the plywood panel to the center support.
- Place a piece of 1 x 2 x 31 over the untrimmed edge of the wall panel and drive screws through it and the plywood into the upright leg.
Install Roof Center Support

The 38 5/8-inch board with parallel angles cut at both ends is the roof’s center support.
- Measure and mark the center point on the front and back of the coop.
- Carefully center the board with the marks and align the top edge flush with the top edge of the walls.
- Secure with two 3-inch screws in each end.
Install the Roof

Move the coop outside to the chosen placement to complete the assembly. This piece is important because the galvanized roofing will rust if held in contact with the treated lumber.
- Place the 43-inch plywood square on top of the coop and measure to leave a 2-inch overhang on each side and 3/4-inch on the front and back.
- Attach the 43 x 43-inch square by driving screws into the 2 x 4's that surround and bisect the roofline.
- Cut the metal roof panel in half so that you have two 4-foot long pieces. This can be done with tin snips, an abrasive wheel in a circular saw or a cutoff wheel on an angle grinder.
- Arrange the roof panel so that there is an even amount of overhang all around. The metal needs to overhang the wood on front and back by a bit so that water doesn’t run around the edge and keep the wood wet, causing it to delaminate and rot.
- Secure the roof panel to the plywood roof with roofing screws.
- Smooth the edges of the metal roof with an angle grinder, file or sandpaper and round off the exposed corners.
Take care when working around the coop to avoid being scratched or cut by the metal roof. If needed, a plastic roof panel can be easily substituted.
Build and Install the Ramp Door

Install the doors last to ensure that the read door clears the overhang when the roof is opened.
- Evenly space the 14-inch 1 x 2 strips on one side of the 18 x 31-inch piece of plywood so that they look like a ladder. This is to give the chickens traction when walking up the ramp.
- Attach each strip with 1-inch screws.
- On the outside of the door, attach two 31-inch and two 15 7/8-inch pieces of 1 x 2 to form a border around the perimeter of the door. This will add needed support and supply a place to attach hardware.
- Screw two of the hinges to one end of the door and two hook eyes to the other end.
- Get someone to help hold the door in place while you drill pilot holes into the coop frame and secure the screws.
Build and Install the Rear Door

Follow a similar procedure with the back door.
- Surround the outer face with 39-inch and 15 7/8-inch pieces of 1 x 2.
- Attach two hinges along one short side of the door and the hooks at the other end.
- Before attaching the hinges to the coop frame, be sure that the door will clear the roof overhang.
Nesting Box

This box has two nest spaces. This is a good size for four chickens as they lay at different times of the day and often lay their eggs in the same nest as other hens.
If you’re having a hard time getting the screws to hold in the edges of the plywood, attach scrap pieces to add thickness.
- Lay a 12- x 24-inch piece flat on your work surface and stand up the other 12 x 24-inch piece behind it, aligning the long edges. Join the two pieces with five screws.
- Place a 9 x 12 piece in the center and attach it with screws into two edges.
- Attach the end pieces in the same manner.
- Lay the strip of 2 x 24-inch plywood across the front and attach it with screws.
- Slide the nesting box inside the back door, facing forward. It doesn’t get attached to the coop, since you’ll need to remove it for cleaning.
Introduce Chickens to Their New Home

Chickens still need a fenced in area for safety from predators. Even chickens that have free ranging time need a safe space close to the coop. There is enough space inside this coop to house four chickens. Assuming you max it out, you’ll need 16 square feet of fenced area. This area needs to be fenced over the top to guard from airborne predators. Be sure to allow room for the ramp to open and close.
Include all but the back wall of the coop in your fence plan. Keeping the back door outside of the fence allows you to open it to gather eggs and clean the coop without having to go inside the fence.
Chickens are fun to watch, and they produce eggs in abundance. However, you must start a regular cleaning schedule to keep a healthy coop.
- When the chickens are in their yard, shut the ramp door and open the back door.
- Don a face mask and garden gloves.
- Pull out the nesting box and use a short-handled hoe or garden trowel to pull all the mess out and into a bucket.
- The contents of the bucket makes great fertilizer, but be careful. It is too strong for most plants in its fresh form.
Want your coop to have that distinctive farmhouse look? Add a diagonal 1 x 2 to the doors to make a Z-shape, as on a barn door. Want a sign? Use a jigsaw to cut the shape of a chicken or an egg from leftover pieces of plywood.
Building a chicken coop from scratch takes planning and preparation. It’s a very involved project, so it’s best to spread it out over a few days or weekends. Remember to add decorative lattice trim to give your new coop style. Once the paint and adhesives are thoroughly dry, you can introduce your chickens.
If you want to start raising your chickens sooner than later, look into pre-built chicken coops. The Home Depot delivers online orders when and where you need them.