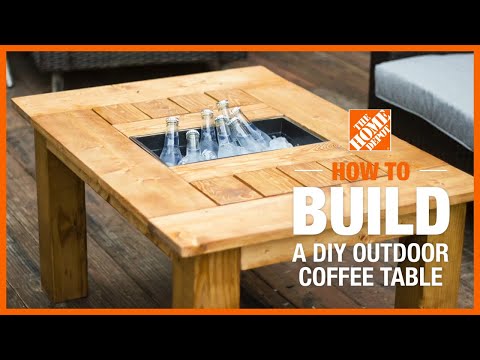
How to Build a DIY Outdoor Coffee Table
Last updated September 7, 2023
Presented by Erin Spain of Erin Spain Blog.
Building a coffee table from scratch may seem daunting, but you'll be able to pull it together with ease following these steps. Once your coffee table is built, place it inside or out. Use the middle area as a planter for succulents and other flowers, or as a cooler for drinks.
Difficulty:
Intermediate
Duration:
2-4 hours
Table of Contents
Cut Your Wood
Sand
Drill Pocket Holes
Assemble Tabletop
Assemble Base
Attach Base to Tabletop
Cut Your Wood

Before you begin, make sure you have these tools and materials:
- 1 x 6 board
- 1 x 4 board
- 1 x 3 board
- 4 x 4 board
- Saw
- Drill/Driver
- Sander
- Pocket Hole Jig
- 1 1/4-inch Pocket Hole Screws
- 1 1/2-inch Pocket Hole Screws
- 3-inch Deck Screws
- Stain or paint
- 6 x 8 x 15-inch planter (or 2 if you want to switch between a drink cooler and a planter)
Cut your wood to the following dimensions:
- 1 x 6 board - (2) pieces at 25 inches long; (2) pieces at 26 inches long
- 1 x 4 board - (2) pieces at 15 inches long; (8) pieces at 5 1/8 inches long
- 1 x 3 board - (2) pieces at 16 incges long; (2) pieces at 26 inches long; (1) piece at 10 inches long; (2) pieces at 6 inches long
- 4 x 4 board - (4) pieces at 18 inches long
Sand

Give everything a good sanding with an orbit sander.
Drill Pocket Holes

Drill two pocket holes at each end of your 25-inch long 1 x 6 boards, 15-inch long 1 x 4 boards, and 5 1/8-inch long 1 x 4 boards.
Assemble Tabletop

- Working with the tabletop upside down (you will flip it later), position your pieces so that your 1 x 6 pieces frame the perimeter of the tabletop.
- Center your planter upside down in the center, and place your 15-inch long 1 x 4 pieces on each side of the planter.
- Position your shorter 5 1/8-inch long 1 x 4 pieces horizontally between the longer 1 x 4 pieces and the 1 x 6 edge pieces, spacing them evenly and leaving a little bit of space for drainage in between.
- Attach everything using 1 1/4-inch pocket hole screws.
Assemble Base

- Drill 2 pocket holes at each end of your 16-inch long and 26-inch long 1 x 3 boards. These pieces will form the table apron.
- Attach them to your 4 x 4 legs using 1 1/2-inch pocket hole screws.
Attach Base to Tabletop

- Position your base in the center of your upside down tabletop, leaving 1 1/2-inch around the perimeter.
- Pre-drill holes into your table apron using a countersinking drill bit (three to four on each side), and then attach using 3-inch deck screws.
Create and Attach Brace for Drink Cooler/Planter

- Using pocket hole screws, attach a 6-inch long 1 x 3 piece to each end of a 10-inch long 1 x 3 piece, creating a “C” shaped brace.
- Attach this to the center of your planter opening using pocket hole screws.
Stain or Paint

Flip your table right side up (you can give it another sanding if you want to), and add stain or paint of your choice. This table is stained with Varathane in the shade Early American. It is sealed with Varathane Spar Urethane in a satin finish. (Be sure to seal your table with an appropriate exterior sealer.)
Add Drink Cooler/Planter

If you are using this table as a planter, we recommend drilling some holes for drainage. Plastic planters are inexpensive, so get two separate ones to swap out if you want the table to double as a drink cooler and planter.
If you're looking for items to decorate your newly built coffee table, such as some nice candles or, if outside, lanterns, The Home Depot delivers online orders when and where you need them.