How_to_Build_a_Dollhouse_
Last updated September 7, 2023
Learning how to build a dollhouse can be done in just a few short hours and with just a few tools. A DIY dollhouse allows you to create a one-of-a-kind gift that can be enjoyed for years to come. This guide features step-by-step instructions as well as design ideas.
Tip: This design is sized for 1:12 dolls and accessories.
Difficulty:
Intermediate
Duration:
Over 1 day
Table of Contents
Gather Materials and Follow the Cut List
Cut the Back Board
Assemble the Sides
Assemble the Interior Walls
Attach the Roof
Attach Sides, Floors and Interior Walls
Gather Materials and Follow the Cut List
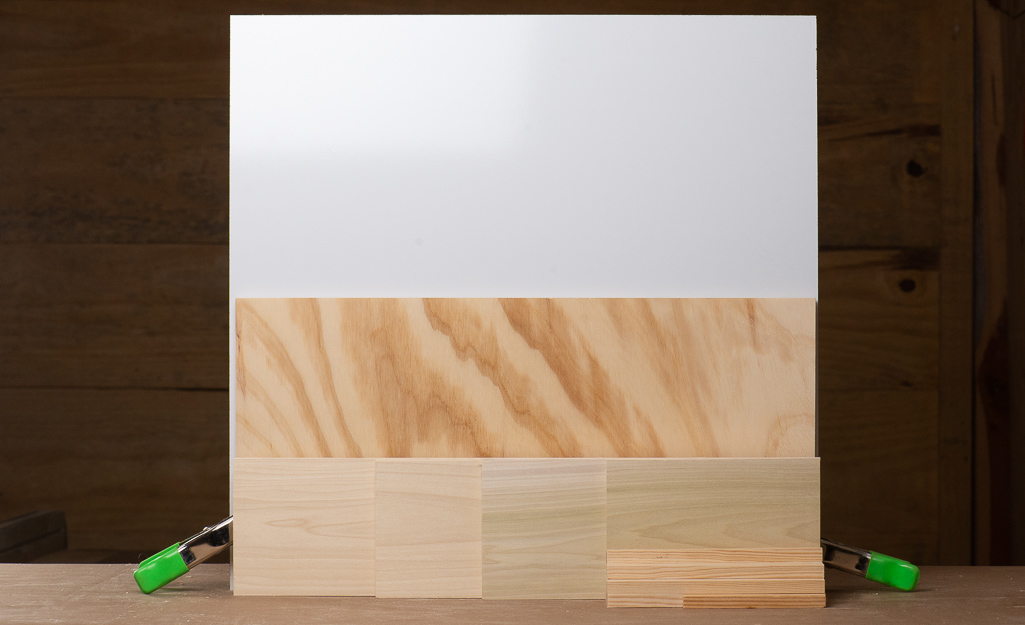
Before getting started, you'll want to gather all of your tools and materials before you begin to cut your wood. Here's what you'll need:
- Chalk MDF Board (1)
- 1/2 x 2 x 2 plywood project panel (1)
- 1/4-inch x 5 1/2-inch x 36-inch poplar or oak project boards (6)
- 1/2-inch x 36-inch square dowels (4)
- 3/4-inch long fasteners: screws, brads or headless pins
- Hot glue
- Paint or stain
- Wood glue
- Circular saw or power miter saw
- Utility razor knife
- Drill with 1/16-inch drill bit if using brad nails or screws
- Screwdriver, hammer or pin nailer, depending on chosen fasteners
- Small framing square
- Metal straightedge, at least 18 inches long
- Spring clamps
- Hot glue gun
- Pencil
Cut List:
- 1/4 x 6 inch board cut to 23 inches (1)
- 1/4 x 6
inch board cut to 22 1/2 inches (1) - 1/4 x 6 inch boards cut to
17 3/4 inches (2) - 1/4 x 6 inch boards cut to 13 1/2 inches (2)
- 1/4 x 6 inch boards cut to 8 1/2 inches (2)
- 1/2 x 1/2 square dowels cut to 8 1/2 inches (12)
- 1/2 x 1/2 square dowel cut to 5 5/8 inches (1)
- 1/2-inch plywood cut to 12 x 23 1/2 inches (1)
- Marker/Chalkboard cut to 23 1/2 x 24 inches; this material can be cut with a saw, but it may be easier to use a straightedge clamped to the material and several passes with a utility knife.
Tip: Regular wood glue won't adhere to the MDF backer used here. If using a regular MDF backer, wood glue would be better. When using hot glue be careful not to use so much that it squeezes out and solidifies in places where it will hinder the joining of other parts.
Cut the Back Board
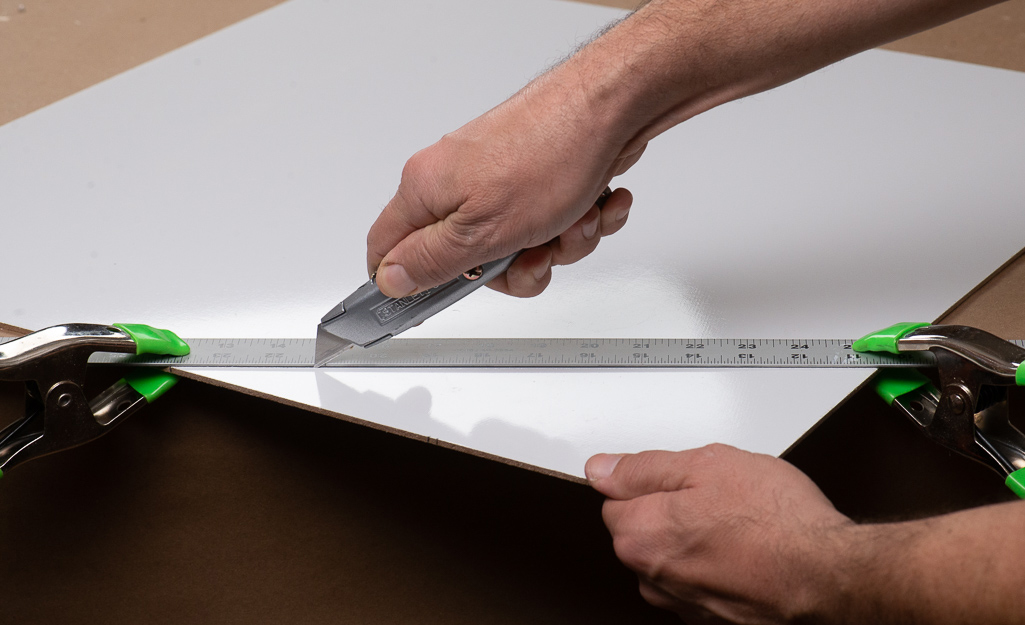
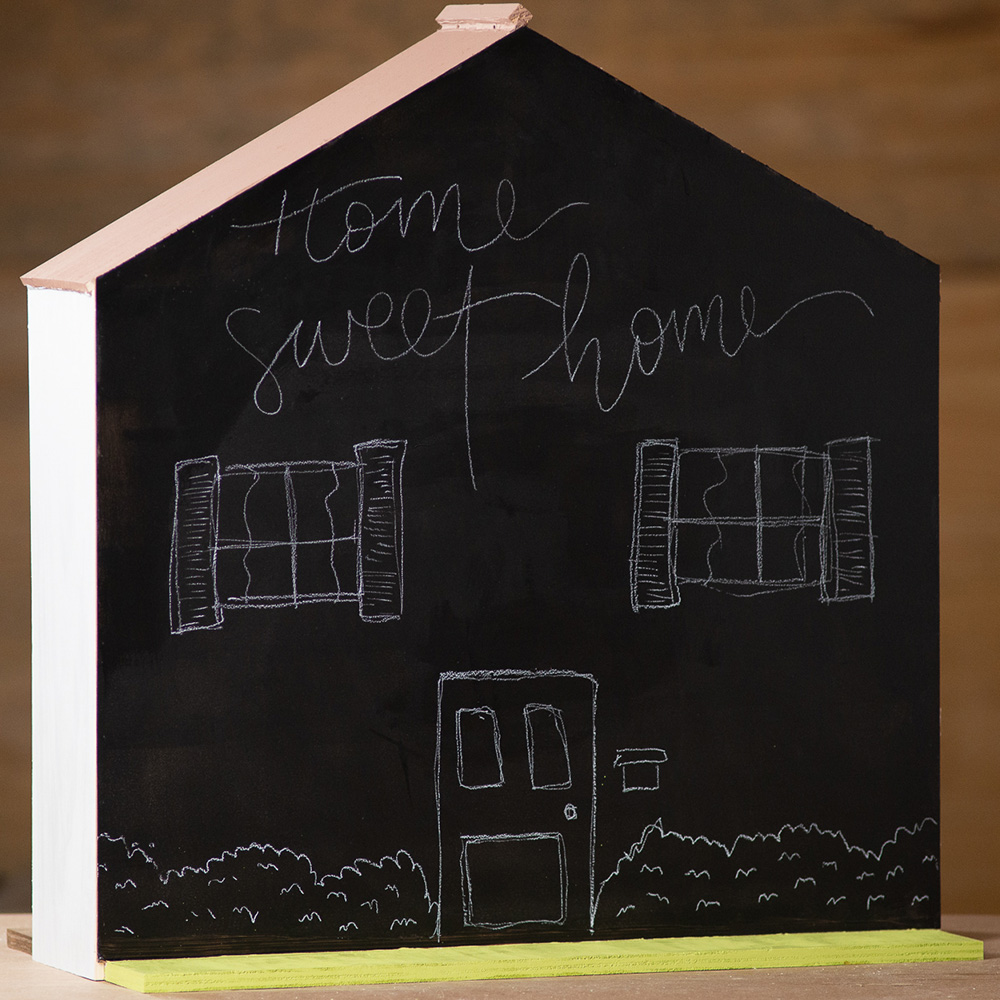
The marker board/chalk board forms the backing of the house and is what gives it the strength to stand as one unit. It will be cut into a house shape.
The central peak will be 24 inches (the sides are each 17 9/16 inches high).
- Measure and mark the center of the 23 1/2-inch side at one end of the board (the measurement from the edge is 11 3/4 inches).
- From the opposite end of the board, along each outside edge, measure and mark a spot 17 9/16 inches.
- Clamp the straightedge to the board so that it intersects the center mark and one of the side marks.
- Use the utility knife to cut along this line. It is better to use many small cuts rather than a few deep cuts.
- Now, move the straightedge to where it intersects with the center mark and the other edge mark and repeat the cutting process.
Assemble the Sides
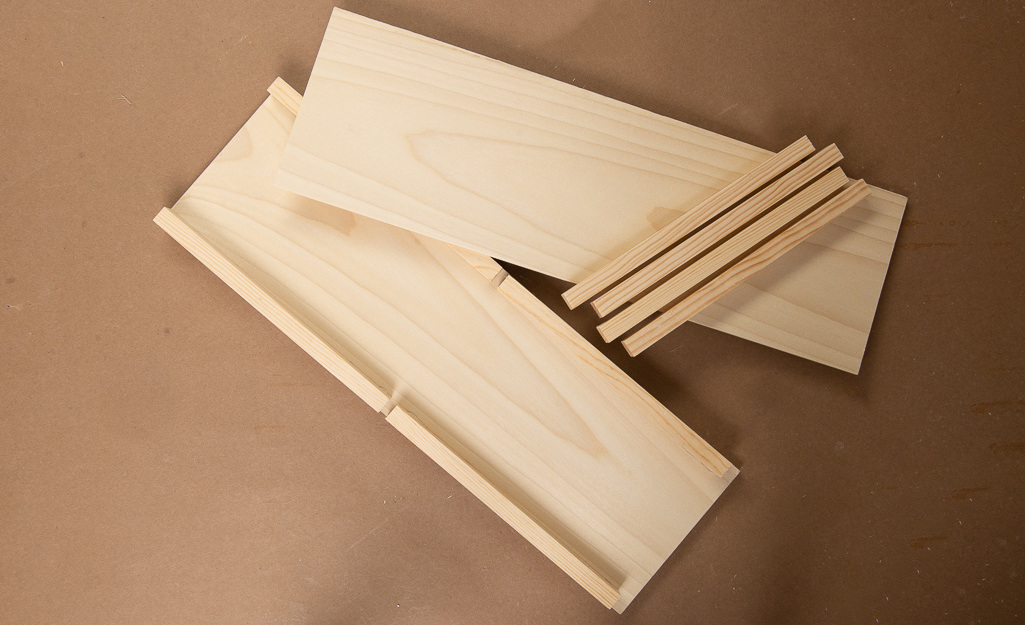
- Take one of the side panels, 1/4 x 6 x 17 3/4-inch, and four of the 8 1/2-inch dowels.
- Glue the first dowel so that its end aligns with the end of the side panel, and its edge aligns with one long edge of the panel. Do the same thing with the next dowel on the adjacent edge.
- Use spring clamps to hold them in place while they are fastened with screws or nails. Fasten from the outside, through the thin board into the thicker dowel.
- Drill pilot.
- Using a piece of 1/4 x 6 board as a spacer, attach the two remaining 8 1/2-inch dowels along the edges of the 1/4 x 6 board in the same manner as before. Take care not to make the space snug, but make sure it's not so tight that the floor board can’t be inserted later. There should be 1/2-inch of board that extends beyond the dowels. This will attach to the base in a later step.
- Repeat the process with the other side board and four more dowels.
Assemble the Interior Walls
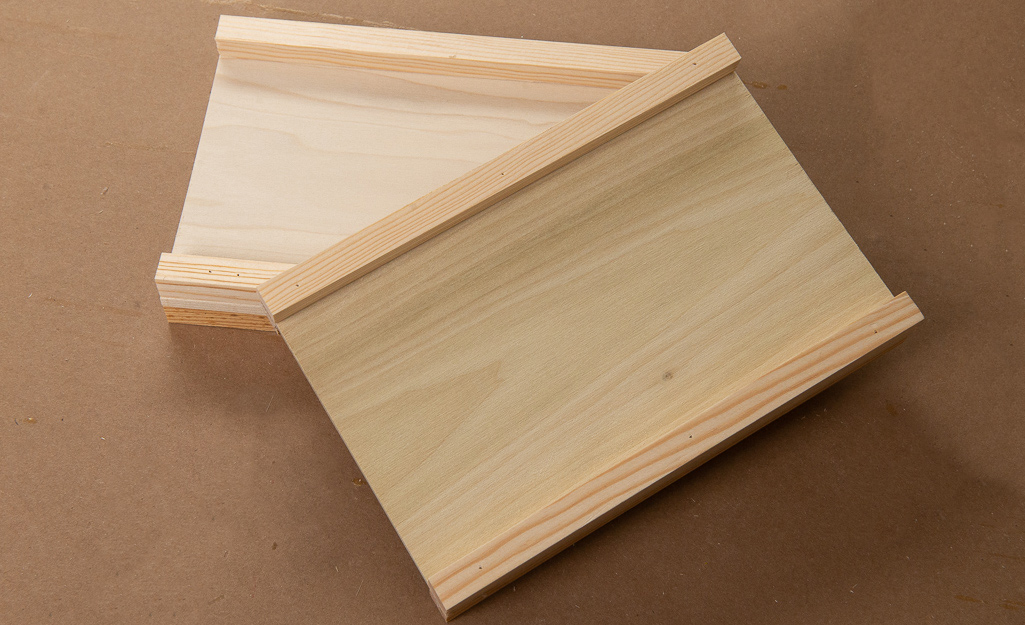
- Take an 8 1/2-inch piece of 1/4 x 6 board and four dowels. Align the dowels to the longer edges of the board, one dowel on each face. It will make a piece that resembles an I-beam. The dowels should be flush with the edges and ends of the boards. Attach with glue and fasteners.
- Repeat the process with the other 8 1/2-inch board and four more dowels.
Attach the Roof
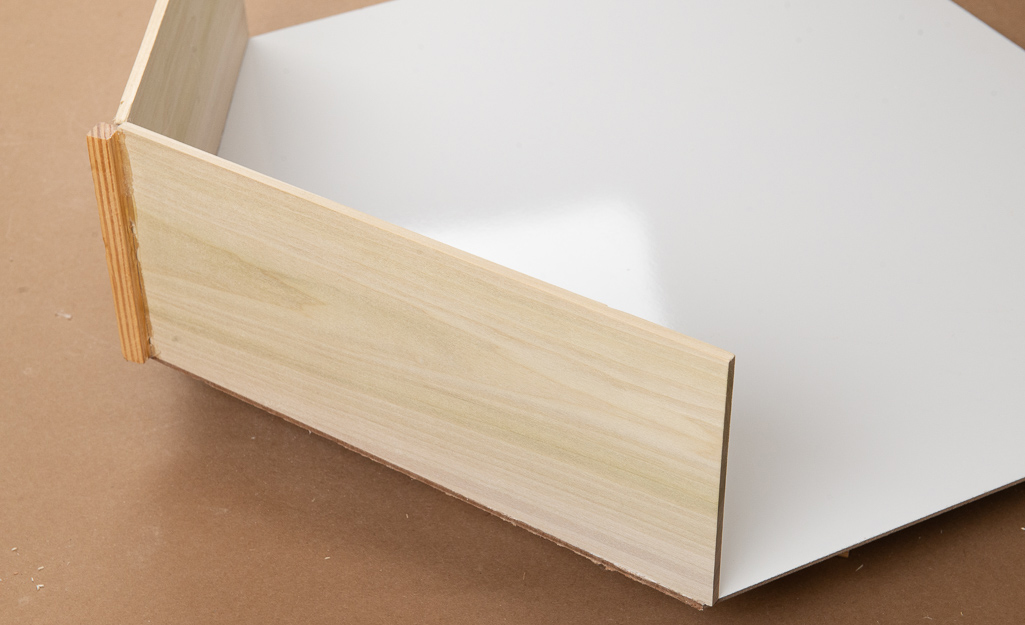
- Lay the back board on a work surface, chalkboard side facing down. Align the two 1/4 x 6/13 x 1/2 boards to the angled edges to form a roof. There will be a gap where they meet, that will be filled in momentarily.
- Affix them to the face of the marker board by running a thin bead of hot glue down the edge of one board and pressing it firmly into place.
- Follow suit with the second board but also put a small amount of glue where the two boards form the peak of the roof.
- Glue one corner of the 5 5/8-inch dowel into the space at the peak of the roof. The peak joint can be strengthened at this time by running a bead of glue on the side that is inside the house.
Attach Sides, Floors and Interior Walls
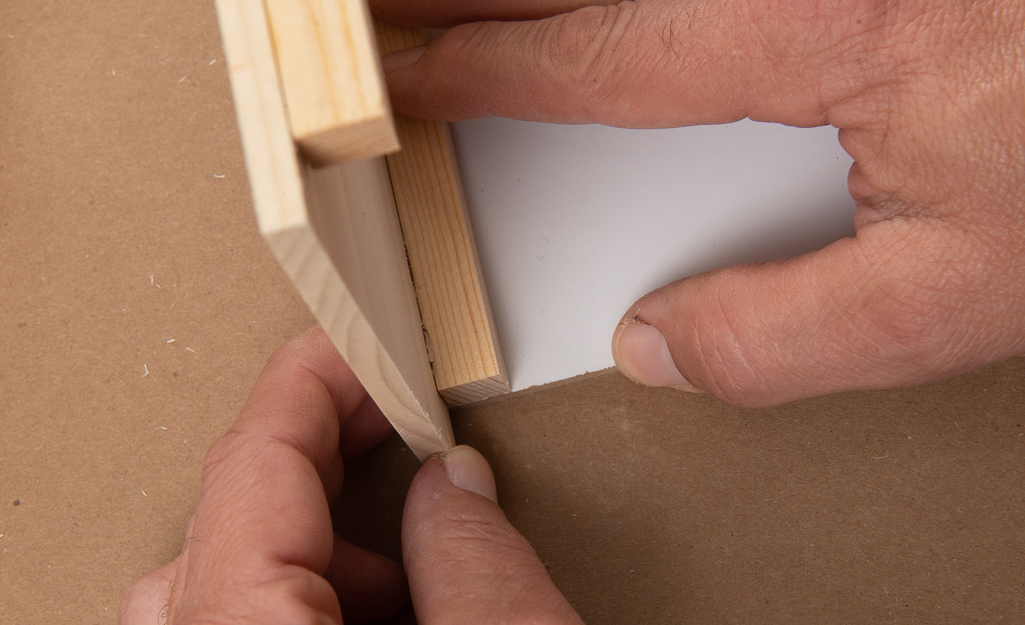
- Dry fit the sides in place, then the floors. The top of the side walls have the flush-mounted dowels. The bottom is the end with the 1/2-inch overhang. This overhang will attach to the plywood base in another step.
- The upper floor is the 1/4 x 6x 22 1/2-inch board; dry fit it in place. It should be supported by the two dowels that were glued flush to the ends of the sides. The lower floor is the 23-inch board. It fits in the slot between the two sets of dowels on the sides.
- The outside edge of the sides should be flush with the outer edge of the back board.
- If cut out windows and doors are desired, this is the time to mark them and cut them before the pieces are glued and fastened into place. They can be cut with a straightedge and utility knife, just like the roof angles.
- Once everything is dry fit into place, begin gluing the sides, then the floors.
- Press the pieces firmly against the backer board and move quickly so adjustments can be made before the glue solidifies. Spring clamps can be helpful during this process to keep things in place.
- The interior walls can be placed directly in the center, making four rooms of equal size. Or, they can be offset to make rooms of varying dimensions. These walls do not need to be glued or fastened in place so the children can move them as desired.
Secure with Fasteners
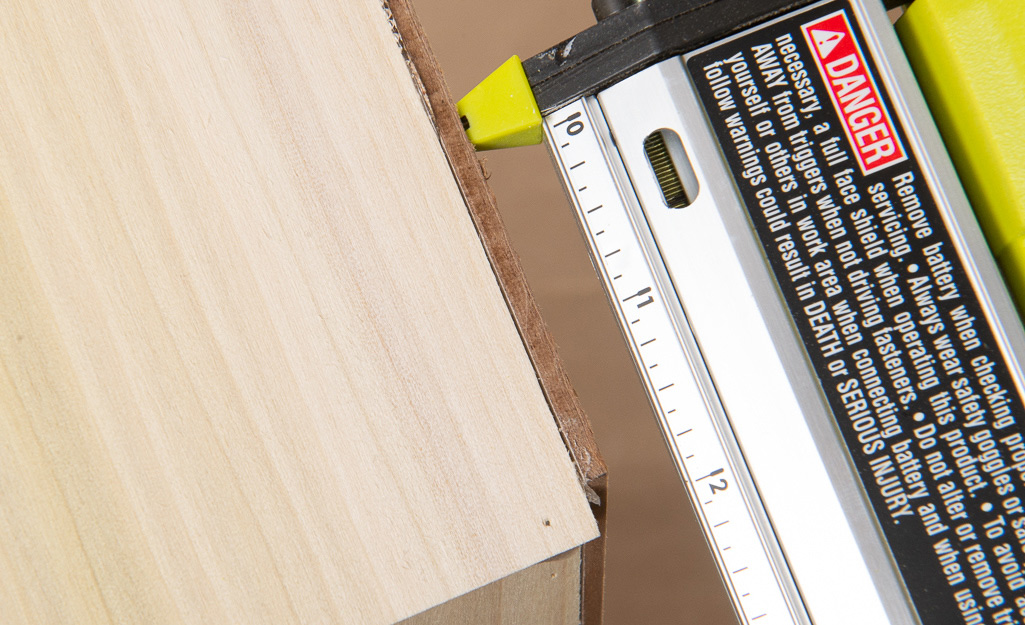
- Hot glue will hold the house together for quite a while, but to make the house strong enough to ensure a long lifetime of use, fasteners should be added.
- The edges of the sides and roof are plain enough to see where fasteners should be added. However, lines need to be marked for fasteners that will go into the edges of the floors. Fortunately, the back side of the house is a chalk board.
- Measure up 8 1/2 inches in several places to make points, and connect them with the straightedge and chalk. Do the same thing at 17 inches. Keep in mind that these measurements are to the bottom edge of the floors and fasteners should go 1/8-inch above it to be in the center of the wood.
- Several fasteners should also be added to the ends of the floors through the side walls.
- If using screws or brad nails, drill pilot holes before driving the fastener. Pilot holes are not necessary for headless pins fired from a pinner.
Attach the Base
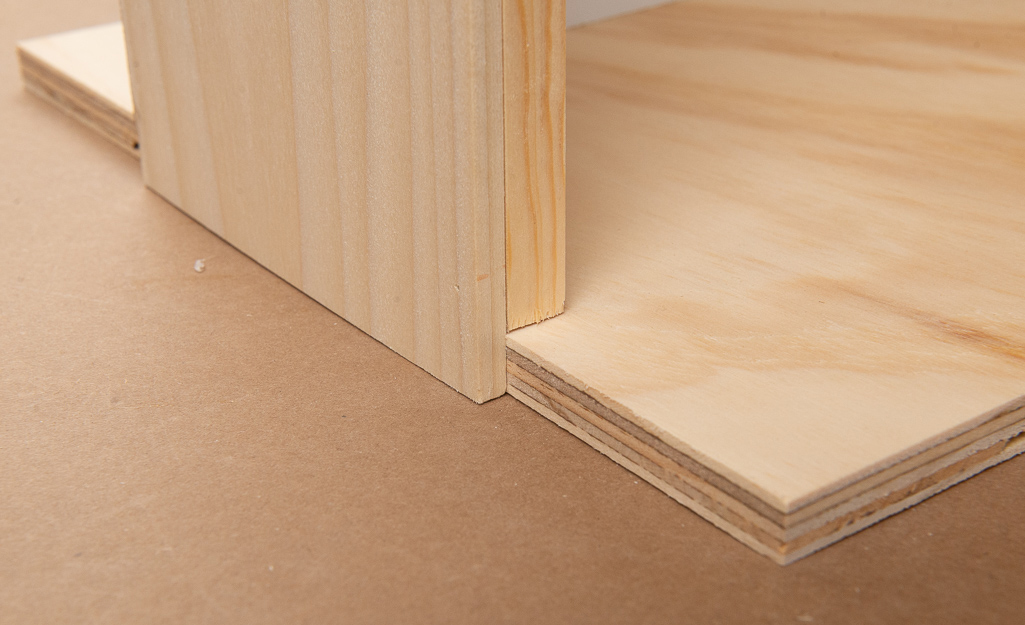
Finally, stand the house up on the plywood base. The 1/2-inch overhang at the bottom of each side will go over the edges of the plywood. Center the house on the base, then attach with glue and fasteners.
Finish, Furnish and Play
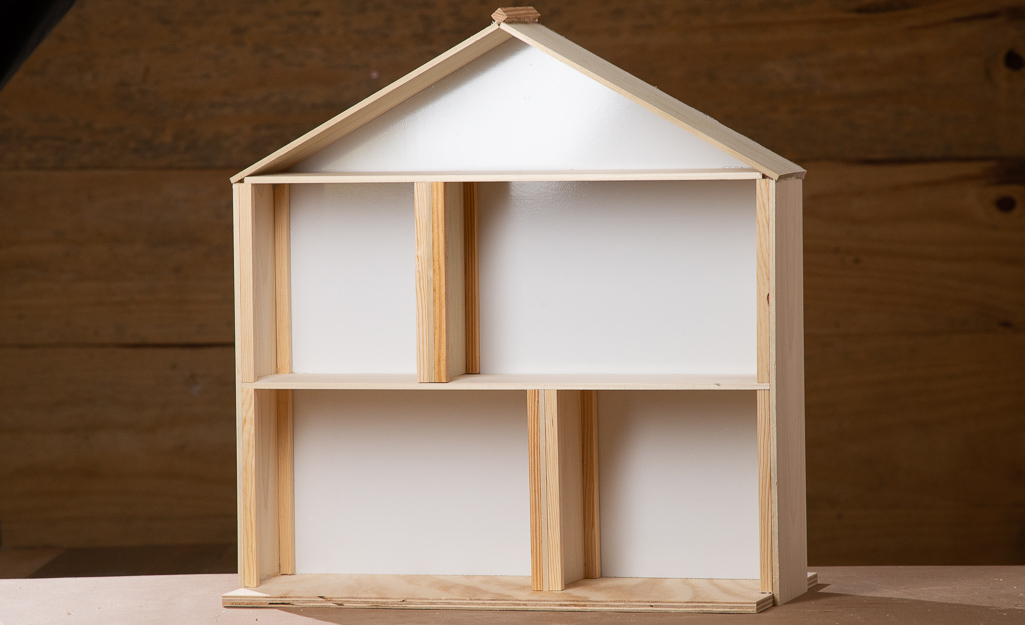
Custom furniture can be created from wood blocks and paint, or 1:12 scale accessories can be purchased. Your children can decorate and redecorate the back wall as often as they like because it’s a dry erase marker board.
Make a DIY dollhouse for the little one in your life. The Home Depot is your DIY headquarters. Looking for a product to complete your project? We have options to deliver online orders when and where you need them.
