How to Build a Key Holder
Last updated September 7, 2023
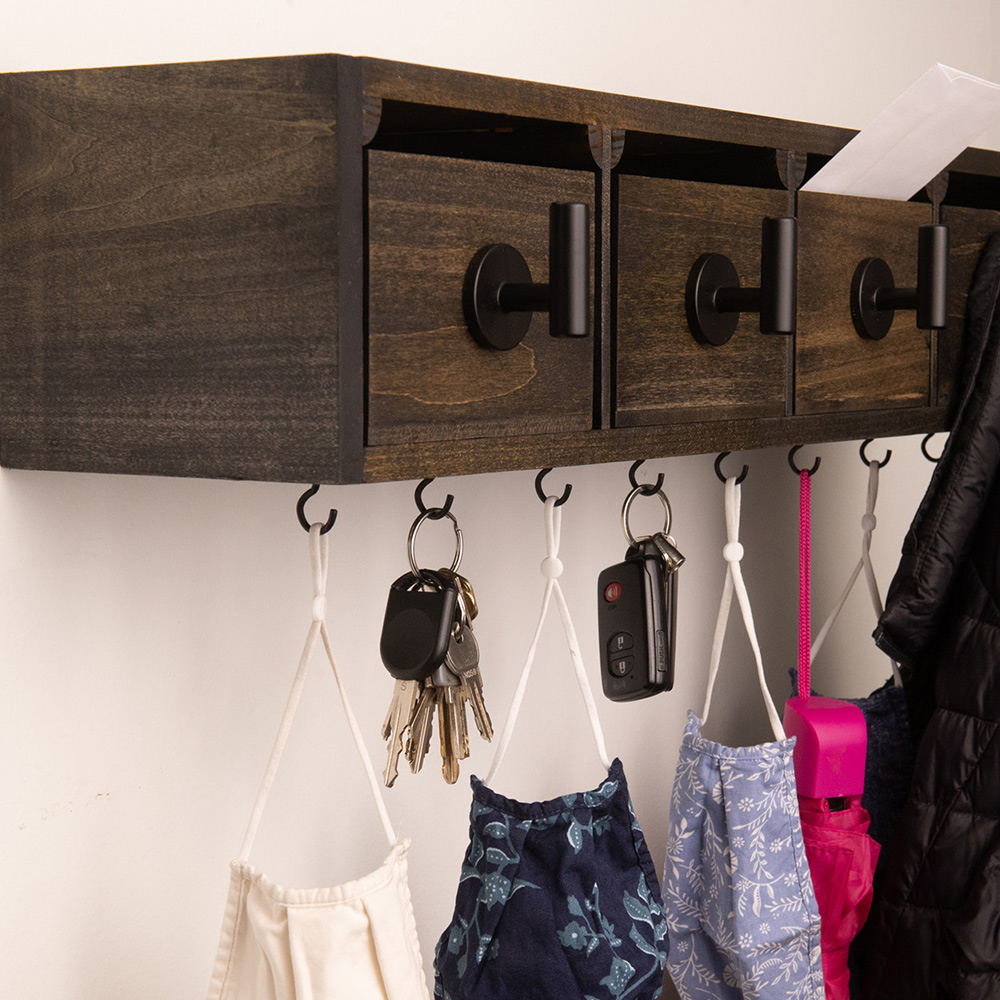
Perfect for hanging keys or acting as a family message board, coat rack, mail center and facemask hanger, a DIY key holder can be made in a few steps. This guide will provide you with step-by-step instructions, so you can learn how to build a key hook that can be great for your household or to give as a thoughtful gift.
Difficulty:
Intermediate
Duration:
Over 1 day
Table of Contents
Gather Materials and Follow the Cut List
Build Drawers
Build Dividers
Build Box
Install Dividers
Finish and Hang on the Wall
Gather Materials and Follow the Cut List
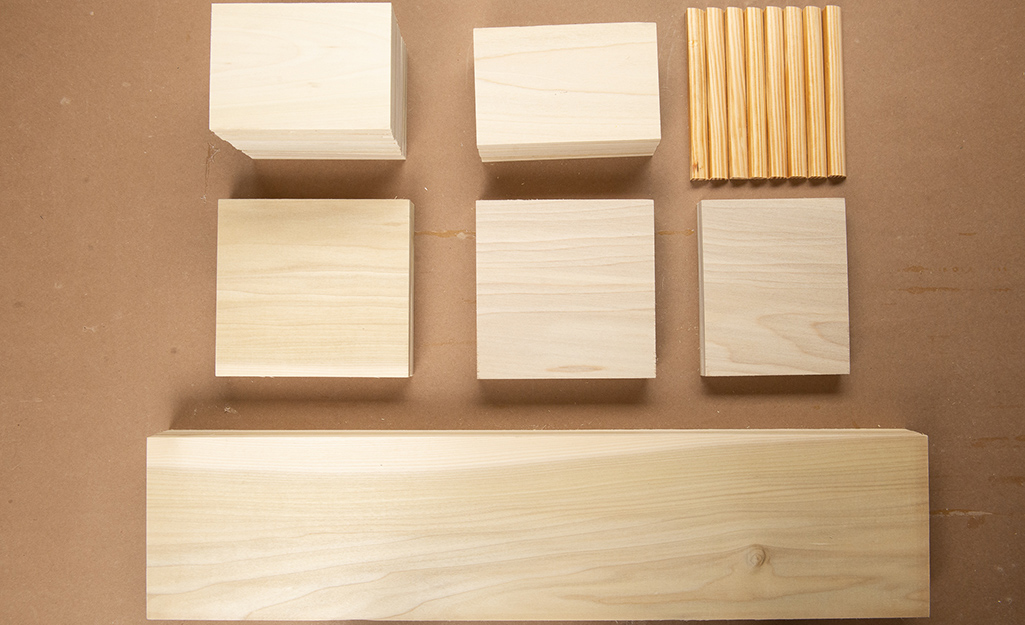
Before getting started, be sure to gather all tools and materials.
Here's what you'll need:
- 1/2 x 6 x 3-inch poplar boards (2)
- 1/4 x 3 x 36-inch poplar boards (2)
- 5 7/16-foot base shoe moulding
- 1/2-inch brad nails, staples, screws or headless pins
- 1-inch brad nails, staples, screws or headless pins
- Wood glue
- Coat hooks (4)
- Cup hooks
- Sandpaper
- Paint or stain and polyurethane, as desired
- Screws and anchors to hang on a wall
- Hand saw, miter saw or circular saw
- Hammer, brad gun, stapler or screw driver, as dictated by the fastener choice
- Drill with a 1/16-inch drill bit for pilot holes, if needed
- Measuring device
- Square
- Clamps
- Safety glasses
- Level for hanging on the wall
Cut List:
- 1/2 x 6 cut to 23 5/8 inches long (3)
- 1/2 x 6 cut to 6 inches long (2)
- 1/4 x 6 cut to 5 1/2 inches long (4)
- 1/4 x 3 cut to 5 1/2 inches long (8)
- 1/4 x 3 cut to 5 inches long (16)
- Twelve pieces of base shoe moulding, 5 inches long
Tip: The wood used in this guide is found in the moulding department at your local Home Depot, along with many other wood products for building all sorts of DIY projects. Check it out and let your imagination run free.
Build Drawers
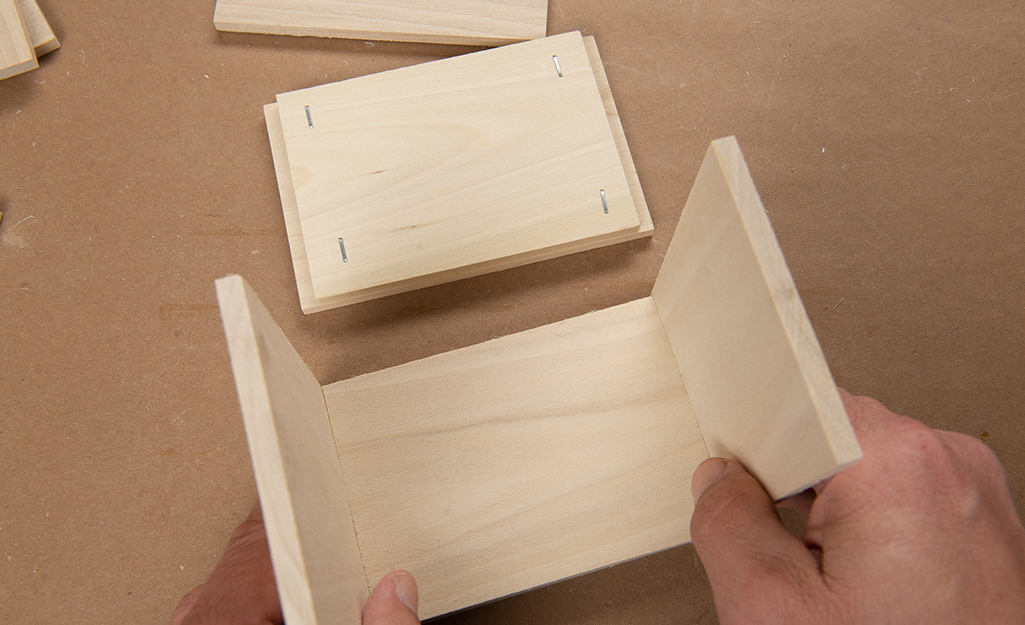
The front and back of the drawers are each made of one 5 1/2-inch and one 5-inch piece of 1/4 x 3. The sides are 1/4 x 5. The bottom is a piece of 1/4 x 5 1/2 x 5 1/2.
- Spread an even, thin coat of glue all over one side of a 5-inch piece and place it in the center; or use a 5 1/2-inch piece so equal amounts protrude over the edge.
- Clamp the pieces together and add four fasteners from the 5-inch side. Repeat this task with the other pieces.
- The step that is created on each end of the front and back makes a corner for the side panels to nest. Apply glue to the mating surfaces and clamp the assembly together. Use fasteners from the sides so they do not show through the front.
- Apply glue to the bottom edge of the drawer box and attach it to the 1/4 x 5 1/2 x5 1/2-inch piece.
- Position the end grain to the sides. Use fasteners from the underside.
Build Dividers
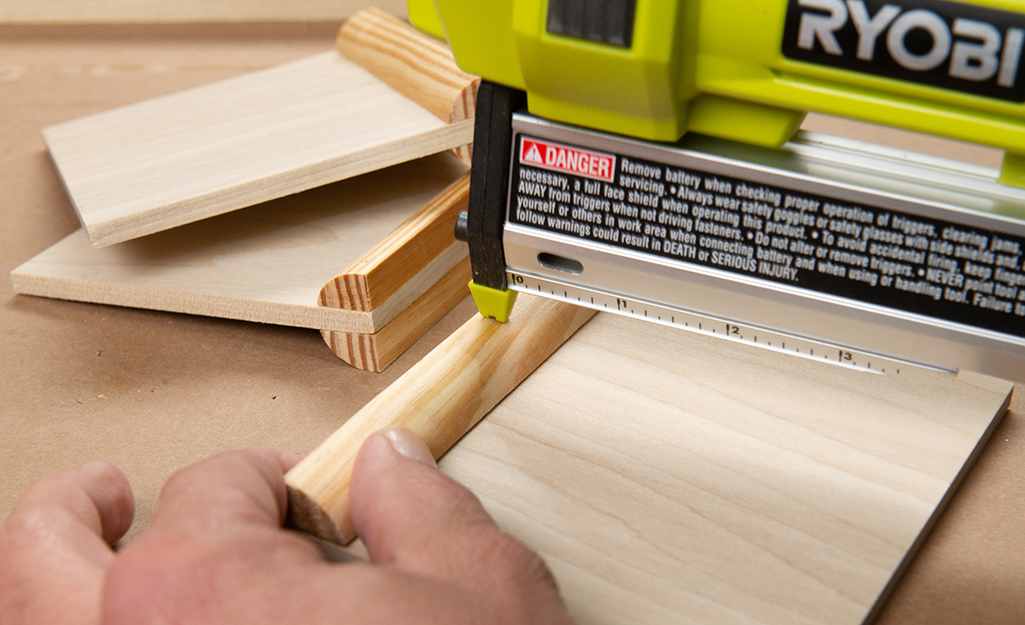
The three dividers are comprised of the 4 1/2-inch pieces of 1/4 x 6 and six pieces of the base shoe moulding.
- Glue and fasten two pieces of the base shoe moulding to the long end of each divider. The moulding should be flush with the top edge and the ends.
Build Box
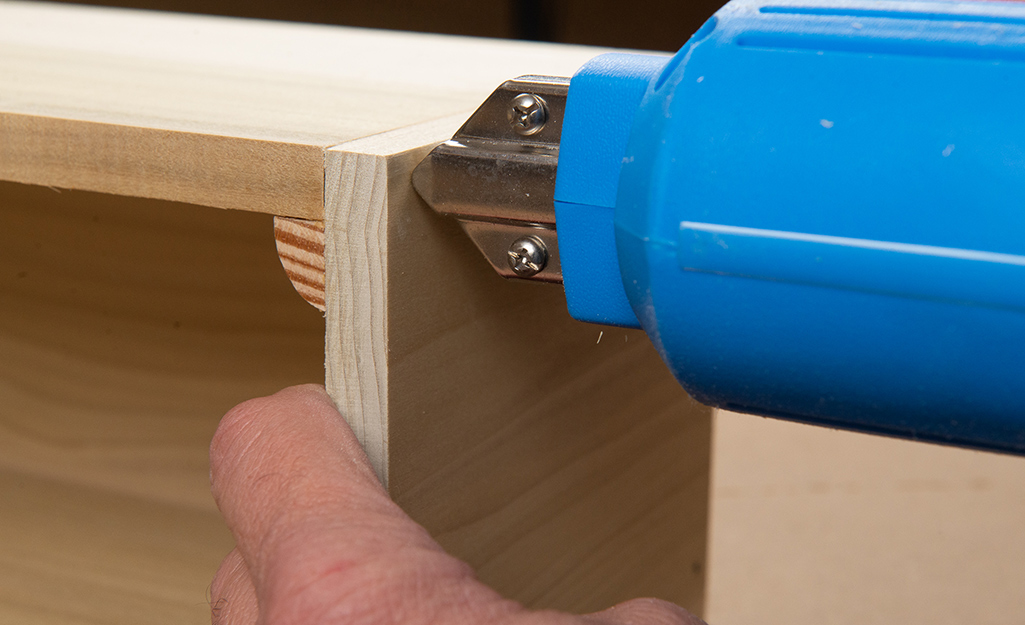
- The three long sections of 1/2 x 6 will be the main part of the box with the two 6-inch pieces of 1/2 x 6 being the ends. Use 1-inch fasteners for this thicker material.
- Each 6-inch piece will have a piece of base shoe moulding attached to it. The moulding should be flush with the front edge of the box.
- Use another piece of the 1/2-inch material as a spacer to place the moulding the correct distance from the top edge. Doing this first will help with the assembly of the box.
- Place the board that will be the bottom flat piece on the work surface.
- Place the back board on the edge behind it to form a 90-degree corner.
- Glue and fasten them together.
- Place an end piece on the edge of the work surface, against the angle that was just made, then glue and fasten it through the back.
- Repeat with the end piece on the other side.
- Sit the top piece on the moulding to complete the box. Glue and fasten.
Install Dividers
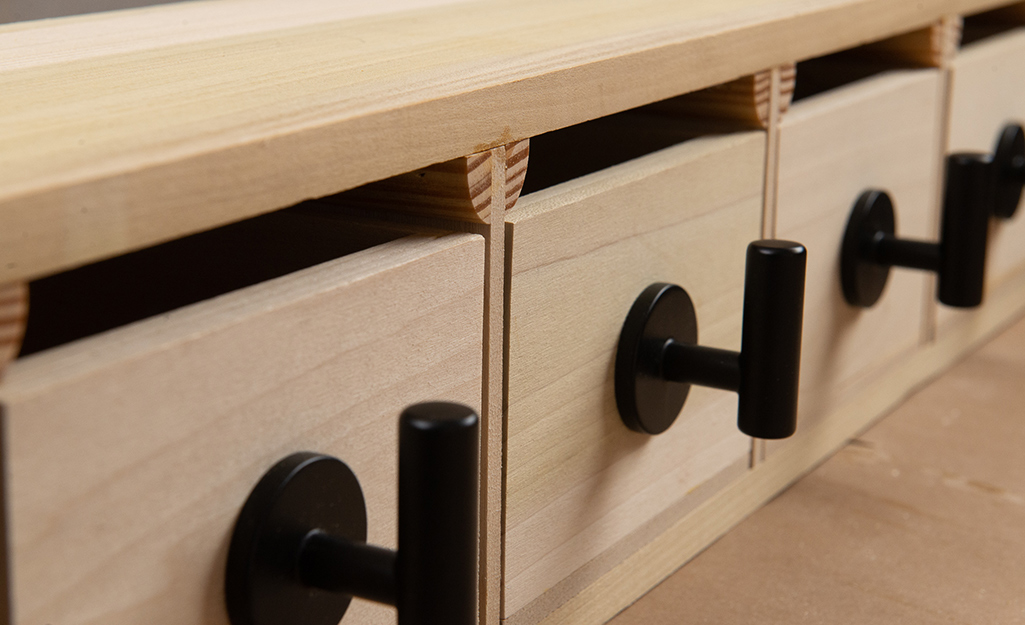
- Use the drawers to space the dividers.
- Place the drawers into the box and arrange them so that the spaces between them are even.
- Slide the dividers into place and adjust them until the spacing is correct and the drawers move freely.
- If the dividers are too tight to fit into place, put a piece of coarse sandpaper face up on a flat surface. Sand the end of the divider shorter by moving it across the stationary paper.
- If the dividers are too loose to stay in place while being positioned, apply layers of masking tape to the top of the moulding. This tape should be removed before final assembly.
- Remove the drawers, draw a line down the side of each divider, then remove the dividers one by one.
- Apply a thin layer of glue to the inside of the box where the divider will go. Reinstall the divider and attach with two or three fasteners through the top and bottom of the box. Repeat with the other two.
- Drill pilot holes for drawer pulls and install.
Tip: If you know where you want to install the key holder, drilling the pilot holes for hanging will be easier before the dividers are secured in place.
Finish and Hang on the Wall
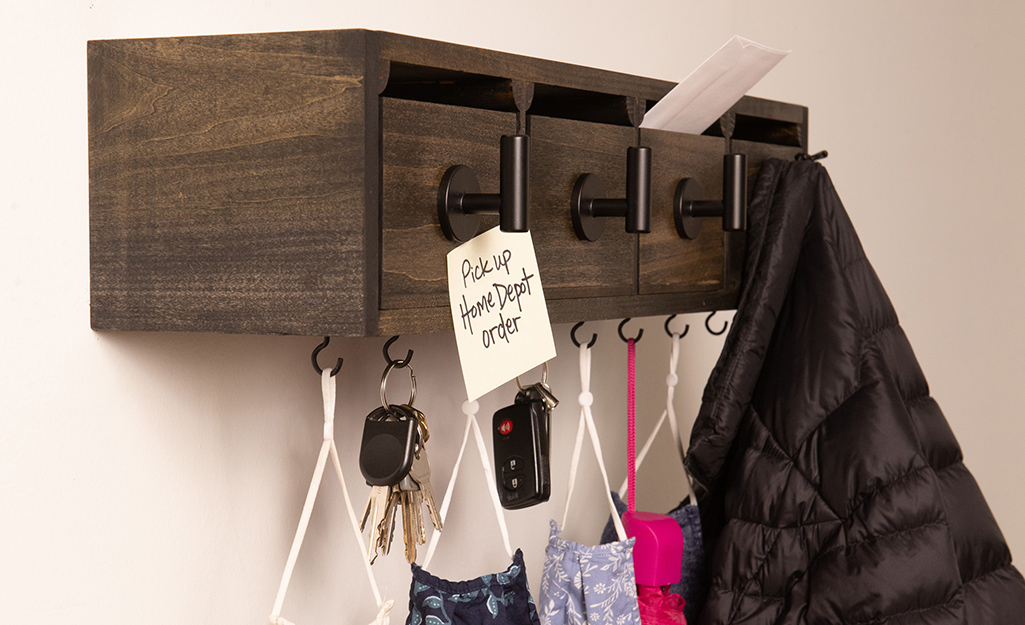
- Finish with stain and spray polyurethane. If painting, don’t paint the outer sides or bottoms of the drawers or the interior of the box where they slide.
- If more hanging space is needed for multiple keyrings, facemasks or other items, cup hooks can be screwed into the bottom of the box as needed.
- Use a level to make sure the box is hung properly.
- Use a stud finder to locate the studs in the wall where you want to hang the unit. If it only crosses one stud, put two screws into it and use wall anchors as needed. At minimum, the box should be supported close to each end. When the screw locations are determined, drill pilot holes through the back of the box and into the wall.
Learning how to build a key holder is a great way to add more storage to your home. It's also a wonderful DIY gift to give to a loved one either for the holidays or as a housewarming gift. TThe Home Depot delivers online orders when and where you need them.
