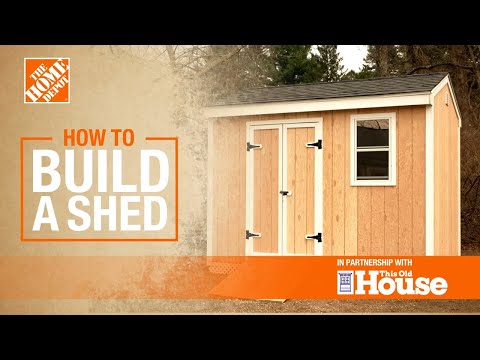
How to Build a Shed
Published September 5, 2023
When you need extra outdoor storage or a new workspace, consider building a shed in your yard. Building a shed allows you to customize it for your specific needs. You can use it for a place to store power tools or even as a woodworking shop. Learning how to build your own storage shed can also be a more budget-friendly option. Use this guide to see how to build a small, basic shed from scratch. You’ll find out how to plan for a shed, pick a location, learn how to build a shed foundation and how to install shed roofing. Read on for the steps and tips on how to build a shed.
Difficulty:
Advanced
Duration:
Over 1 day
Table of Contents
Planning a Shed
Build a Foundation
Complete the Floor Frame with Joists and Sheathing
Frame the Walls
Frame the Roof
Install the Roofing
Planning a Shed

Building a small, basic shed yourself can be a very budget-friendly option. Here’s the basic things to consider when designing a shed:
- Determine the shed location. If possible, build the shed on ground that is within 6-inches of being level. Building a shed on a slope is more difficult and requires either a special foundation or for you to level the ground yourself. Avoid locating the shed at the foot of a hill or low-lying area where water collects. Also consider avoiding areas near dense trees where falling debris might damage the roof.
- Determine the size and style of your shed.
- Decide what type of roof and door you want.
- Make sure you plan to install a door in the right location. The door should be large enough for all the equipment you plan to store in your new shed.
- If you want windows, choose what size and type.
- Consider adding a ramp for wheeling in and out mowers, wheelbarrows and other tools.
- Create a drawing. You can do this on your own, hire a professional designer, or purchase ready-made shed plans.
- Get a building permit if required by local ordinances.
- If you plan to run power to the shed be sure to work with a professional and check the building code requirements in your area.
A great option for building a shed for beginners is to start with a pre-built kit. A DIY shed kit can’t be easily customized, but there are many benefits:
- Allows you to build a resin, plastic shed or metal shed from prefabricated pieces and detailed manufacturer instructions.
- Are an easier option for anyone who wants a woodshed alternative.
- Takes less time to assemble than it takes to build a shed from scratch.
This guide details how to build an 8 foot x 12 foot shed with a 48-inch door opening, one window, a gable roof and a ramp. You can modify this design by changing the final size, materials and finishes.
Build a Foundation

The first step is building a foundation for your shed. In most areas, the base of the shed can consist of a wood floor platform that rests on top of concrete deck blocks.
These blocks can be set on crushed stone if the ground is within 6 inches of being level.
If your yard has a significant slope, use concrete mix to build on poured concrete piers or something similar. This is also true if you live in a high-wind or seismic zone.
- To locate the foundation, build the perimeter of the floor frame first.
- Build the perimeter of the floor frame by assembling a square box made of pressure-treated 2 x 8s that is equal to the length and width of the shed. Nail the 2 x 8s together using 16d galvanized nails.
- Once the foundation box is assembled, lay it where you want the shed to sit in the yard.
- Measure diagonally corner-to-corner to roughly square the box.
- Place concrete deck blocks in the corners.
- Check the frame for level across all four sides to determine the high corner. You’ll set this concrete deck block first.
- Set the frame aside, keeping the blocks in place.
- Starting with the block in the high corner, dig down 5- to 6-inches below where the block will sit.
- Fill the area with crushed stone. Use a tamper or a sledge hammer to compact the stone. Crushed stone helps maintain drainage around these footings. Set the block on top of the crushed stone or concrete.
- Repeat the step above for the three remaining corner blocks. Level each block to the first block using a long straight edge and level. Use crushed stone and extra blocks as necessary to bring each corner level with the first block.
- Add a second block mid-span on each of the 12-foot runs, leveling with the corner block as in the previous step.
- Place the floor frame perimeter on top of the concrete blocks. Double check the floor frame perimeter with the level.
- Adjust the blocks as needed by adding or removing stone.
Tip: Check your climate and local building code to determine which is best foundation for you, especially if your area requires a building permit.
Complete the Floor Frame with Joists and Sheathing

- Add floor joists every 16 inches on-center. Run the joists across the short span. For the shed in this guide that will be 8 feet.
- Nail through the band joist into each end of the floor joist using 16d galvanized nails.
- Once all the joists are nailed in place, add joist hangers at each location. Nail the joist hangers in place using galvanized joist-hanger nails.
- Square the floor framing again by measuring diagonally from corner to corner.
- Lay a sheet of 3/4-inch plywood sheathing or tongue-and-grooved floor sheathing in one corner. Use this sheathing to ensure the floor framing is square. Nail it down using 8d ring-shank nails. An optional step here would be to add exterior-rated subfloor adhesive to the joist before adding the sheathing.
- Lay the next sheet. Cut to length as necessary and repeat the step above.
- Complete the sheathing. Make sure to stagger the seams.
Tip: If something very heavy, like a riding lawn mower will be stored in the shed, place a concrete foundation block in the center of every floor joist.
Frame the Walls

This shed consists of two gable-end walls and two bearing walls. Site-made roof trusses will sit atop the walls to create the roof. Walls consist of a bottom plate, studs spaced 16 inches on-center and two top plates. Any openings for doors or windows will require headers per the shed plans.
- Assemble one gable end of the shed using 2 x 4's cut to length per the shed plan drawings. Assemble the wall on top of the floor sheathing so that it can be tipped up once it is complete.
- Next, square the wall by pulling diagonals from opposite corners as you did with the floor framing.
- With the wall square, add sheathing and then the siding. Hold the sheathing down below the bottom plate. It should register onto the floor band joist of the floor framing.
In this case, the sheathing and siding are one-in-the-same. Nail the sheathing/T-111 with 8d ring-shanked nails. - Install any windows to the wall now using 1 1/2-inch roofing nails. (Windows should be installed after the wall has been raised.)
- Trim the window as desired.
- Lift the wall up so that it’s plumb. Align the outside so that the sheathing runs flush with the floor framing and nail through the bottom plate into the floor framing. Temporarily brace the wall in place using a 2 x 4 screwed or nailed diagonally from the sides of the wall to the floor framing.
- Repeat this process for the two bearing walls, and then the remaining gable wall.
- Once all the walls are tipped in place and plumb, nail them to one another at the corners.
Frame the Roof

There are several ways to frame a roof, including using a ridge beam, common rafters, collar ties and roof trusses. This guide will cover a roof assembly composed of site-built roof trusses. The trusses must all have the exact same measurements to create an even roof. Once assembled they will sit on top of the bearing walls spaced 16 inches on-center.
- Roof trusses consist of two rafters (also called top cords) that join at the peak, and a bottom cord that stretches across the two at the bottom. Together these three parts or members create a triangle. The rafters and bottom cords are joined together by plywood gussets at each joint.
- Rafter and bottom chord length will vary based on your shed plans. Cut each member according to the drawings. Lay them down to form a triangle.
- Build a truss for each gable wall. Span the bearing wall at 16 inches or 24 inches on center, depending on your shed plans.
- Attach the rafters and bottom cord using 1/2-inch plywood gussets cut to 8 inches x 14 inches. Trim gussets as needed.
- The four interior trusses will have gussets on both sides. The two exterior trusses will only have gussets on one side. The other side will be covered with siding.
- Cut four 2-inch x 4-inch boards to 1 foot. Cut four 2-inch x 4-inch boards to 2 feet with a 30-degree miter cut on one side. These will be vertical supports for the exterior trusses.
- Fit the above cuts into the exterior trusses.
- Toenail them into the rafters and cross ties. (Toenailing is nailing two pieces of wood together at about a 45-degree angle.)
- Cut the shed siding to size to cover the exterior trusses. Attach with 8d ring shank nails.
- Raise the trusses and toenail them to the top plate of the front and back shed walls. Each truss should be 2 feet apart.
- Once complete, set the rafters on top of the bearing walls at 24 inches on-center.
- Add half the plywood sheathing to the roof. Start at the lower corner of one side, run the plywood across the rafters so that it is perpendicular to the 8-foot run of plywood across the rafters. Nail off with 8d ring-shanked nails.
- Repeat this process. Cut pieces to fit as needed and staggering joints at each row of plywood.
Install the Roofing

There are many roofing options and designs. Be sure to follow the shingle manufacturer’s instructions. The process below describes how to install typical 3-tab asphalt shingles.
- Cut and install the fascia trim along the gable ends and along the eaves. Be sure to hold the fascia trim down from the sheathing so that its outer edge is in-plane with the top of the roof sheathing.
- Now, install the drip edge. Line up aluminum drip edge flush with the edges of the roof at the eaves and make a pencil line at the top on each end of the shed.
- Make a straight line for reference using a chalk line. Snap the line between the two marks that you just made.
- Install the drip edge, holding it down about a half-inch from that line to create a gap between the drip edge and the fascia board. This gap will keep water from sneaking back up and behind the fascia boards.
- Nail the drip edge down using 1 1/4-inch plastic cap roofing nails. For long runs, overlap the drip edge by a 1- to 1 1/2-inch.
- Do the same on the gabled ends, installing the drip edge up the roof along the gable. Fold the drip edge over the ridge and down the other side to avoid a seam there.
- Lay out 30-lb. asphalt roofing felt paper and nail it in place using 1 1/4-inch plastic cap roofing nails.
- To lay out the design for the shingles, begin at the bottom of the roof. Place a tape measure 1/2-inch from the edge of the roof to ensure the shingles overhang the drip edge.
- Mark 12 inches up on the roof for the first course of shingles, then mark every 5 inches all the way up the roof to set your reveal. Do this on both sides of the roof.
- Using the chalk line, snap a straight line on each 5-inch increment.
- Use the chalk line to snap a straight line vertically every 6 inches.
- Install a starter course by cutting off the three tabs on a shingle, leaving only the top tar section. Orient the starter course so the tar is facing up and located over the drip edge.
- The easiest way to cut shingles is to scribe the back with a utility knife. Fold and break at the line.
- Install the first shingle over the starter course, aligning the top edge with the horizontal line and the side edge with the vertical line. Ensure that the seams of the tabs overlap the seams in the start course below by about 6 inches. Continue to the end of the roof.
- Start the next row so that it is offset 6 inches from the previous row.
- Repeat this process for each row, all the way up to the ridge.
- Repeat on the other side of the roof.
- Once both sides are complete, cut shingles into each individual tab.
- Install them perpendicular to the shingles so that they fold evenly over the ridge.
- Overlap each cap shingle by 5 inches.
Install the Door

Decide which of the different door types you prefer. Choose from prehung doors to slab units with exterior gate-style hinges. This guide shows you how to install a prehung door. If using a prehung door, get an exterior-grade unit that will include a threshold.
- Set the door so that it is centered in the opening.
- If the door has pre-installed brick molding, plumb the hinge side and nail the molding into the sheathing/siding (if you used T-111). Nail the molding off around the door. Then shim/nail following the steps below.
- Shim behind the hinges to maintain plumb.
- Remove the screw closest to the door stop and replace it with a screw long enough to penetrate the framing by at least 1 inch. Repeat this process for each hinge.
- Shim behind the latch and install a screw so that it penetrates the framing by about 1 inch.
- Add shims to the latch side of the door jamb so the reveal is even when the door is shut. Nail through the door jamb and shims, penetrating the framing by 1 inch.
- Repeat this process for the head jamb.
Paint or Stain

- Install exterior trim as desired on the corners of the shed, along siding seams, around the door and around windows.
- Paint or finish the siding and trim with a weather-resistant exterior wood paint or stain. If desired, paint the trim a contrasting color from the siding.
- Consider installing wireless lights or hiring an electrician to wire the shed for lights and outlets.
- Consider adding window boxes and planting garden beds around your shed.
- Build a ramp to wheel large equipment in and out of the shed. This can be as simple making a 2 x 4 frame screwed to the shed just below the threshold and finished with pressure-treated decking.
At the end of the project, you will have an outdoor storage shed or workshop custom-built for your exact needs.
Start by designing a shed based on your purpose, space and budget. Building a shed takes some carpentry skills but it's a project you can do yourself. All you need is time and the right tools. In some cases, building your own shed can be more budget-friendly than buying a shed. Got your plans for a shed all ready to go? From lumber to a level, get everything you need. Use the Home Depot Mobile App to locate products and check inventory. We’ll take you to the exact aisle and bay. You can also build your own shed with a DIY shed kit or hire our professional shed installation services.
Related Products
Leave Your Next Project to Us
Professional Shed Installation
- Expert Shed Installers Do It For You
We hand-select licensed and insured local shed installers in your area who are known for their experience, knowledge, and superior service.
- How Our Shed Installation Service Works
Excited to get started on your shed project? Begin by using TuffShed's configurator tool to design and price your shed. We’ll guide you through every detail, helping you select the perfect model, size, and custom options like color, door placement, and shelving. Once your design is complete and purchased, our licensed shed pros will manage the entire process, from delivering your shed to installing it perfectly in your space.


