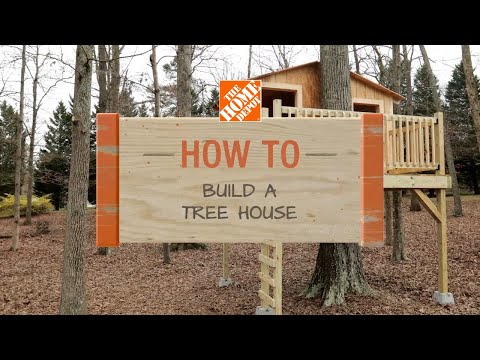
How to Build a Treehouse
Last updated September 7, 2023
Backyard treehouses are a fun and charming addition to any home. They give your outdoor space extra character and offer a great play area for the kids. This guide gives you DIY instructions on how to build a treehouse of your own.
Difficulty:
Advanced
Duration:
Over 1 day
Table of Contents
Choose a Tree
Create a Blueprint
Build the Foundation
Layout the Platform
Attach Floor Joists
Attach Joist Hangers
Choose a Tree

The first step to building a tree house is to find the right tree.
Choose one that is sturdy enough to withstand the weight of your new treehouse, as well as any visitors that may occupy the space. Ideally, you’ll want a tree with a distinct “y” shaped branch, but there are other things to consider:
- Type: Hardwood varieties like oak, maple and hickory are ideal for treehouses.
- Height: The tree should be high enough for a nice view, but consider the safety of the builder and children as well. We recommend staying between 6 to 10 feet high.
- Branches: The branches should be strong and thick enough to bear the structure.
- Quality: Take care to choose a tree that is not damaged in any way. Also avoid ones with shallow roots since they’re more vulnerable and have a weaker foundation.
Create a Blueprint

The next step is to draw up treehouse plans as accurately as possible.
Creating a blueprint will ensure you have the right materials during the build.
- Measure the height from the ground to the platform location and then measure how large you want the platform.
- Include these dimensions on your plan. Also include ideas for walls and railings. These will provide extra safety for the future treehouse occupants.
Build the Foundation

Now it’s time to build the foundation of your treehouse.
- Start by setting your 4 x 4 posts on the concrete deck blocks, using scrap lumber to help hold up posts until they are connected.
- Once posts are on the blocks, connect them by using 2 x 8 bands.
- Use your level to make sure they are lined up correctly. Then, use your framing nailer and 3-inch framing nails.
Layout the Platform

To build the platform, you'll need to determine which direction you want to run your decking. This will determine the direction of your floor joists, which should run perpendicular to the deck boards.
Attach Floor Joists

Now it's time to attach the floor joists to the tree.
- Pre-drill the tree and the 2 x 8's prior to attaching them to one another, as it will make it easier to install and decrease the odds that the boards will crack.
- Once drilled, use an impact wrench to tighten the screws. Keep in mind, your lag screws should be at least 6 inches long.
- Now, add the remaining floor joists at 16 inches from the center.
Attach Joist Hangers

With the joists in place, add joist hangers using your hammer and 1-inch galvanized nails.
Cut Angle Braces

- Next, using your miter saw, cut
your shorter 4 x 4 posts for angle braces. The braces will add extra stability to the foundation. - Cut the posts at a 45-degree angle. Each angle brace should be about 2 feet long.
- Attach to the foundation post with 3-inch deck nails.
Attach Deck Boards

- Next, connect the deck boards to the platform using 2-inch wood nails.
- Be sure to measure each piece, as you'll have to cut around tree and the posts to fit.
Build the Frame

It's time to move on to the walls.
- Measure and cut your 2 x 4 studs to build the treehouse frame. You'll want to build the frame based on the perimeter of the platform and your desired height of the roof.
- Attach to the platform using your framing nailer and 3-inch nails.
- Next, add vertical studs at 16 inches on the center.
- Remember to frame out where you've planned for doors and windows.
Tip: Install temporary 2 x 4's across the top to keep the walls plumb.
Build the Roof

- Using your 2 x 6 lumber and saw, make the ridge beam.
- Attach the 2 x 4 rafters at 2 feet, on the center. The rafter should reach from the top plate of the walls to the ridge beam.
Tip: Stand 2 x 4 studs up to support the ridge beam while you are attaching it to the frame.
Frame the Walls

- Frame up your gable end walls from the floor to the rafters using your 2 x 4 studs.
- Once attached, you can remove the temporary 2 x 4's.
Install Siding

- Now that your walls are in place, begin installing the siding.
- Measure and cut the siding to your desired fit.
- Attach using your framing nailer and 2 3/8-inch framing nails.
- Nail the siding to the gable end walls.
- Use a reciprocating saw to remove any excess wood.
Cut Holes for Doors and Windows

With your reciprocating saw, cut out holes for doors and windows.
Add Roof

Now, you're ready to add a roof to your treehouse.
- Cut the plywood sheathing to fit and attach it to the rafters, using your framing nailer and 2 3/8-inch nails.
- Be sure to leave enough room for the tree and enough plywood for a 6-inch overhang.
Add Trim to Doors and Windows

- Give your treehouse a more finished look by installing trim around the doors and windows.
- You can create the trim using 1 x 4 and 1 x 6 lumber.
- Attach the trim using your nailer.
Add a Handrail

For safety purposes, it's a good idea to add a handrail to your treehouse.
- Attach a pre-built handrail section around the deck area.
- Leave space for the ladder and entrance.
- Connect railing to the posts using rail connector brackets.
Attach Ladder

- Space the rungs for the ladder about 7 to 10 inches apart.
- Using 2 x 4 lumber, cut the desired amount of steps.
- Attach using your drill and 3-inch deck screws. Pre-drill the holes to make drilling easier.
Enjoy Your Treehouse

- Once your ladder is complete, your treehouse is built. You may choose to stain it or leave the lumber as-is.
- Now, enjoy it with your family for years to come.
Learning how to build a treehouse can seem overwhelming, but it can done safely with the right supplies and instructions. The Home Depot is your DIY headquarters. Ready to get started on your treehouse? Use our project calculator to find the right amount of materials for your project.