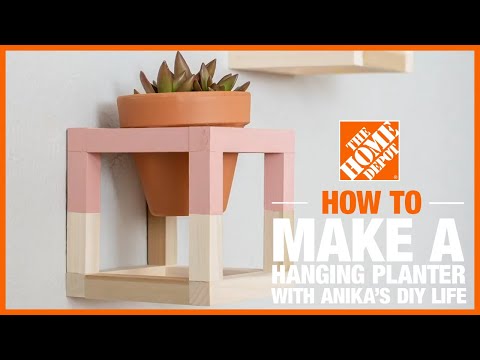
How to Build a Wall Plant Hanger
Last updated September 7, 2023
Presented by Anika Gandhi of Anika's DIY Life
This quick and easy project is a fun way to add greenery to your space. A DIY wall plant hanger is a versatile decor piece that can be made without using power tools. Make multiple hangers and arrange them together for a fresh display piece.
Difficulty:
Beginner
Duration:
Under 2 hours
Table of Contents
Cut the Dowels
Sand the Dowels
Attach the First Piece
Attach the Other End
Attach the Top
Repeat
Cut the Dowels

Cut the 3/4-inch dowels using a miter box and handsaw (or a miter saw) into the following sizes:
- (8) 4-inch pieces
- (4) 5 1/2-inch pieces
Sand the Dowels

Sand the edges of the dowels to remove burrs and splinters and also sand the sides slightly for a smooth finish.
Attach the First Piece

- Apply a small dab of super glue to one end of a 5 1/2-inch piece.
- Attach a 4-inch piece to it. Hold for 10 seconds (this hold time might vary by super glue used).
Attach the Other End

Apply a dab of super glue to the other end and attach a 4-inch piece.
Attach the Top

Add a dab of super glue to the top of both the 4-inch pieces from the above step and attach a 5 1/2-inch piece.
This makes a square frame.
Repeat

Repeat the process to make a second square frame.
Attached the Frames

On each corner of a square frame, apply super glue and attach the 4-inch pieces vertically.
Complete the Hanger

- Apply super glue on top of each 4-inch post and attach the second square frame.
- This builds a plant hanger to accommodate a 4-inch diameter clay pot.
Paint and Hang

- Paint or stain in the color of your choice.
- Attach multiple cubes using super glue to assemble interesting patterns, if you like.
- Use D-ring hangers to hang up on the wall, and enjoy.
Get all the things you need to make your own DIY wall plant hanger today. The Home Depot delivers online orders when and where you need them.