Table of Contents
Measure and Cut Wood
Assemble the Frame
Install the Shelves
Attach Pegboard and Casters
Best Wood for Workbench Tops
DIY Workbench Mistakes to Avoid
Related Products


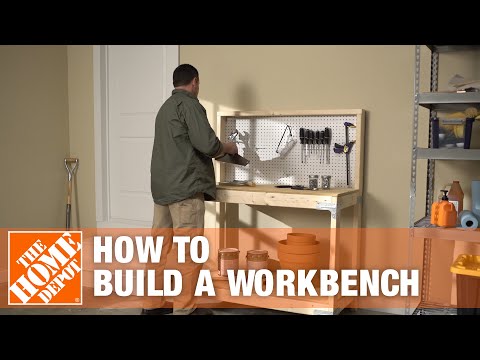
How to Build a DIY Workbench
Last updated September 7, 2023
The Home Depot sells a variety of workbenches, but when you learn how to build a DIY workbench, you can customize the workbench for your own needs.
Attach the Pegboard Attach Casters (optional) Attach the Top Rail
Difficulty:
Intermediate
Duration:
2-4 hours
Measure and Cut Wood

Mark the lumber according to the following cut lists.
Cut the 2 x 4-inch x 8-foot common board:
- 4 rails – 45 inches
- 2 rear posts – 58 inches
- 4 end rails – 17 inches
- 1 top rail – 48 inches
- 2 front posts – 36 inches
Cut the 5/8-inch x 4 x 4-foot plywood:
- 2 shelves; 1 top and 1 bottom – 24 x 48 inches
Use a circular saw to cut along all of your markings and set aside the lumber, labeling each piece with your pencil so you can remember its intended purpose.
Assemble the Frame

Next, measure and mark spacing for connectors:
- Place the four front and rear posts side by side.
- Even out the bottom ends of the posts, then measure and mark a line 6 inches in as a guide for the bottom connectors.
- Mark another line at 34 3/8 inches in from the bottom for the top connectors.
- Place one front and one rear post aside for now.
Then, attach the connectors:
- On the front post, slide one of the RTC2Z connectors up to the mark you made at 6 inches.
- Use a clamp to hold the connector in place, then drive in wafer screws to secure.
- Repeat for the rear post.
- Place another connector at the mark you made at 34 3/8 inches on the front post, and repeat this process. Do the same for the rear post.
- Double-check that the alignment of this connector is in the same direction as the one you just installed on the bottom on the post.
It's time to connect the posts:
- Join the front and rear posts together with the end rails and 1 1/4-inch wafer screws to complete one side of the frame.
Finally, complete the other side and connect the frames:
- Repeat the steps to complete the other side of the frame with the remaining front and rear posts.
- When completed, connect the two frames together with the 45-inch rails and attach with 1 1/4-inch wafer screws.
- Stand the bench up.
Install the Shelves

NNotch the Shelves:
- Stack the two shelves you cut from the plywood on top of each other and hold firmly in place with clamps.
- If you want, you can use a 2 x 4 piece of lumber as a guide for these notches.
- Measure in 3 1/2 inches from the back edge and 1 1/2 inches in from the sides.
- Use a jig saw to cut out the two notches.
- Unclamp the shelves and place one aside – this is the top shelf.
- Make two more notches on the front edge of the remaining shelf – this is the bottom shelf. The additional notches are so it can fit around the bench’s legs.
AAtAttAAAAAaAAttach the Shelves:
- Place the bottom shelf (the one with all four corners notched) into the bench.
- Attach with 1 1/4-inch wood screws.
- Place the top shelf (only two corners notched) on top of your workbench and attach with 1 1/4-inch wood screws.
Attach the Top RailAttach the Top RailAttach the Top RailAttach the Top Rail
Attach the Top Rail
Attach the top rail with 2 1/2-inch wood screws.
Attach Pegboard and Casters

AAttach the Pegboard:
- Align the pegboard onto the back of the workbench so that all edges are flush.
- Clamp the pegboard into position and attach with 1 1/4-inch wood screws.
Attach Casters (optional)
If desired, attach casters to the bottom of each of your workbench’s four legs. Make sure each caster is lockable and rated for the weight you anticipate being on the workbench.
- You may want to get a friend to help you set the workbench on its side as you install the casters.
- Double-check that the bench is still level once all casters have been attached.
Best Wood for Workbench Tops

The top of your DIY workbench is going to get a workout, but don’t overthink the type of wood you choose for the bench top, as there are advantages to just about any kind of wood you select.
Softwood - Pine and birch are some of the softwoods that can be effectively used as a workbench top. Softwoods are inexpensive and easy to work with, but are not as durable as other materials, so your workbench top may need more maintenance and might need replacing sooner than you might like if you are an avid woodworker.
Hardwood - Hardwoods, such as oak and maple, are tough and can take more punishment. Small nicks can be easily sanded out of the surface, and larger depressions can be filled with wood putty. However, hardwoods are expensive, and will increase your project budget. They are also slightly more prone to splinter with repeated exposure to force like hammering.
Plywood - Plywood as a workbench top offers medium durability at a reasonable cost. Layer the wood so the top is a minimum of 3/4 inches thick and you’ll have a sturdy surface to hold your projects. Plywood is also less likely to warp.
MDF - Medium Density Fiberboard (MDF) is also an economical choice for a workbench top. It has many of the same advantages as plywood and is light but sturdy enough to use in an overhang design that can accommodate a clamp, which can be extremely useful in all kinds of projects.
You might also consider creating a combination workbench top. A hardwood base, for example, with an MDF or plywood top combines durability with affordability, and the top will be easy to replace in the long term.
DIY Workbench Mistakes to Avoid

Measurements:
- Building your workbench to the correct dimensions is one of the most important parts of the design, and one that many woodworkers tend to over or underestimate.
- Height – The average height of a workbench should be around 36 inches. This will allow a good range of motion and reach for most users. For more accurate customization, stand straight but in a comfortable posture, then measure the length from floor to the bend in your wrist. This measurement will provide a good height for your workbench for day-to-day shop activities. However, if more than one member of the household will be using the same bench, the general measurement would reasonably accommodate most range of heights.
- Depth – The depth of the woodworking bench should be about 24 inches. This is the length of the average arm reach; any longer and you may find yourself having to stretch uncomfortably across the surface of the bench to complete some tasks.
- Length – The length of your workbench is entirely up to you. However, the longer the bench, the thicker you will need your top to be to provide the correct stability for your work.
Building a work bench is not as difficult as it may seem. With just a few tools and materials, you'll have a convenient place to work on your DIY projects with ease. Whether you need the the right tools or wood, The Home Depot delivers online orders when and where you need them.
Explore More on homedepot.com


