How to Build an Outdoor Hexagon Planter
Last updated September 7, 2023
The perfect planter can add function and style to your porch, patio or deck. Here’s how to build a hexagon-shaped planter in your backyard. You can use your new outdoor planter to grow anything from fresh herbs to colorful annuals and perennials.
Read on for the materials and tools you need, plus step-by-step directions.
Difficulty:
Advanced
Duration:
Over 1 day
Table of Contents
Gather Materials and Tools
Measure and Cut Lumber
Stain or Paint
Build Outside Frame
Build Interior
Add Panels
Gather Materials and Tools

The outdoor hexagon planter is customizable to fit your outdoor space.
These instructions are for a planter with a 48-inch diameter. The project can be scaled up or down. For example, if you increase the size to 60 inches, make 30-inch outer pieces and 27-3/4” inner pieces. You can decrease the size to 36 inches by making 18-inch outer pieces and 16-5/8” inner pieces. (Note that below a 36-inch diameter, it's better to cut two inner dividers, making three sections, rather than six dividers to make the aperture-shaped seven sections. Build the outer hexagon and measure across to find the dimensions.)
The finished planter is two hexagons stacked to provide room for deep-rooted plants to grow. You can make multiple planters for a multi-tiered garden of varying heights, or arrange many planters into a honeycomb pattern.
We selected pressure treated wood for this planter. You can line the interior surface with plastic or landscaping fabric if you're growing edibles. You can also build the planter from 2 x 6 cedar boards, but be sure to account for the narrow width of available materials.
- Six 2x10x8 pressure treated boards
- Three 1x3x8 pressure treated boards
- Two pounds of 3-1/2-inch exterior, self-drilling screws, rated for use in treated lumber
- Six 2-inch exterior, self-drilling screws, rated for use in treated lumber
- One pound of 8d galvanized or stainless-steel nails
- Paint or stain as desired
Tools:
- Circular saw or sliding compound miter saw
- Driver and bit for screws
- Hammer
- 12-inch rafter or “speed” square
- Measuring tape
- Pencil
- Paintbrush
Measure and Cut Lumber

A hexagon shape requires precise cuts so the pieces align. Measure carefully and cut on the waste side of the line.
Using a sliding miter saw is the easiest way to make these precise cuts, but you can also make them with a circular saw and square.
All of the 2 x 10 lumber is cut with opposite 30-degree angles on each end. To achieve this, cut one end of the board at 30 degrees, then flip the board over, measure the long side of the board, then make the cut, resulting in one side of the board being the long side and the other being the short side, also known as an isosceles trapezoid, when viewed from the edge. If using a circular saw, use the square to mark a line all the way across the face of the board and then use the square to guide the saw.
Cut list:
- Six outside pieces of 2 x 10 that are 24 inches on the long dimension.
- Six inside pieces of 2 x 10 that are 22-1/8 inches on the long dimension.
- The 1 x 3 trim pieces are also cut with a 30 degree angle on each end, except they are cut from edge to edge.
- Six outer rim pieces of 1 x 3 that are 25 inches on the long dimension.
- Six inside pieces of 1 x 3 that are 22-1/16 inches on the long dimension.
Stain or Paint

- If the pressure-treated lumber is new, it may be “wet” from the treatment process. Allow new wood to dry before coating. It could take several months, depending on conditions.
- Pressure treated wood lasts for many years in most outdoor environments. However, if you prefer a specific color, staining or painting will help it last even longer.
- Sand any rough parts of the wood to make the lumber smooth and ready to accept paint or stain.
- Move the wood pieces to a well-ventilated area before painting.
- Paint with an exterior stain or paint. Follow manufacturer’s directions.
- If staining, seal with an exterior polyurethane.
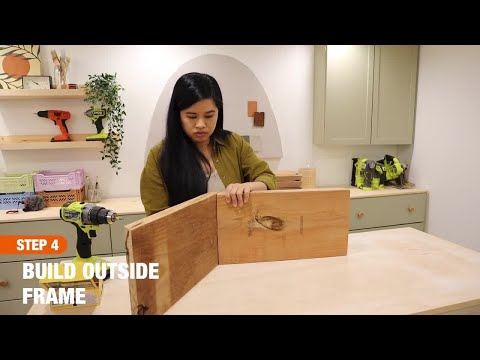
Build Outside Frame

- Find a flat, level area that’s large enough for the 4-foot diameter of the planter and for you to move around it.
- Start by standing the six outer pieces on edge, roughly in a circle, with the short sides facing outwards. Align the first two pieces where the ends are flush with each other. Being careful to hold the two pieces tightly together, fasten them together with three screws, one in the center and one about 1-1/2-inch from each edge.
- When using self-drilling screws in 2x lumber, pilot holes aren’t usually necessary. If you don’t have self-drilling screws, or if the wood is splitting, drill pilot holes.
- Every corner will look the same, with the end of one board against the face of the next.
Build Interior

- Along the top edge, mark the center of each outer board.
- Place the six interior dividers into the planter, one at the time, with the end of each board touching a center mark.
- Dry fit all boards in place before adding fasteners.
- One or more boards may need to be shortened to fit into the design, but try exerting some force, possibly with a hammer, before cutting again.
- Once satisfied with the placement of the interior dividers, attach with three screws at each end.
Add Panels

- Repeat the steps to create the second hexagon.
- Place the base hexagon in its final location before stacking.
- Stack the second hexagon on top of the first one. This will make a 48 x 20-inch, 60 x 24-inch planter.
- Join the top and bottom planters together with scraps from the trim boards.
- Drive 2-inch exterior wood screws into each panel.
Glue Trim

- Dry fit the trim to ensure a proper fit.
- The outer pieces go together like a picture frame.
- Once the outer pieces are in place, fit the interior pieces over the dividers.
- Attach trim to the planter with 8d nails.
Place and Plant

- Most herbs and flowers like full sun, but will tolerate some shade. Choose a site that gets at least 4 to 6 hours of sunlight each day.
- Make sure the planter is set on a level surface. You can prepare the surface by adding layers of cardboard or landscape cloth. If you're worried about digging pests like voles, secure hardware cloth to the inside.
- Fill with good quality soil. You can purchase raised bed soil, or create your own mixture of soil and compost for a rich, moisture-retentive, well-draining soil.
- You can add a slow release fertilizer to the soil.
Plant with Herbs, Annuals and Perennials

The Outdoor Hexagon Planter project is the perfect size for a kitchen herb garden. Just add your favorite herb seedings to each section. The key to a beautiful herb garden is to use it frequently. Frequent pruning stimulates the plants to grow more.
Explore the Garden Center for annuals and perennials that will thrive in your hexagon planter.
A new hexagonal planter adds a unique element to outdoor spaces. Learning how to build a hexagon planter takes the right materials and amount of time. It’s a project that you do yourself. Choose wood that stands up to outdoor use, such as redwood. Place your planter on a level surface and choose plants that work in your area.
Need lumber to build your planter or potting soil to get gardening? Use The Home Depot Mobile App to locate products and check inventory. We'll take you to the exact aisle and bay.