How to Create a DIY Flower Vase
Last updated September 7, 2023
Turn your cut flower bouquets into art with a DIY wall flower vase. In this project, you'll turn an uncoated metal ceiling tile and a Mason jar into a work of farmhouse charm worthy of your favorite walls.
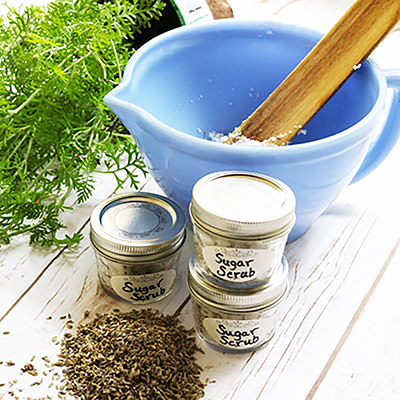
Once the project is complete, you can fill the vase with fresh flowers from your own garden, or a rustic bundle of dried flowers and herbs.
Read on for the step-by-step instructions.
Difficulty:
Intermediate
Duration:
Over 1 day
Table of Contents
Tools and Materials
Measure Tin Tile
Prepare Metal Tile
Spray Paint Metal for Rustic Patina
Paint and Seal Metal Tile
Build the Frame
Tools and Materials

The wall flower vase project begins with an uncoated metal ceiling tile painted to recreate an aged patina. The ceiling tile is framed with distressed wood (we used cedar). A Mason jar is wired to the tile and the project is ready for your wall.
The project can be made with new materials or found materials, or a mix of both.
Tools:
- Drill or driver with drill and driver bits
- Pocket hole screw kit (optional)
- Power miter saw or miter box
- Abrasive stripping pad or angle grinder with wire cup wheel
- Coarse sandpaper or a sanding block
- Ball-peen hammer
- Aviation snips (tin snips)
- Tape measure
- Pencil
- Felt tip marker
- Chip brush or paintbrush
- Personal protective equipment: Gloves, safety glasses, dust mask, hearing protection (if using power tools)
Materials:
- Large piece of cardboard to protect work surface
- Uncoated metal ceiling tile
- 1 quart glass jar like a Mason jar
- 24” bare copper wire, solid 12 or 14 gauge (look for "hobby wire")
- Degreaser or cleaner
- Brown, copper and green spray paint
- Spray clearcoat (polyurethane, varnish, Gorilla Crystal Clear Rubber spray)
- Wood stain
- 1x4x8 cedar board
- 1/2” screws
- 1” pocket hole screws
- 1 wooden paint stir stick
Measure Tin Tile

Begin with a metal ceiling tile cut down to your preferred size. We worked with a 24" by 24" ceiling tile for this project. You will use aviation snips, commonly called tin snips, to cut the metal.
Tip: Metal should be steel to create a natural rust effect.
Prepare Metal Tile

First, use tin snips to cut the metal corners. Use an abrasive pad, steel wool or angle grinder over the surface of the metal for a distressed look. Be sure to give more attention to the low spots in the design.
For an even more distressed surface, place a piece of wood under the metal tile and strike the tile with a ball peen hammer.
Then, scrape the surface of the screws you will use later to secure the metal to the frame. Run the screw head over the sand paper or a sanding block to roughen the surface.
Tip: Metal is sharp. Be sure to wear work gloves and protect your eyes and mouth while cutting and sanding the metal.
Spray Paint Metal for Rustic Patina

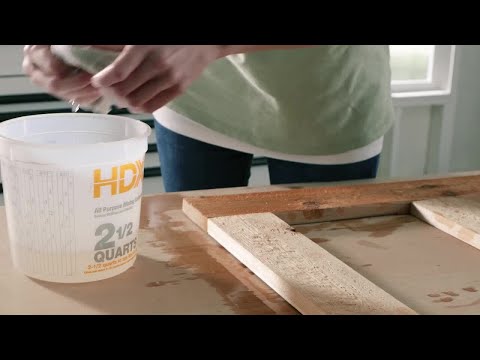
Spray paint the metal in an outdoor space. Protect your work surface with a sheet of cardboard.
Place the metal tile on the cardboard. Begin by spraying with copper or brown spray paint. Use a back-and-forth motion and a light touch.
Use paper towels to wipe or dab paint off before it has a chance to dry. After dabbing at the paint, let the paint dry before moving on to the next step.
Tip: A comfort spray grip accessory turns the spray paint can into a spray gun and helps you maintain consistent spray pressure.
Paint and Seal Metal Tile

When the first coat is fully dry, take green spray paint and apply a second coat. Hold about 2 feet away and spray to create a textured and spotty appearance.
Lightly dab again with a clean paper towel and allow to dry.
Next, use steel wool to rub away the paint so the bare metal shines through.
Finally, spray with a matte clear coat once you have achieved the desired rustic look.
Build the Frame

- Build the frame from a cedar wood 1 x 4.
- To fit around the tile, cut two 27-inch pieces and three 20-inch pieces.
- Drill two pocket holes into each end of the shorter pieces.
- Then attach the 20-inch pieces between the 27-inch pieces with pocket hole screws.
- Finally, attach the third piece across the center.
Tip: Wear protective gear when using power tools, including ear protection.
Distress and Paint the Frame

Give the wood a distressed and weathered appearance to match the tile.
- Begin by striking the wood surface with the round side of a ball peen hammer.
- Wet the surface with water to raise the grain. Let dry.
- Use a stiff wire brush to distress the frame.
- Complete the look by brushing on a weathered gray wood stain. Let dry.
Tip: You can also purchase weathered wood to skip this step.
Attach Metal to Frame

Next, secure the tile to the frame.
Begin by placing the metal tile in the center on the front of the frame. For an alternate look, you can attach the metal to the back of the frame.
- Drill 8 pilot holes: one in each corner, and one on each edge.
- Attach the metal with 8 screws you sanded earlier.
Attach Hanging Hardware

It's easier to attach the hanging hardware to the frame before you position the jar on the metal tile.
On the back of the frame, attach D-rings to the top corner of each side of the frame.
Attach the Jar

The final construction step is to attach the jar to the front of the framed metal tile.
- Use a tape measure to find the center of the piece. Measure 1 and 1/4 inches from center on each side and mark.
- Drill pilot holes through the metal and cross support.
- Wrap the wire several times around the jar, just below the mouth. Be sure to leave several inches on each end.
- Thread the wire through the holes. Twist them together on the side with pliers.
- Cut off any excess wire.
Finished Wall Flower Vase

This is your completed wall flower vase.
The finished product will be heavy, especially once flowers and embellishments, along with water, are added to the display.
Be sure to use heavy duty wall hanging hardware and secure to a wall stud. Learn more in How to Hang a Heavy Mirror.
Arrange Flowers in Wall Flower Vase

Be inspired by your garden or the flowers in the market to create seasonal displays in your wall flower vase. Be creative and add sprigs of herbs or foliage from shrubs and vines. Keep flowers fresh by adding an inch of water to the vase.
Try a dried flower bouquet for longer-lasting beauty. You can place a few pebbles or glass beads in the bottom to anchor the stems.
Whether you need the right tools or plants, The Home Depot delivers
online orders
when and where you need them.