How to Create a Personalized Lazy Susan Tray
Last updated September 7, 2023
Presented by Ashleigh Lauren of ashleighurn
Learn how to create a personalized Lazy Susan to use as a decor piece, a serving tray or a gift for a loved one. This guide will show you how to make this custom piece by following step-by-step instructions, using a wood round or pine round board, as well as a few tools.
Difficulty:
Intermediate
Duration:
Over 1 day
Table of Contents
Choose Your Image
Prep for Transfer
Lay Down Carbon Paper
Measure Image
Trace Image
Burn Wood
Choose Your Image

- Once you've gathered your tools and materials, it's time to get started.
- Begin by choosing your image. Select the image, design or words to add to the wood round.
Tip: If you prefer to hand-letter or doodle, skip this step and draw right on the wood.
Prep for Transfer

Using scissors, cut and trim the image to prep it to transfer onto the round.
Lay Down Carbon Paper

Overlappinng the carbon paper will help ensure that every part of the image transfers onto the wood round.
Measure Image

If you're using a round design, measure from the image edge to the edge of the round.
Trace Image

Now, with your image placed on top of the carbon paper, use your embossing stylus, pencil or pen to trace over the image.
Burn Wood

Now, it's time to burn the design into the wood. This design used a calligraphy tip to trace the words, a dotted tip to trace the lines and a stencil cutting tip to trace over the flowers and leaves.
Tip: When operating any type of soldering iron or power equipment, be sure to wear the proper safety equipment.
Sand Wood Round

After burning the image into the wood round, use your sander and 150-grit sandpaper. Once you've passed over the entire round, go back over it with your sander and 220-grit.
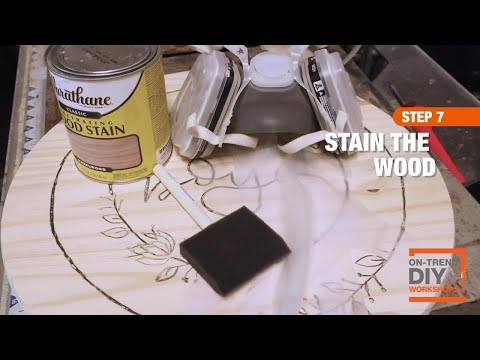
Stain Wood Round

After the round is sanded, it's time to stain.
Using a sponge, apply the wood stain. Be sure to apply the stain in the same direction as the wood grain.
Carve Image into Wood Round

With your rotary tool, carve out the image a bit more. Now, reburn the image and stain once more.
Measure for Handles

Begin by measuring how far out you want the handles to be. Do this to both sides and mark the spots with a pencil.
Line Up Hardware

Next, add paint to the bottom of your hardware and place the hardware on top of the painter's tape to create a stamp. This will help when drilling.
Drill Holes for Hardware

Using the stamps as markers, hold your drill upright and start drilling holes for hardware.
Attach Turntable

- It's time to add the turntable to the bottom for your Lazy Susan.
- Turn over the wood round and place the turntable in the center of the board. You can measure both sides with a ruler to ensure it's perfectly centered.
- Use your pencil to mark where drill holes will go.
- Now, using your drill and wood screws, attach turntable to wood round.
Seal & Add Hardware

With the turntable attached, use a sponge brush and water-based polyurethane to seal the wood round. Once it's dry, attach hardware.
Enjoy!

Now you have a personalized Lazy Susan tray that's perfect for serving a tray of food and beverages, using as decor or giving as a gift.
Creating a one-of-a-kind item is a great way to enjoy the holiday. Ready to start your DIY project? We have options to deliver your online order when and where you need them.