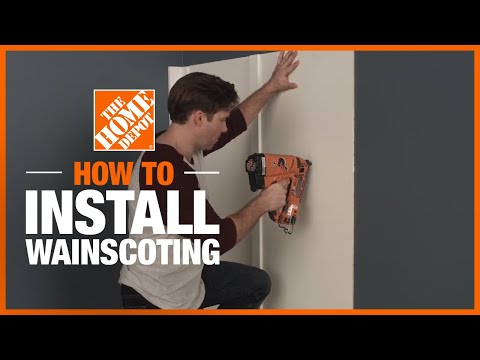
How to Create an Easy DIY Wainscoting Look
Last updated September 7, 2023
Wainscoting is a type of decorative paneling that can give every room in your home a more formal and stylish look. Installing wainscoting may seem like a complex job, but DIY wainscoting is an approachable option for beginners. The overall wainscoting cost is also greatly reduced if you do the work yourself instead of hiring a pro.
This guide will explain how to create an easy DIY recessed panel wainscoting look in your home.
Difficulty:
Beginner
Duration:
2-4 hours
Table of Contents
Plan Layout and Prep Room
Measure Walls and Mark Studs
Prepare the Walls
Install Panels
Install Top Rail, Stiles and Baseboard
Stain and Finish
Plan Layout and Prep Room

Once you decide that recessed panel wainscoting is the right addition to your room, finding the look that suits your space is the first step.
Here’s how to choose your style and what information you’ll need to make your measurements so you can buy the right amount of paneling.
- Choose the lumber: bathrooms, kitchens and dining rooms are all great candidates for MDF. This material is easy to work with and isn’t subject to the same weather-related expansion and shrinkage like solid wood wainscoting. Vinyl and natural wood are also go-to options depending on your budget and installation needs.
- Take note of the panel size when shopping for wainscoting panels. Many ready-made panels measure 32-inches high by 48-inches wide. You’ll need this information to measure and prep your room.
- We recommend buying pre-squared lumber (1 x 4 or 1 x 6) as it makes the panels easier to assemble.
Measure Walls and Mark Studs

Before you can start any DIY wainscoting installation, you’ll need to measure the walls where you want to install wainscoting.
- Using a tape measure, measure the length of each wall. This will give you the linear footage of the room. Divide this number by the width of the panels in feet. The size of your room with determine the width of the panels you install.
- Round up to add an extra panel to your setup if you get a number that is not even. If your room doesn’t have walls that can be broken down into 4-foot increments, there’s a good chance you’ll need to buy an extra panel and cut it to size to finish the job.
- Measure your walls to find the top level line for your wall panels. Make a mark on the wall to show your top level line. You’ll be using this to check that you’re installing your paneling straight as you go.
- Use your stud finder to locate the studs in the wall. Mark them just above your level line.
- Make sure the panel lines up with your top level line.
- Leave about 1/16-inch between the wall and the paneling unless you’re using a material like vinyl that won’t expand due to humidity and weather fluctuations.
- Gather your wainscoting panels. MDF isn’t subject to much weather change, so you don’t need to let it acclimate to your home. If you’re using solid wood, it’s a good idea to let your panels rest for about 48 hours before beginning the installation.
Tip: Don’t place stiles over electrical outlets.
Prepare the Walls

Installing wainscoting panels requires some preliminary wall prep. While each space is different, there are some general guidelines to follow.
- Remove base moulding or chair rail that’s already in place. If you don’t have base moulding or a chair rail you can skip this step. If you plan to re-use your existing moulding, work slowly to avoid damaging the material.
- Remove any wall plates or coverings that are in the area where you want to install your wainscoting. Put these aside as you may need to use them again.
- Apply a coat of primer to create an even surface for the panels. Allow your primer to dry according to the manufacturer’s instructions before moving on to the next step.
- Use a full panel to start the installation, working your way from the left side to the right side of the room.
- Cut a hole for an outlet cover with your jigsaw if your first panel would otherwise cover one.
- To do this, you’ll want to measure down from your top level line, making marks on the back of your panel with a pencil to make cuts for your outlet.
- Your cutout should look like a vertical rectangle.
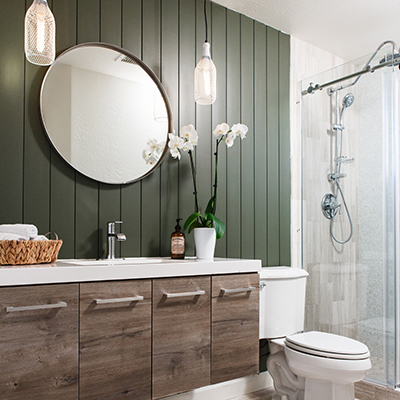
Tip: If you’re installing wainscoting in a bathroom or wet space like a small kitchen, you’ll want to use a combination of primer and a mildew-resistant coating. Not all paneling is designed to be moisture-resistant right out of the box.
Install Panels

- Begin at the corner of the longest wall. Measure from the floor to the height you want (we recommend 35 inches), then use a level.
- Hold your first wainscoting panel in place and secure it to the wall using your caulk gun and construction adhesive. Finish with paneling nails, taking care to match them up with your marked studs.
- Continue adding panels with construction adhesive and paneling nails, working your way toward the right side of the wall. Leave 1/16-inches between each panel to account for expansion.
- Use the method outlined above to cut additional outlet panels as needed.
- Measure the distance between your last full panel and your right side corner panel if you need to cut one to size to finish the wall. Make marks on the back of your panel with a pencil and cut it to size using your jigsaw. Cut any outlet holes required for this partial panel as well. Remember to leave 1/16-inches between your partial panel and the wall.
- Mount your partial panel using construction adhesive and paneling nails driven into your marked studs. Double-check all of your panels to make sure they’re properly aligned.
Install Top Rail, Stiles and Baseboard

- Now, it’s time to install the horizontal top rail directly on top of your installed panels.
- Using finishing nails, fasten the rail through the panel, wall and studs.
- To connect two pieces on a longer wall, use a touch of wood glue.
- Next, using your miter saw, cut all of your stiles to size.
- Measure and mark your stile layout, trying to place your stiles directly atop studs.
- Make sure your stiles are level, then, starting in the corner and working your way out, nail the stiles to the panels with finishing nails.
- Next, install any baseboard moulding that you’re using. At this point, you can use the existing moulding or add new moulding that better fits your room’s new style.
- Use glue to adhere a baseboard to each stile and secure them in place using finishing nails.
Tip: Fit the top cap moulding and nail it to the top rails. Finally, nail the cove moulding tightly under the cap moulding. This will hide the nails.
Stain and Finish

- Paint your new wall paneling to your desired color.
- Consider using a semi-gloss paint for chair rails and moulding so they’ll be easier to quickly wipe down in high-traffic areas like the dining room.
Tip: Use wood putty to fill all the nail holes.
Learning how to create an easy DIY wainscotting look can add a decorative touch to virtually any space in your house. Installation doesn't have to be expensive and time-consuming. Look for pre-primed panels ready to install right out of the box. Stock up on all the tools and materials you need for your DIY project at The Home Depot. Use the Home Depot Mobile App to locate products and check inventory. We'll take you to the exact aisle and bay.