Table of Contents
Gather Tools and Materials
Check the Connection Bolts and Tighten or Replace
Disconnect the Toilet
Remove and Replace the Wax Ring
Clean Thoroughly
Related Products


How to Fix a Leaking Toilet Base

Last updated September 7, 2023
Seeing water leaking from the base of your toilet is usually a sign that some plumbing connections aren't fully tightened. There's no need to panic, as this can be easily fixed with some simple DIY know-how. Remember that a toilet leaking from the bottom, or a toilet leaking from the base when flushed, requires slightly different handling than one that has a malfunctioning tank. With this guide and a few tools, you can make the repairs you need in no time.
Difficulty:
Intermediate
Duration:
Under 2 hours
Gather Tools and Materials

- You will need multiple cleaning cloths to complete this project. Both terry cloth and microfiber will be useful.
- A putty knife will be easier to work with when installing the toilet parts later in the project rather than a utility knife.
- In addition to a wrench, hacksaw and screwdriver you will also need to acquire parts from a toilet repair kit. Specifically, make sure you have assorted washersor gaskets, toilet bolts and a toilet wax ring.
- You may find it easier to complete some parts of the project if you get a second person to assist, particularly if you need to replace the wax ring; toilets are both heavy and bulky, so they can be difficult to maneuver alone.
- After the repair, be sure to have some bathroom cleaneron hand. Antibacterial or bleach-based cleaners are the best to ensure a proper clean.
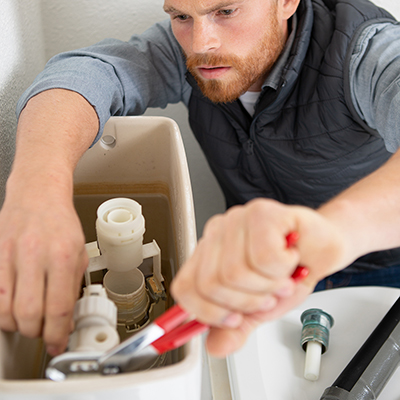
Check the Connection Bolts and Tighten or Replace

- One reason for a toilet leak from the base might be a loose connection where the tank meets the toilet.
- Check the connecting bolts. If they seem loose or you can see water gathering in that area, use the screwdriver to tighten them. Approach the bolts from inside the tank and screw downward to create the best seal.
- Dry the area and wait 15 minutes. If water gathers in the area, move on to replacing the bolts and washers.
- Shut off the water at the valve, then flush and hold the handle until all the water has drained from the tank.
- Remove the old bolts and washers.
- Clean and dry the area, then install new washers and bolts.
- Screw in place with the screwdriver.
Disconnect the Toilet

- More advanced phases of curing a toilet leaking from the base will require moving the toilet itself.
- Shut off the water at the valve and drain the water from the toilet tank.
- Use a plunger to force out any water that remains in the bowl. Alternately, fill a five-gallon bucket with water then pour a steady stream down the bowl from between 12 and 18 inches above the opening. This will also force the water out.
- Dry out the bowl completely.
- Disconnect the water supply line from the toilet tank; loosen the nut that attaches the supply line to the tank and it should slide out easily.
- With a wrench, loosen the toilet mounting bolts, or tee bolts, that hold the toilet to the floor. If they are too corroded to turn, use a hacksaw to cut the bolts.
- Rock the toilet gently to break its seal, then lift the toilet off the flange and set it on its side. It is a good idea to have help with this step to avoid damaging the toilet or injuring yourself.
- Stuff a rag in the exposed sewer pipe to prevent gases from escaping into the home. If possible, ventilate the bathroom by opening a window.
Remove and Replace the Wax Ring

- Use rubber gloves to protect your hands.
- Using the putty knife, gently scrape away the old wax ring. Be sure to clear out any wax stuck on on the horn of the toilet as well as on the flange (the metal ring in place over the drain). All the old wax must be cleaned out of the grooves and the slots in the flange to make sure the new ring will have a good seal.
- Install the new wax ring over the flange and press gently into place.
- Slide the tee bolts into the slots on the side of the flange.
- Remove the rag from the sewer pipe and discard, sealing it up in a garbage bag.
- Lift up the toilet and line up the holes on the base with the tee bolts and set it place. Press down with your bodyweight to create a watertight seal with the wax ring.
- Replace the washers and nuts on either side and tighten, alternating sides, until both fit snugly. Do not overtighten as this may crack the porcelain.
- Replace the plastic caps over the bolts.
- Reconnect the water supply line and turn the water back on at the valve. Wait for the tank to refill, then flush the toilet and check for additional leaking.
Clean Thoroughly

Clean the area thoroughly with disinfectant cleaner, especially the floor. Rinse well, and then dry with microfiber towels or paper towels.
Simple plumbing repairs can often be handled on a DIY basis without professional toilet repair help. The Home Depot can deliver online orders for your next bathroom project, when and where you need it.
Explore More on homedepot.com
Doors & Windows
Furniture
Outdoor Garden
Outdoor Living
- Shop Emergency Use Standard (Above 60 dB) Portable Generators
- Round Screen Included Wood-Burning Fire Pits
- Blower Outdoor Power Equipment Parts
- Shop WEN Dual Fuel Inverter Generators
- Buy EXCEPTIONAL CONCEPTS Snow Carpet Sled Roll Up Snow Sled with Handles, Speed Snow Sledding, Durable Lightweight Roll Up Sled for Kids
- Shop WILDRIDGE Adirondack Chairs


