How to Install a Bathroom Fan

Last updated November 28, 2023
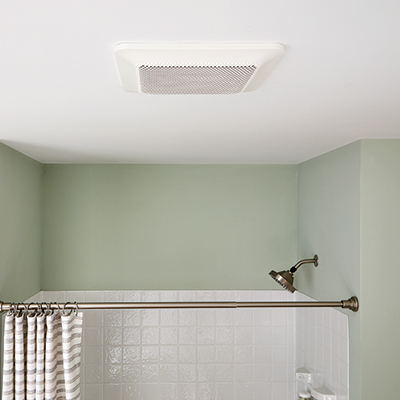
A bathroom vent is an essential part of your home's ventilation system. Bathroom exhaust fans remove moisture, heat and odors from the bathroom. Even if they are right next to each other, two bathrooms should not share a vent. Each bathroom will need its own exhaust fan.
Whether you need a new wall bathroom exhaust fan or a ceiling bathroom exhaust fan, installing a bathroom fan is a project you can do yourself.
This guide gives you step-by-step instructions on how to install a bathroom fan in the ceiling, including creating a new roof exhaust point if you are dealing with new construction.
Difficulty:
Intermediate
Duration:
Over 1 day
Table of Contents
Before Installing a Bathroom Fan
Cut the Hole
Attach the Fan
Cut a Hole in the Roof and Remove Shingles
Install the Roof Vent
Connect and Wire the Fan
Before Installing a Bathroom Fan

Home renovation projects can be rewarding. Before you begin installing a bathroom exhaust fan, consider the type and size of the bathroom fan you need. Our buying guide helps you decide on the right bathroom fan for your home.
Bathroom fans require an electrical circuit to power the fan. The humid air is carried outside the home via ducting. You'll need to know if your bathroom fan installation project requires an electrical or mechanical permit from your local municipality.
Tools needed:
- Reciprocating saw and blades
- Drill and drill bits
- Linesman electrical pliers
- Screwdrivers
- Utility knife
- Wire strippers
- Hand saw
- Fish tape and poles
Materials needed:
- Bathroom fans
- Flexible ductwork
- Lumber
- Rooftop venting
- Straps and hangers
- Wood screws
Cut the Hole

The first step in figuring out how to install a bathroom fan is cutting a hole based on the size of the fan you need. Small bath fans provide adequate bathroom ventilation for 79 square feet and under, while medium bath fans work well for bathooms 70 to 100 square feet.
For bathrooms over 100 square feet, use a large, or exhaust, fan to circulate the air. Additionally, if your bath has a separate room for the toilet and shower, separate fans may be needed for both areas. Avoid placing your bathroom exhaust fan over a tub or shower. Over a toilet works best.
- Mark the location of your fan by inserting a 16d roofing nail into the drywall at each corner so the nails protrude into the attic.
- From the attic, locate the nails and mark the location of the fan with a pencil.
- Cut out the drywall or plaster with a drywall saw or reciprocating saw. Start your cut by drilling a hole in the drywall large enough to accept the saw blade.
- If there is no attic or if the roof is inaccessible, use a stud sensor to locate a joist from the bathroom. Cut the opening from below, using the fan enclosure as a guide.
Tip: In your bathroom exhaust fan installation project, never vent to an attic or subfloor as moist air creates an environment for mold and mildew growth.
Attach the Fan

The next step in your bathroom fan installation is to attach the fan enclosure to the joist with screws.
- Cut or push back the insulation, leaving a 6-inch gap between the unit and insulation.
- Cut pieces of a 2 foot x 4 foot board to fit between the joists, blocking off the fan from the insulation.
- Attach wood pieces with screws.
Cut a Hole in the Roof and Remove Shingles

- Trace a circle on the underside of the roof just large enough for the roof vent and tailpipe.
- Drill a hole large enough for the saw blade, then cut out the circle with a reciprocating saw, saber saw or keyhole saw.
- Remove the shingles from around the cutoff without damaging the underlying roof paper.
Tip: A major part of a bathroom fan replacement project involves working on your roof. Exercise caution when you use a ladder to climb up on the roof and while you are working there.
Install the Roof Vent

Install the roof vent by sliding the top flange under the shingles above it and resting the bottom flange on the shingles below.
- Apply roofing adhesive on the underside of the flanges to seal.
- Secure the vent flanges with roofing nails before installing the shingles.
- Install the shingles on the sides of the roof vent and apply roofing cement to seal the joint with the shingles. Start at the bottom and work your way up to the top of the vent.
- Slip the last shingle under the existing shingles above the vent.
Connect and Wire the Fan

- Slide clamps over the flexible duct at both the roof cap and the fan housing, then slip the clamps over the tailpieces of the roof vent and fan and tighten the clamps.
- Wrap the joints with duct tape.
Before you start the next steps, make sure to turn off power at your circuit breaker box before you begin any wiring.
- Run cable to the fan and to the switch if no wiring is present.
- If you are installing a fan with a light, you’ll need to run a three-wire cable from the switch to the fan.
- Connect wiring according to the manufacturer’s instructions.
- Plug the fan motor into the built-in receptacle.
Wire the Switch

- For a fan and light switch with existing wiring, splice the white wires and connect the grounds securely with wire connectors.
- Connect power to both switches through two pigtails spliced to the feed wire.
- Connect the red wire to one switch terminal and the black wire to the other terminal.
- Follow the manufacturer's instructions for turning on and operating your specific bathroom fan.
Installing a bathroom exhaust fan can eliminate moisture and help freshen the air. Whether your current bathroom fan is noisy, or you need to install an entirely new fan system, we have everything you need to make the job easier. If you prefer to leave the job to a professional, take advantage of our bathroom installation services.