How to Install a Pedestal Sink
Last updated August 1, 2024
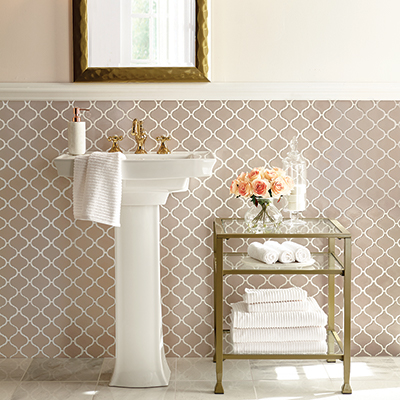
Learning how to install a pedestal sink gives you a sleek, space-saving option for your bathroom. Pedestal sinks have a simple, elegant design and take up less space than a bathroom sink and vanity. If you already have the right plumbing in place, installing a pedestal sink is a project most experienced DIYers can tackle in a day.
This guide will teach you how to install a pedestal sink in your bathroom and how to tackle any pedestal sink installation problems.
Difficulty:
Advanced
Duration:
Over 1 day
Table of Contents
Preparation
Install the Mounting Brace
Install the Sink Mounting
Install the Faucet
Install the Drain
Attach the Trap
Preparation

Most pedestal sink basins hang from a bracket attached to a mounting brace (or framing) in the wall. The pedestal sink base is only a secondary support. The pedestal’s primary function is to hold the plumbing. In this guide, you’ll learn how to attach a pedestal sink to the wall securely. You’ll also learn how to attach the plumbing.
Before you begin, though, you’ll need to prepare for installation by following these steps:
- Shut off the water at the sink’s supply line. If the sink doesn’t have its own water shut-off valve, shut off the water for your whole home. Drain standing water from the hot and cold lines into a bucket.
- If you are installing a sink in a new location, get a plumber to rough-in the plumbing. A plumber will also help you when you need to know how to install a pedestal sink with floor plumbing, since you’ll likely have to run the plumbing through the wall.
- If you are replacing an old sink, you may be able to use the existing plumbing. However, some of the plumbing will be visible when you install a pedestal sink. You may want to replace old-looking plumbing. You may also need to reposition the plumbing to better fit the new pedestal sink. If desired, move the stop valves closer to the trap, in order to hide them behind the pedestal.
- Remove your old vanity and sink if necessary. Depending on the type of vanity you had, you may need to touch up or install flooring at the sink area.
- Sinks don’t typically come with fasteners, so make sure you have lag screws and washers ready for this project.
- Find a helper. Pedestal sink combos can be heavy and difficult to move alone. Several steps may require someone else to hold the sink in place while you work.
Install the Mounting Brace

Check your pedestal sink’s manufacturer's instructions to see if it requires a mounting brace.
- Use a stud finder to locate the wall studs. You’ll fit the mounting brace between the studs.
- Mark the height of the sink on the wall.
- Cut a hole in the wall at the sink height that spans from stud to stud.
- If you have an already tiled wall, you will need to either remove the tile or cut through it using an angle grinder.
- Cut a piece of 2 × 6 board to fit snugly between the studs.
- Attach the brace with angle-driven screws.
- Patch the wall using a piece of drywall cut to size and a layer of joint compound. Sand the surface smooth.
- Paint the patched area to match your wall. If you plan to tile the wall, you can skip the paint.
Install the Sink Mounting

- Check the manufacturer’s instructions for the mounting height.
- Assemble the sink basin on top of the pedestal. Have a helper hold it against the wall.
- Mark the sink’s anchor holes on the wall.
- Take apart the sink and move it away from the wall.
- Pre-drill at your marks and install hanger bolts in the wall. Let the bolts extend from the wall about 1-inch.
If your pedestal sink came with a mounting bracket, follow these steps instead:
- Check the manufacturer’s instructions for the height of the mounting bracket.
- Assemble the sink basin on top of the pedestal. Have a helper hold it against the wall while you mark the position for the mounting bracket.
- Anchor the bracket by driving screws into the 2 × 6 inside the wall. Check that the bracket is level as you attach it.
Install the Faucet

- Refer to the manufacturer’s instructions for your faucet.
- Roll a 3/4-inch thick rope of plumber’s putty. Wrap the putty rope around the underside of the flanges of the faucet’s valves and spout.
- Insert the pieces of the faucet into their respective holes in the sink basin. Press the flanges down and wipe away any putty that pushes out.
- Thread the provided gasket and nut onto the underside of each of the faucet’s fittings. Tighten the nuts by hand, then finish tightening with a wrench.
Install the Drain

This step will give you an overview on how to install a pop-up drain.
- Refer to the manufacturer’s instructions for your drain.
- Wipe out the inside of the sink basin and the basin’s drain hole.
- Roll a 3/4-inch thick rope of plumber’s putty. Wrap the putty rope around the underside of the flange of the pop-up drain.
- Put the drain flange through the basin’s drain hole. Press the flange down and wipe away excess putty that pushes out.
- On the underside of the basin, put the gasket and washer onto the drain. The gasket and washer should come included with your drain.
- Screw the locknut onto the drain and tighten by hand. Then, tighten it a 1/4 turn using a wrench or water-pump pliers. Be careful not to over-tighten.
- Set aside the drain plunger for now.
Tip: Most sinks do not come with drains or faucets. Purchase these pieces separately.
Attach the Trap

- Assemble the sink basin on top of the pedestal, away from the wall. Have a helper hold it in place.
- Test-fit the trap assembly to the waste pipe in the wall. The trap assembly will include a P-trap, elbow, cover, washers and a slip nut.
- Measure the distance from the floor up to the top of the vertical part of the P-trap. Now measure the same distance from the floor up to the pop-up drain’s waste tailpiece. Mark that measurement on the tailpiece. This will be how high up the P-trap should be on the tailpiece.
- Remove the entire trap from the waste pipe.
- Cover the P-trap's threads with plumber’s tape for a secure, leak-free fit.
- Put the P-trap's slip-nut and washer over the pop-up's tailpiece.
- Slide the P-trap up to the mark you made on the tailpiece, then thread the slip-nut onto the P-trap. Tighten by hand. Use a wrench or water-pump pliers to tighten the nut another 1/4 turn.
Mount the Sink

- Carefully move the sink and pedestal back against the wall.
- Mount the sink basin on the mounting bracket.
- If you don’t have a mounting bracket, line up the basin’s mounting holes with the hanger bolts you installed earlier. Push the sink against the wall snugly
so that the hanger bolts extend through the mounting holes. - Check the level of the sink.
- Secure the sink with cap nuts and washers. Tighten by hand, then finish tightening with a wrench.
Connect the Plumbing

- Wrap the threads of the trap’s elbow with plumber’s tape.
- Attach the washer and elbow to the P-trap again. Tighten the elbow’s nut by hand and finish tightening with a wrench or water-pump pliers.
- Attach the faucet valve to the angle-stop plumbing in your wall with an acorn-head supply tube and compression nuts. As always, tighten the nuts by hand first and then finish tightening with a wrench.
- Repeat the above step for the other faucet valve and angle-stop.
- Attach the faucet spot’s lift rod to the actuator arm of the pop-up drain. For this step, consult your manufacturer’s instructions for your specific faucet and drain.
- Slide the trap cover over the waste pipe. Screw the elbow into the cover.
- Turn the water on and check your connections. If there are leaks, try re-securing your connections or adding plumber’s tape to threads as necessary.
Bolt the Pedestal to the Floor

- Finish installing the pedestal sink by bolting the pedestal to the floor with the bolts or nuts provided.
- Don’t over-tighten or you may crack the pedestal.
Installing a pedestal sink can open up a lot of floor space in your bathroom. Make sure to have a helper on hand when you start this project. If you don’t have someone who can help, consider using our professional bathroom installation services. Need help identifying a tool or material? Find products fast with image search in The Home Depot Mobile App. Snap a picture of an item you like and we'll show you similar products.