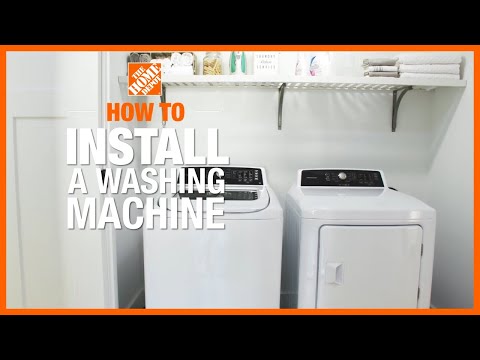
How to Install a Washing Machine
Published September 5, 2023
Washing machines are easy to install if you are replacing an old unit with a new one.
As long as
you already have the necessary plumbing ready,
installing a washing machine only requires you to make the right drain and supply connections, level the washer and plug it in.
If you don’t
have existing
plumbing or
are
installing a washing machine in a new location
without plumbing,
you can either connect your washer to a laundry or kitchen sink or
run the appropriate plumbing lines to the
new laundry
area.
This guide will teach you how to hook up a washing machine
to both existing plumbing and a sink, as well as give an overview of how to install a washing machine
when you do not have existing plumbing.
Difficulty:
Beginner
Duration:
Under 2 hours
Table of Contents
Remove Your Old Washing Machine
Prepare Your New Washing Machine
Connect the Water Supply Hoses
Set Up the Drain Hose
Level the Washing Machine
How to Hook Up a Washing Machine to a Sink
Remove Your Old Washing Machine

Before washer installation
can begin, you must remove your old washing machine.
- Check the drum to ensure the washing machine is empty.
- Turn off the washing machine and unplug it.
- Pull the machine away from the wall to give you access to its water supply valves.
Turn off both the hot- and cold-water valves. - With a bucket or pan ready to catch any water still in the supply hoses, disconnect the
supply lines. You may need to use pliers or a wrench to loosen and remove the hoses. - Remove the waste-water hose by simply pulling it out of its entry spot in the wall or floor.
- If you purchased a washer and dryer set, unplug and remove your old dryer as well.
Tip: With the exception of portable washers, washing machines are bulky and difficult to carry, so have helpers when moving the washer or have the delivery people put the unit in its final location.
Prepare Your New Washing Machine

Measure and prep your new unit before you begin the next steps that explain how to hook up a washer.
- Measure your space and doorways to make sure that the new washing machine you choose will fit and can be carried into your home with
little hassle.
Whether you buy a front load washer or a top load washer, take the measurement of the door into account so that the washer can fully open. - To make the best use of a small laundry space, consider installing a laundry center that combines a washer and dryer into a single, compact unit.
- Ensure that the location you are placing the washing machine has a clean, level and hard floor and
access to cold and hot water connections, appropriate drainage and an electrical outlet. If you are replacing an old washing machine,
the same spot should be ready for a new unit. - Typically, washing machines will have carriage bolts attached to
each of the four corners on the
back of the unit, which prevent the drum from moving in transit. Unscrew and remove
all
the carriage bolts.
Your new unit may come with a wrench specifically designed for removing the bolts. If not,
your own
adjustable wrench or pliers should suffice. - Remove any other packaging materials.
Tip: For extra security against leaks and water damage, place the washing machine over a drain pan, especially if your washer is not
on the lowest or basement level of your home.
Connect the Water Supply Hoses

Your new washer should come with
water supply hoses and all other necessary washing machine parts. Usually these hoses are stored in the drum of the machine.
- When connecting the water supply hoses, you can
usually
screw them in by hand, but use mole grips if you have trouble.
Don’t overtighten. - Screw the water supply hoses to the connections on the back of the washing machine. The
hoses and
connections
may
indicate
whether they are for hot or cold water. Make sure you connect each hose to the appropriate connection. - Screw the other end of the water supply hoses into the
coordinating hot- and cold-water supply valves. - If any of the hoses are too short to reach their connections, do not try to stretch the hoses, as doing so may cause breaks and leaks. Instead, purchase longer replacement hoses.
- Most connectors have a rubber washer to create a tight seal and prevent water from leaking through the
threading.
For this reason,
you do not need to wrap plumber’s tape around the threading of the valve spigots or other connections.
Set Up the Drain Hose

The drain hose
will come attached to your washing machine and should
feed into either a nearby sink or
a standpipe.
- If you are feeding the drain hose into a sink, attach a plastic hose guide to
keep the hose bent downward into the sink without kinking. Usually a new washing machine comes with a hose guide, but you can also purchase
one
separately. - If the correct plumbing has been installed, you will already have a standpipe installed next to or near the water supply valves. It
may
be installed in the wall and appear only as a hole, or it may be installed to the surface of the wall and appear as a
tall pipe that leads to a drain.
Insert the end of the drain hose into the standpipe. - If your drain hose cannot reach the sink or standpipe, attach an extension hose.
- Turn on the
water supply
valves to check for leaks. If you see water dripping from any of the connections, tighten
or adjust
as needed.
Note that overtightening a connection can also cause leaks by warping the connector’s rubber washer.
Level the Washing Machine

The final step for washer installation is leveling the unit so it does not “walk” or bang when running a load of laundry.
- Place a level on top of the washer.
- Level the unit by adjusting the legs as needed and securing the locknuts against the frame.
- Check the unit’s level by placing your level on
top of the washer in
the center, on both the left and right sides and on
the front and back. This should guarantee that your washing machine is perfectly level on all sides. - Plug in the unit and start washing your laundry.
Tip: Ready to find the supplies you need for washer installation? Use
The
Home Depot app
to locate products and check inventory
at your local store. If you need those supplies fast, order before noon for conveniently
scheduled same-day delivery.
How to Hook Up a Washing Machine to a Sink

If you do not have designated plumbing for your washing machine, you can hook it up to a sink instead.
- Use a sink aerator thread to hose connection adapter
to attach the water supply hose to the sink faucet.
The adapter connects to the faucet and the hose connects to the adapter. - Connect the other end of the water supply hose to the cold-water connection on the back of the washing machine. You will control the temperature of the water from the faucet
instead of
the
washing machine. - If your water supply hose is not long enough, you will need to purchase a longer hose or an extension for your existing hose.
- Cover the unused hot-water connection with a hose cap to prevent leaks.
- Feed the drain hose into the sink so that it dispenses
wastewater
into the sink drain. - Do a test load of laundry to ensure nothing leaks and the washing machine runs well.
How to Install Washing Machine Plumbing

If you do not have existing plumbing or a nearby sink for your washing machine, you will need to install appropriate plumbing. Since washing machines use a large amount of water and
a small plumbing mistake can result in serious home water damage, we recommend hiring a professional plumber rather than trying to install the plumbing yourself.
Here is a
basic
overview of the plumbing
process:
- Turn off the main water supply to the house.
- Tap into water supply lines
elsewhere in the house by cutting the pipes
and installing tee fittings. - Add lengths of pipe to reach the area
the washer will be installed. - Install a supply stub out to the end of each
supply pipe and secure the stub out to the wall with masonry screws. - Screw
hose bibs into the supply stub outs. - Tap into a drainpipe elsewhere in the house by cutting the pipe and installing a tee fitting or a wye
fitting. - Add piping from the new fitting to reach the area the washer will be installed.
- Within five-feet of the washer, install a 2-inch tee fitting into the drainpipe for the vent pipe.
- Connect a standpipe to the drainpipe using a P-trap.
- Extend a vent pipe from the tee fitting into the attic to tie with the home’s main vent stack.
With the correct plumbing, installing a washing machine is a quick and simple task. Plus, knowing how to install a washing machine
using a sink is great for apartment-living or when waiting for appropriate washer plumbing elsewhere in your home.
If you’d prefer to leave installation to the experts, then just add appliance installation to your new appliance purchase from The Home Depot.


