How to Install or Replace an Undermount Sink

Published September 18, 2024
Undermount kitchen sinks have a sleek configuration that can showcase a countertop and make cleaning easier. They can also be more challenging to install than drop-in sinks. This guide reviews how to install an undermount sink as well as the different types of installation.
Difficulty:
Intermediate
Duration:
2-4 hours
Table of Contents
Undermount Sink Vs. Drop-In
Tools and Materials to Install or Replace an Undermount Sink
Before Installing or Replacing an Undermount Sink
Types of Undermount Sink Installations
Prepare & Cut the Countertop
Unattached Countertop Installation
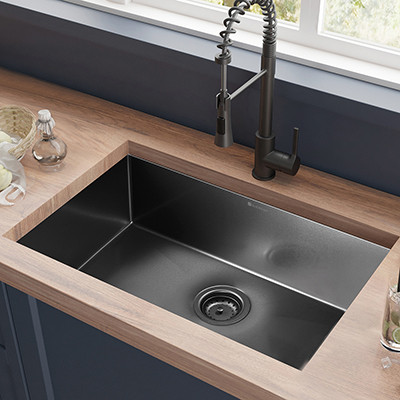
Undermount Sink Vs. Drop-In

An undermount sink, as the name suggests, is a sink that is mounted underneath a countertop in a kitchen or other room. Drop-in sinks are mounted to the top of the countertop.
- The “hidden” edge of the undermount sink has an attractive, streamlined appearance, and the lack of crevice or a lip makes the edges less likely to catch dirt.
- Popular materials for undermount sinks include stainless steel, cast iron and copper, and they can come in single-bowl and double-bowl varieties.
- Undermount sinks are recommended for granite, solid surface and quartz countertops, but may not be as effective with laminate. They can be more expensive than drop-in sinks.
Tools and Materials to Install or Replace an Undermount Sink

If you’re wondering how to replace an undermount sink, you will need certain tools. These include:
- Mounting hardware
- Rachet set, with an extension bar
- Adjustable wrench
- Screwdriver
- Utility knife
- Hammer
- Bar clamp
- Razor scraper
- Circular saw or jigsaw
- Power drill
- Caulk gun
- Tape measure
This project will also require the following materials:
- Undermount sink
- Sink drain
- Silicone caulk and sealant
- Plumber’s putty
- Acetone
- 2-in x 4-in dimensional lumber
- Shims
- Bucket or shallow pan to catch any water
- Pillow for back
- Cleaning gloves
- Old towels and rags
- Flashlight
- Safety glasses and other personal protective equipment (PPE)
Before Installing or Replacing an Undermount Sink

If you’re wondering how to replace an undermount sink, you must take certain steps. When debating an undermount sink vs. drop-in, consider that some materials, like porcelain, can be heavy. Even the most experienced individuals may need a partner to help with lifting and holding them in place.
Take specific sink size measurements when selecting an undermount sink replacement. The simplest way is by measuring your existing sink. Measure all four sides across the sink’s rim or lip. Check the length from the outside of the rims. Then, measure the width, from the back to the front. Finally, measure sink depth, from the top rim to the underside. If changing the depth, be sure it’s not too deep for your cabinet.
- Turn the faucet on to remove any remaining water from the pipes. Place a bucket below to catch dripping water or use a rag to wipe up any excess.
- Locate and shut off the main water supply lines. Found underneath the sink’s main water supply, the water lines connect at the sink and shut-off valves. You can also just shut off the kitchen sink’s hot and cold shut-off valves.
- If you see a knob, turn it clockwise to turn it off. For levers, turn them so they form a right angle with the pipe.
You must disconnect the existing plumbing fixtures with an undermount sink replacement.
- Remove and replace any pipe fittings and kitchen faucets, whether single-handle or two-handle models.
- The drainpipe may have to be disconnected and removed. Use channel lock pliers or an adjustable wrench to loosen its plastic nut. This prevents separation between the metal sink strainer and drainpipe. Loosen the slip nut on the P-trap, shaped like a “U” or “J.” Remove the entire pipe segment between the strainer and P-trap.
- Turn off the power to garbage disposals. Use a screwdriver or Allen wrench to disconnect the main connection between the disposal and drainpipe. You may need to hold the disposal’s bottom to loosen it.
- Unplug dishwashers from the drain line. Move aside any plugs, taping and pushing aside their cords if the dishwasher can’t be fully removed.
You can then remove the existing sink.
- Check if the sink is installed on the countertop, rather than wood surfaces, like plywood. As blades can damage wood countertops, put adhesive on the counter to prevent damage to counter surfaces.
- If directly mounted onto the counter, you can begin removing the sink.
- Detach any old silicone sealant, sink brackets and/or metal mounting clips. These are used to attach undermount sinks to countertops.
- Make sure you can easily reach the metal mounting clips. A ratchet extension bar may be needed to unscrew them. It can also be helpful to take pictures of the current setup.
- With a utility knife, carefully cut through any silicone sealant. Run the blade between the sink’s rim and the counter’s cutout. The old sink may be repurposed as a utility sink.
- Use an adhesive remover and scraper to remove old silicone and epoxy. A clean surface is needed before new installation. A second person can help support the old sink if the old silicone has worn away.
Types of Undermount Sink Installations

There are three types of undermount sink installation, distinguished by their different “reveal style.” This refers to how much of the sink’s rim remains visible once installed.
- Zero reveal ensures that the edge of the countertop is flush with the opening of the sink.
- Positive reveal ensures that some of the sink’s rim is visible past the edge of the countertop.
- Negative reveal conceals the sink’s rim entirely beneath the countertop, so the countertop edge overhangs.
- Generally, sinks with zero reveal are easier to clean than those with positive or negative reveal. Otherwise, choose a reveal style based on personal preference.
Prepare & Cut the Countertop

- Choose the location for the bathroom or kitchen sink installation. This may be dictated by the location of the water supply lines and other plumbing fixtures in the room.
- Measure the hole for the sink. The easiest way is to turn the sink upside down and trace the outline directly on the countertop with a pencil. Some sinks include cardboard templates, which can be used to trace the sink hole.
- The outline will be slightly larger than the sink’s opening, so make a second outline about 1/2 inch smaller than the original for the hole.
- Cut the hole with a circular saw or jigsaw while wearing safety goggles and work gloves.
- Use a power drill if additional holes for the faucet and other accessories are needed.
- Clean the sink and countertop with denatured alcohol.
Tip: With the upfront investment that granite countertops require and difficulty cutting them, consider hiring a professional for this step.
Unattached Countertop Installation

There are two common methods to installing an undermount sink. But if deciding on how to replace an undermount sink, know that it's easier to install the sink to a countertop before the countertop is attached to the base cabinets. This is particularly useful when attaching a sink with a garbage disposal.
You will probably need an additional person to help you turn the countertop.
- Confirm clearance on all sides under the countertop before installing the sink.
- Flip the countertop so the underside is facing up.
- Center the sink over the hole and trace an outline.
- Position sink mounting clips at each corner and at 10-inch intervals along the sides.
- Use construction adhesive to glue the sink clip studs in place. Follow instructions for drying time.
- Using a caulk gun, apply a thick bead of silicone caulk to the countertop along the inner edge of the outline.
- Place the sink down and clip it to the countertop by twisting the wingnuts that come with the clips.
- Wipe up excess caulk with a rag and denatured alcohol. Allow remaining caulk to dry for 24 hours or to manufacturer’s instructions.
- Turn countertop over and finish installation. Attach faucet fittings, garbage disposal and water supply lines as needed.
Tip: If possible, take this approach when considering how to install an undermount sink to quartz countertops.
Attached Countertop Installation

- When replacing or re-installing a sink, begin by shutting off the water supply, disconnecting all faucet and pipe fittings and removing the old sink. Disconnect the garbage disposal.
- Detach any old sink brackets and remove old epoxy with adhesive remover and a scraper.
- Install sink clips to the underside of the counter as needed.
- Set up boards (such as
2- x 4-inch boards) underneath the countertop as a stand for the sink. - Use a caulk gun to apply a thick bead of caulk around the edge of the countertop.
- Raise the sink so it presses against the underside of the countertop and forms a watertight seal. Add boards and shims as needed to ensure the sink stays in place.
- Use the sink clips to attach the sink to the counter.
- Wipe up all excess silicone sealant you can reach with a rag and denatured alcohol. Allow remaining caulk to dry for 24 hours or to manufacturer’s instructions.
- Remove shims and boards.
- Reconnect faucet, drain, pipe fittings and garbage disposal and turn on water supply.
Learning how to replace an undermount kitchen sink or install one is something most DIY-ers can do. All that's needed are the right tools and time. The toughest part is cutting the countertop, especially if it is granite or quartzite. If you'd like help, consider The Home Depot's installation services for projects involving undermount sinks in your kitchen or bathroom.