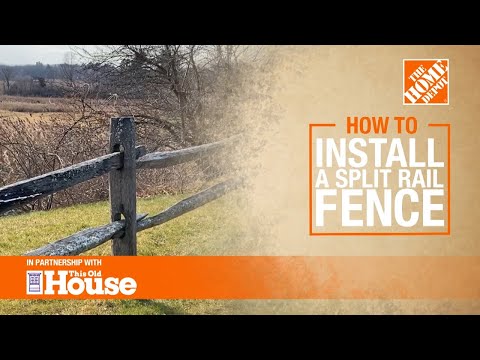
How to Install Split Rail Fence
Last updated September 7, 2023
Fencing can serve many purposes from establishing a property’s boundary to keeping animals in or out of your yard. Popular fence types include privacy, picket, split rail and basket weave. Split rail fencing is a simple design comprised of posts and two or more rails that slide into the posts. A split rail fence is a more rustic option, but also one of the simplest fences to install.
Installing split rail fence requires careful planning and construction. Read on for steps on building a split rail fence. Split rail fences are available in a variety of material types including pressure treated lumber, cedar, pine and vinyl.
Difficulty:
Beginner
Duration:
Over 1 day
Table of Contents
Plan Your Split Rail Fence
Lay Out the Fence Posts
Dig Holes
Set the Posts
Hang the Rails
Plan Your Split Rail Fence

You will likely need a permit before you begin your split rail fence install. Check local building codes concerning fence restrictions. Typically, these focus on height limitations, which won’t be an issue with a split rail fence. But it is important to confirm before you proceed.
- Determine your property line. Your local assessor’s office can provide information on your property line. Think about where you want your fence in relation to your property line. Often, local code requirements will dictate whether your fence can be installed on your property line or if it needs to remain a certain distance away from it.
- Review any fence plans with neighbors who share your property line to head off any future disputes.
- Determine where you want to locate any openings or gates. Spray paint parallel lines on the ground to indicate the opening placement. If installing a gate, be sure to take into account where any hinges and fence gate accessories will go.
- Measure the perimeter of the fence area to get the total linear footage.
- Wood fence rails are available in a variety of lengths, including 11-feet. Vinyl fence rails are typically 5-ft long.
- Divide the linear feet of the fence by the length of your fence rails to determine how many posts you need. For example, if you are building a fence that has a linear footage of 120-feet, 120 / 11 = 11 posts (10.9 rounded up). Note how many of these posts will need to be corner and end posts.
Lay Out the Fence Posts

While split rail fence is more rustic looking than other fence types, it will look much better if the fence posts are properly aligned. Begin a split fence install by laying out the fence perimeter using batter boards and a string line. Mason’s line is a good choice because it is strong and flexible enough to be pulled tightly. Run the string line to represent either the outside or inside perimeter of the fence.
If running your fence parallel to the house:
- Start by running a string line or narrow rope parallel to the house first. Then run perpendicular lines to complete the perimeter, crossing the string line at the corners.
- Square the corners using a tape measure and the 3-4-5 method. Measure 3-feet from where the lines intersect and make a mark on the string line. Measure 4-feet along the line that runs perpendicular to that line. Make a mark. Measure between the 3-foot and 4-foot marks. Adjust the line until the marks are exactly 5-feet apart.
- Mark fence post locations using spray paint. If building the fence using wood rails, position the fence posts so that the rails will overlap by a few inches on each end. This is where split rail fence installation does not require precision and can be forgiving.
- Try to make the spacing between posts fairly consistent. Using the rails as a guide by laying them on the ground can make this part of the process easier.
- If the fence runs up or down a slope, follow the angle using the rail as a guide.
Dig Holes

When learning how to install split rail fence, you must avoid damaging any buried utility lines. Call 811 before you dig. Your local utility company will mark the location of any water, gas and power lines in your yard. To be safe, hand dig any holes that are within 18-inches to 24-inches of a marked utility.
Dig holes using a post hole digger or two-person auger. You can rent an auger and make quick work of digging the post holes. When using an auger, avoid any areas marked by the utility company.
Dig holes about a third as deep as they are tall. For example, a 6-foot post needs a hole at least 2-feet deep, plus add about 4-inches for gravel. The diameter of the hole should be three times the width of the post. Ensure that the bottom rail will remain a few inches above ground.
Set the Posts

Once the holes are dug, it’s time for the next part of installing split rail fence. You can set the posts in concrete if you choose, but because they are relatively lightweight and not susceptible to the effects of wind, concrete is not necessary.
- Pour 3-inches to 4-inches of gravel down the base of the hole for proper drainage. Tamp the gravel using the bottom of the post or a tamper.
- Align the posts so that the openings run in the right direction to meet up with the rails.
- Use a level then brace the posts plumb using 2-foot by 4-foot boards and stakes. You can use nails and a claw hammer to attach the braces to the posts, or you can use a power drill and deck screws.
- Backfill the hole with dirt. Tamp the dirt every few inches to pack it securely around the post.
Hang the Rails

When building a split rail fence, once the posts are set, it’s time to add the rails.
- Starting at the bottom, slide the rail into one post until it clears the adjacent post, then slide it into the adjacent post.
- Continue on until all of the rails are installed, making minor adjustments as needed.
- Now go back and adjust each rail so that it overlaps both posts evenly.
Knowing how to install split rail fence starts with a fair amount of preparation and planning. When installing split rail fence, carefully plan the height, size and material type of fence you need that fits your home and neighborhood. A beautiful split rail fence install can give your home more curb appeal.
As you figure out how to build a spilt rail fence, don't worry if you don't own all the tools needed to complete this DIY fence project. The Home Depot offers tool rental. If you'd prefer to have a professional build a fence on your property, The Home Depot offers fence installation services.