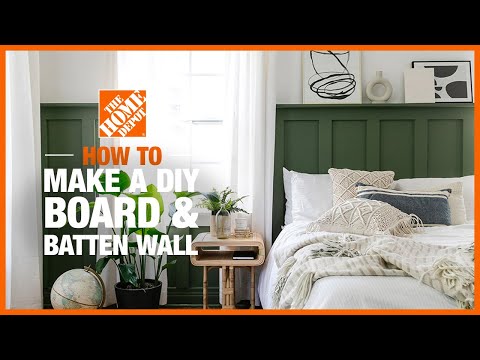
How to Make a Board and Batten Wall Accent
Last updated September 30, 2024
Presented by Drew Scott of Lone Fox.
Give your bedroom an instant update with a board and batten accent wall. With this process, you install medium-density fiberboard (MDF) strips, an engineered product, on your wall. MDF offers an eye-catching, paintable and cost-effective alternative to solid wood. With careful planning and the right tools and materials, you can easily complete this DIY project in a few simple steps.
Difficulty:
Beginner
Duration:
2-4 hours
Table of Contents
Gather Materials
Remove Existing Baseboards
Make a Plan
Measure and Cut the Horizontal Boards
Measure and Cut the Trim Boards
Glue the Horizontal Boards
Gather Materials

You will require the following tools to install a board and batten wall accent.
- Brad nailer
- Miter saw
- Utility knife
- Pry bar
- Hammer
- Level
- Measuring tape
- Stud finder
Here are the materials you will need for this project:
- MDF boards (pre-primed), in different sizes, including 1 inch x 3 or 4 inches and 1 inch x 8 inches
- Trim board
- Brad nails, in different sizes, including 1 ¼ inches and 2 inches
- Paint (interior)
- Primer (if boards aren’t pre-primed)
- Caulk (paintable)
- Lightweight spackle
- Paint brush
- Paint roller
- Paint tray
- Industrial glue
- Painter’s tape
- Construction adhesive
- Drop cloth
Remove Existing Baseboards

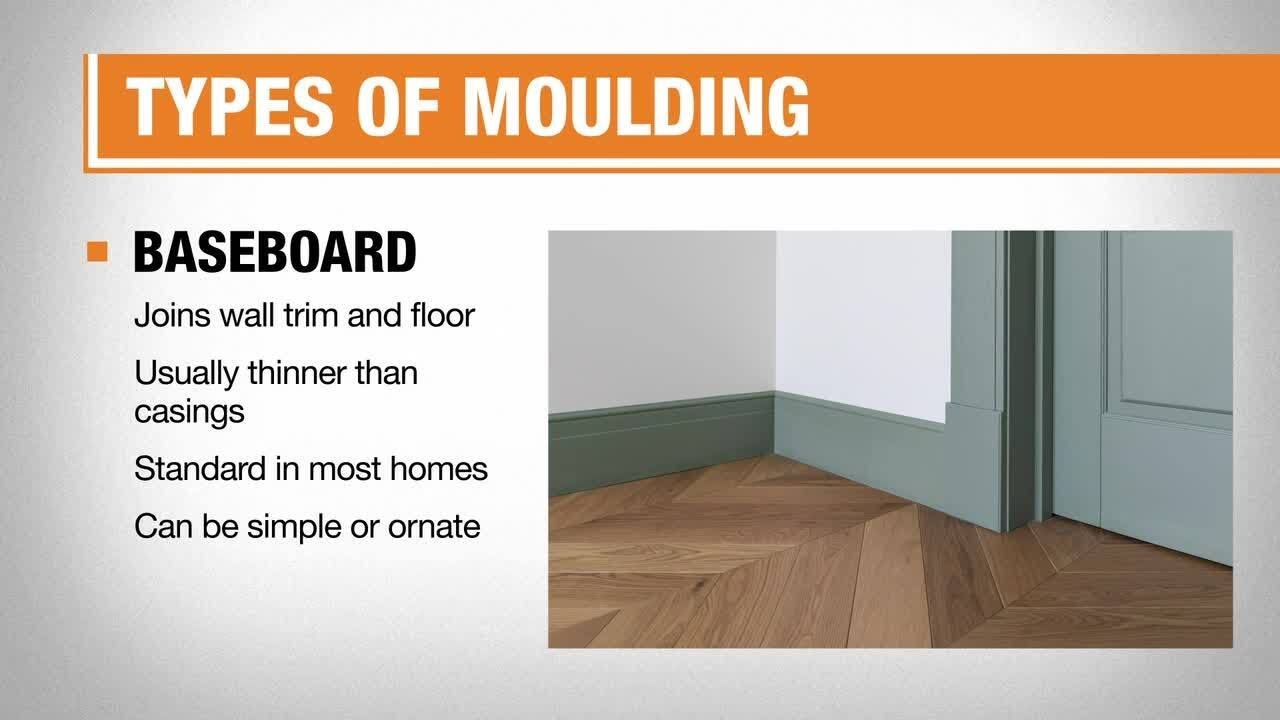
Before installing a board and batten wall, you should remove and replace existing baseboards. Pick a wall to begin and measure the baseboard’s length. Typically, the battens (vertical boards) should line up, with no unusual overhang. You can compare them to a 1-inch x 3 or 4-inches vertical board, for a more seamless look. The new and existing baseboards don’t have to be the same height, and you may prefer a taller 1-inch x 6-inch board. To remove the existing baseboard:
- Use a utility knife to notch the caulk.
- With a pry bar or hammer, carefully remove the wall’s trim and any leftover nails.
- If you don’t want to remove the original baseboard, use a mitered angle to cut the battens' bottom. This may be needed if the baseboards are thinner than the molding.
- Use miter saws on the baseboards, at a clean 45 degrees, to help them line up smoothly with the wall’s edge. You may want to do this if you feel baseboards and battens of the same thickness don’t look as nice.
- With a stud finder, locate each stud along the baseboard or wall. This also ensures that the baseboards are securely attached to the wall.
- Once marked, insert nails — two per stud work well — with either 16-gauge or 18-gauge nail guns. The nails should be about 2 inches long, to go through the MDF, drywall and into the studs.
- Repeat the process of measuring, mitering, marking studs and nailing on the next wall. If your miter joints aren’t perfect, common with crooked walls and older homes, just apply caulk and spackle to fix any mistakes.
You can also make your wall textures smoother for board and batten wall spacing. Attach a 1/8-inch panel board, like plywood, cut to size, on the wall. Typically sold in 4 × 8-foot sheets, they can be cut for you in a home improvement store, if needed.
Make a Plan

Once the old baseboards are removed, you can develop a plan. Take accurate, consistent measurements to determine the vertical and horizontal spacing for your DIY board and batten wall. You’ll calculate your measurements by wall, not by room. But as most walls aren’t perfectly straight, the measurements may be slightly different.
When installing a board and batten wall accent, you may want it to start and end on the wall’s corners. You must account for wall height, from floor to ceiling, although taller or shorter vertical spacing may be needed. It’s also necessary to measure spacing, which is generally 12-20 feet. You can calculate the exact spacing between each board. For an average-size room, about 16-18 inches of spacing separates each board.
- Measure the project wall’s total length (in inches).
- Divide by 17 inches, the rough equivalent of 7 boards.
- Multiply 17 inches by 3.5 inches (1×4 boards’ actual width), for a total of 24.5 inches.
- Assuming a wall’s total length of 123.5 inches, subtract 24.5 inches, for a total of 99 inches.
- Divide 99 by 6 (the number of spaces between 7 boards), for a total of 16.5 inches.
Measure and Cut the Horizontal Boards

- Start off by measuring and cutting your horizontal boards. In the project, we had to cut three boards, as there were two windows on the wall the board and batten was being applied to.
- At this stage, you can also determine how tall your accent wall will be. In this project, the accent wall is 4 feet tall measured from the baseboard.
Measure and Cut the Trim Boards

- Using a miter saw, cut all horizontal and vertical trim boards. The vertical boards will be cut to the height determined in the prior step.
- Try to utilize the board fully. An 8-foot-long board can be cut in half to achieve two 4-foot panels. You may have to cut a few smaller boards to place under the window. These can also be used as siding trim to cover seams between panels.
Glue the Horizontal Boards

- Apply the horizontal trim boards first, piece by piece. Using an industrial strength glue, glue the back of the trim board and place on the wall.
- Use a level to ensure it is straight.
Attach Boards to the Wall

- While holding the horizontal board in place, use a nail gun to attach it to the wall.
- Place a nail every 10 inches or so on the top and bottom of the board to ensure it is fixed to the wall properly while the glue has time to dry.
- Repeat the steps with the vertical trim batten boards. Remember to keep the spacing between trim batten boards the same.
- Start from the exact middle of the wall and place a vertical batten board. Pick your spacing size (in this project, the spacing is 10 inches) and place your next boards to the left and right of the middle board.
- Work your way out from the middle until all vertical panels are attached to the wall.
Install Top Board

Next, you must place the top 1-foot x 2-foot (or 4-foot) board on the top of the middle board of your DIY board and batten wall. This will create a ledge on the top of installed wall. To install this board, use 1 1/4-inch brad nails and some construction adhesive. You can also add the original quarter round shoe molding back to the baseboard. This will allow you to both cover flooring gaps and match other side wall molding.
Caulk the Boards

Once all the boards are secured on the wall, caulk all the edges.
- Start at one end and work in a continuous direction. Apply pressure to the trigger or tube and fill the gap between the wall and trim with an even bead of caulk.
- Then, drag a finger along the edge to seal the joint. This smooths the line and gives it a clean look.
- Do this anywhere the panel meets the wall and anywhere the panels touch each other (such as the joint where the vertical and horizontal panels connect).
Tip: Fill the nail holes with excess caulk or spackle.
Paint the Accent Wall

- Using painter's tape, tape off the edges where you will be applying paint and lay down a drop cloth.
- Using your paint of choice, apply two coats using both the paintbrush and roller.
Tip: Behr interior paint and primer in the color Conifer Green (eggshell finish) was the color chosen for this particular wall.
Enjoy Your New Decor

Remove the tape and allow everything to dry overnight. Enjoy your new accent wall!
An accent wall is a beautiful addition to your decor. Working with board and batten requires careful planning, accurate measurements and ensuring you have the proper materials. But by following these simple instructions, you can add this striking statement to your bedroom or any other room in your home.
Ready to start your project? The Home Depot delivers online orders when and where you need them.