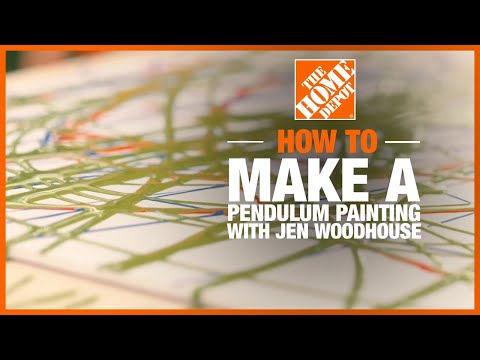
How to Make a Pendulum Painting
Last updated September 7, 2023
Here’s a fun outdoor activity any young artist can enjoy. This simple DIY pendulum paint project is a great way to use basic tools and stretch those creative muscles. All you need is a sunny day and a few things you probably already have around the house.
Difficulty:
Beginner
Duration:
Under 2 hours
Table of Contents
Get Everything Ready
Cut Circle in Wood
Drill Holes for String
Hang Painting Pendulum
Drill Holes in Paint Cups
Swing and Paint
Get Everything Ready

Set up a painting station outside under a tree. You’ll need a table and a few canvases. Things can get messy, so use an old table or cover the area with a painter’s drop cloth. You’ll also need a small piece of wood, twine, scissors, a drill and a jigsaw.
Tip: Don’t forget to put on your safety glasses when cutting or drilling.
Cut Circle in Wood

The first step is to make a paint cup holder out of a scrap piece of wood.
- Trace the outline of the cup but cut inside the line.
- Use a drill bit to drill a starter hole in the middle of the drawn circle.
- Insert the jigsaw blade in the starter hole.
Cut about a quarter of an inch on the inside of the circle so that the hole is smaller than the widest part of the cup. The hole should be a bit smaller than the cup so it doesn’t fall through.
Drill Holes for String

- Measure the distance between a low-hanging branch and the painting table. Using this measurement, cut four equal lengths of twine or string. Add an extra few inches to make sure you can adjust the pendulum height and keep it level. See the video above for more tips.
- Drill four small holes at each corner of the board.
- Thread one piece of string or twine through each hole and tie them securely.
Hang Painting Pendulum

Hang your DIY pendulum above the center of the table or workspace. Hang it high enough so that it swings freely. Three to four inches above the table is a good rule of thumb.
Drill Holes in Paint Cups

Create a paint drip cup by drilling a hole in the bottom of a plastic cup. Make several paint drip cups, one for each color.
Set aside some extra cups without a hole where you can thin and mix paints. The paint should drizzle out in a continuous stream.
Swing and Paint

- Drop one of the drip cups into the cup holder on the pendulum.
- Use a finger to plug the hole in the bottom of the cup in the pendulum. Pour in mixed paint.
- When you're ready, remove your finger and swing the pendulum over the canvas. Swap out paint drip cups with different colors as often as you wish.
Painting a pendulum picture is a fun, creative activity that your child can enjoy for hours. Don’t forget to display their original artwork after they’re done. From tools to paint, The Home Depot delivers online orders when and where you need them.