How to Make Indoor Seed Starter Shelves

Last updated September 7, 2023
Presented by Timothy Hammond of Big City Gardener.
Leafy greens like leaf lettuce, arugula, kale are always a healthy plus. With this project you will be able to grow greens and herbs year-round. This DIY wood shelving unit lets you seed, grow and harvest an indoor garden. Watch the video and read on for steps and expert advice.
Difficulty:
Intermediate
Duration:
2-4 hours
Table of Contents
Pick a Space
Measure and Cut Lumber
Make Shelf Frames
Attach Shelf Planks
Attach Legs
How to Plant a Leafy Indoor Container Garden
Pick a Space

Choose and measure the space where you plan to keep your shelf. For the best results, locate the shelf by a window that receives a minimum of 4 hours of sunlight daily. Or install a grow light (See Step 7). If placing near a door, remember to account for the space needed to open the door.
Measure and Cut Lumber

For this seed starting wood shelving unit, the shelves are spaced 24 inches apart. This allows 3 inches for a grow light and 3 inches for the height of the container. The remaining 18 inches of space allows room for the seedlings to grow.
The unit shown is 50”H x 24”W x 18”D.
For each shelf you decide to build, use 2x4 untreated wood boards.
- Cut three 24-inch long planks per shelf.
- Cut two additional 24-inch wide frame pieces per shelf.
- Cut two 18-inch long frame pieces per shelf.
- Cut four legs that measure from the bottom of your lowest shelf to top of your highest shelf.
Tip: Lightly hand sand pieces. If painting or staining, do so before putting the shelving unit together.
Make Shelf Frames

To create each shelf frame, attach two 24-inch wide pieces to two 18-inch pieces at the corners with 2 1/2-inch screws. Drilling pilot holes first will make attaching the corners easier.
Attach Shelf Planks

Attach three 24-inch planks to each shelf frame with 1 1/4-inch screws. Leave a gap between your planks on the shelving. This will increase airflow around your plants and decrease the chance of disease.
Attach Legs

After constructing the shelves, stand them up on their sides. Attach two legs on one side of the shelving unit with 2 1/12-inch screws. Turn the table over and repeat the process with the other two legs. If attaching casters or wheels, do so before turning the table upright following the manufacturer's instructions.
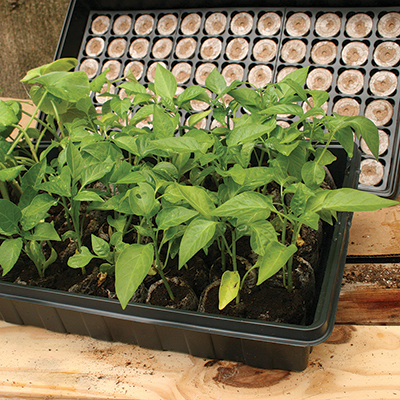
How to Plant a Leafy Indoor Container Garden

Here are tips on planting an indoor container garden. It will produce for about eight weeks before you may need to replant it. For a continuous harvest, plant a new container every two to three weeks.
- Use a wide container. Salad greens have an extremely shallow root system. The wider the container the better.
- Choose your seeds. Mix seeds from different types of leaf lettuce, arugula, kale and any other leafy greens you want in your salad mix.
- Fill the container with high quality potting soil. Moisten the soil.
- Sprinkle the seeds over the entire surface of the soil. Do not worry about pushing these seeds beneath the soil.
- Top the seeds with less than a 1-inch layer of potting soil.
- Water the seeds and place the container in sun or underneath a grow light. Keep soil moist.
- Seeds can sprout within 3 to 14 days. Once sprouted, allow the seedlings to grow for two to three weeks before harvesting.
- To harvest, hand pick the outermost leaves. Or use a pair of scissors to cut the lettuce about 1 inch to 2 inches from the top of the soil. Within a few days of cutting, you will see new leaves starting to grow.
Now you know how to build a seed starter shelving unit from wood. You can harvest the greens at any of its stages: microgreens, young leaf or fully grown mature leaf. The flavor of some leafy greens changes as they mature. Harvest at different stages to see which flavor profile you prefer.
Having access to fresh, healthy foods year round is one way you can stay well — and transform your home into a haven. Ready to get started? The Home Depot delivers
online orders
when and where you need them.