How to Make a Wall-Mounted Coat Rack Hanger

Last updated September 7, 2023
Think outside the box when it comes to useful home decor. A pipe coat hanger is a useful and unexpected way to add storage in a hall or entryway while also adding interest to your decor. This guide will teach you how to create your very own DIY Pipe Coat Hanger with just a few supplies and in about 30 minutes.
Difficulty:
Beginner
Duration:
Under 2 hours
Table of Contents
Review DIY Coat Rack Cut List
Gather Tools & Materials
Measure Boards
Cut Boards
Sand Cut Boards
Assemble Coat Rack
Review DIY Coat Rack Cut List

- Review the cut list, making note of the measurements, cut indicators and scrap wood.
Gather Tools & Materials

Here's what you'll need to make this DIY wall-mounted coat rack hanger.
- Drill
- Circular saw
- 3 Pipe flanges
- 3 Pipe nipples
- 3 Pipe caps
- 1- x 6- x6-inch wood board
- Wood screws
- Sandpaper
- Paint or stain
Measure Boards

Review Step 1 above for cut list measurements. Using the measuring tape, measure and mark cuts on the wood.
Tip: Cut pieces one at a time then measure and mark the next piece from the remaining scrap to ensure that all pieces are correct in size.
Cut Boards

- Secure your wood to your work surface using two clamps. Wear eye protection and make your first cut using a circular saw.
- Line up your first cut piece on the remaining board and use it to mark your second piece.
- Secure your board again and, with your eyewear on, make your second cut.
Sand Cut Boards

Use a sanding sponge to smooth any rough edges. With your wood cut and sanded, you can personalize your project. Here are a few ideas:
- Apply chalked paint to the wood and pipe for a modern look.
- For a rustic look, leave the pipe black and apply a stain to the wood to highlight the natural grain.
- Choose a light-colored metal paint for the fixtures and a dark stain for the wood to make a statement piece.
Assemble Coat Rack

- Place one board on top of edge of second board flush to the edge.
- Pre-drill using 1/8-inch bit a hole 2 inches away from each edge.
- Attach shelf with 2 1/2-inch wood screws.
Paint or Stain Coat Rack

Spread a drop cloth on your work surface and lay out your project pieces. Make sure your workroom is well-ventilated before starting.
Using a paintbrush, apply your paint or stain to all sides of your wood, including the edges and end grain. Allow the paint to dry completely before moving on to the next step. Two coats may be necessary, depending on the paint or stain. Read the label on the paint container for the manufacturer's recommendations.
Pre-Drill the Mounting Holes

Using the 1/8-inch drill bit drill two pilot holes centered on the back board 4 inches in from each side.
Mount Shelf

- Using remaining 2 1/2-inch wood screws attach shelf to wall (holes are 16 inches apart in case you want to mount to studs).
- Use 3/4-inch wood screws to attach hooks. Mount one hook directly over each mounting screw and the third one in the center.
- Drawing a horizontal line centered on the back board and three vertical lines (one in the center and two 4 inches in from each side) will give you a great guide for where to put your screws.
- Optional: Paint the screw heads to match the pipe color/finish.
Tip: Use a straight edge and measuring tape to perfectly space and line up the pipe hooks.
Add Coat Hooks & Enjoy

Screw caps on one end of each pipe and screw the other end into the flanges. Repeat two more times.
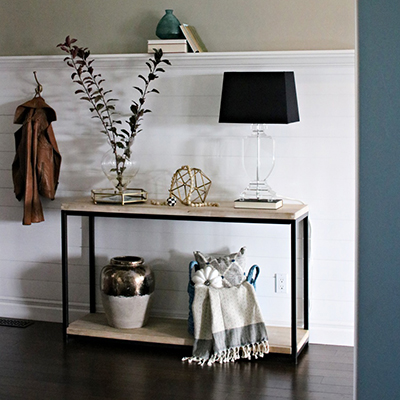
Once your pipe coat hanger is complete and hung, make it your own with decor. Hang it by the front door to catch all those bags and coats or in the mudroom. Add a little extra personality with an indoor plant or art.
Creating a unique and eye-catching coat hanger and shelf is quick and easy when you have the right tools. We have options to deliver online orders when and where you need them.