How to Make a Wooden Plant Stand

Last updated September 7, 2023
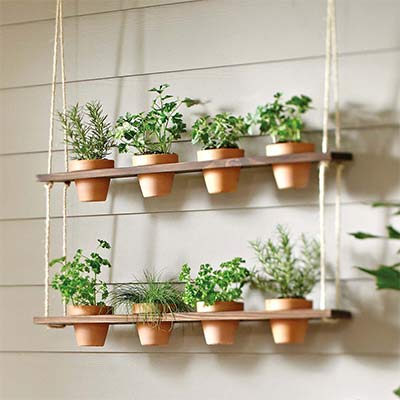
Build a simple hanging planter using just a few pieces of wood. This easy DIY project is sure to impress the neighbors and bring some fun color to your porch. This guide will teach you how to build your own wooden hanging planter stand.
Difficulty:
Intermediate
Duration:
2-4 hours
Project Guide
Outdoor Living Ideas
Outdoor Decor Ideas & Projects
Planters
Outdoor
Table of Contents
Cut the Boards
Nail the Frame Together
Add Glue for the Base
Nail in the Base
Attach the Basket Hanger
Paint & Enjoy
Cut the Boards

- Cut the boards to length. Use a miter saw to cut the 2- x 4-inch x 8-foot board into four pieces: two pieces 20-inches long and two pieces 33-inches long.
- Use a miter saw to cut 24 inches off the 2- x 4-inch x 8-foot board.
Nail the Frame Together

- Use the finish nailer with 2-inch nails to attach the 2- x 4- x 20-inch boards to the ends of each 2- x 4- x 33-inches.
- This is your rectangular frame.
Add Glue for the Base

Add wood glue to the outside surface of one of the 2- x 4- x 20-inch boards.
Nail in the Base

- Use the nailer with 2-inch nails to attach the 2- x 6- x 24-inch board. There should be a 2-inch overhang on each end.
- Turn the frame over so the base is on the ground.
Attach the Basket Hanger

- Drill a small pilot hole slightly off center on the bottom side of the board.
- Screw the multi-purpose hook into the pilot hole.
Paint & Enjoy

- Finish the hanging plant stand with spray paint or stain and allow it to dry for at least 24 hours.
- Hang the planter basket from the hook and add your plants!
Ready to get started? Shop our selection of materials today. The Home Depot delivers online orders when and where you need them.