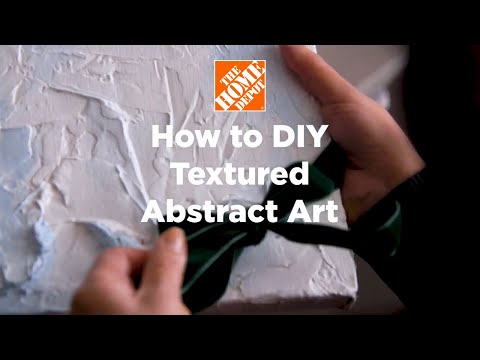
How to Make DIY Textured Art
Last updated September 7, 2023
Learn how to make your own DIY canvas and paint a monochromatic, textured design with this artsy DIY project. All you need to get started is a single piece of lumber, a drop cloth, joint compound and paint samples. Whether you’re already an artist or a novice painter, this guide makes it easy to learn how to create your own masterpiece to keep or give as a gift for Christmas, Mother's Day and more.
Difficulty:
Beginner
Duration:
Over 1 day
Table of Contents
Gather Supplies
Measure Wood
Cut Wood
Build Frame
Cut Drop Cloth
Fold and Fit Cloth
Gather Supplies

With just a single piece of lumber, a drop cloth, joint compound and a few paint samples, you can create monochromatic, textured pieces of art that friends and family will love to receive. They’ll also look great on the walls of your own home.
Here's what you'll need:
- Miter Box and Saw
- 1-inch x 2-inch x 8-foot Lumber
- Measuring Tape
- Pencil
- Scissors
- Staple Gun
- Staples
- Canvas Drop Cloth with Plastic Backing
- Paint Primer
- Mini Roller
- Mini Roller Tray
- All-Purpose Joint Compound
- Putty Knife Set
- White Paint Sample
- Off-White Paint Sample (or a color of your choice)
- Angled Artist Paint Brush Set
- 2-inch Paint Brushes
Measure Wood

Using your tape measure, measure out two 12-inch pieces of wood and two 9-inch pieces of wood to create your frame.
Cut Wood

- With a miter box, saw the board into two 24-inch lengths and two 18-inch lengths with 45-degree cuts on each end.
- Place the boards together to create a frame.
- Use a staple gun to staple each corner five times on the front and back.
Build Frame

- Once all pieces are cut, lay them together to form a frame.
- When all angles are aligned, use your staple gun to attach the wood and build your frame.
- Hold the pieces together and make sure to staple multiple times in each corner.
Cut Drop Cloth

- Cut the drop cloth into a 30-inch x 24-inch rectangle.
- Place the drop cloth piece face down and lengthwise in front of you.
Fold and Fit Cloth

- Set the frame centered in the middle.
- Use a staple gun to secure the top edge of the canvas to the frame, tacking in the center and every 3 inches in both directions.
- Do the same to one of the 18-inch sides, making sure that the fabric is as flat and tight as possible.
- Stretch the canvas as hard as you can while maintaining a smooth canvas and attach the remaining 24-inch side in the center.
- Continue to stretch and pull the canvas as you staple in 3-inch increments from the center.
- Repeat for the remaining side.
- Remove the give from the canvas by pulling and stapling between the staples from the last step.
- Switch sides frequently and repeat until the only sections not tight are the corners. The front of the canvas should make a drum sound when it is taut.
- Trim canvas along the frame sides but leave excess material around the corners.
- Pull and fold fabric corners diagonally towards the center of the frame.
- Staple to secure, making sure the front of the art canvas is taut; cut off unnecessary material.
Paint Canvas with Primer

- Use a mini roller to apply primer to the entire area of the canvas’ front and wrapped sides.
- Let dry.
Add Putty

- Use putty knives to generously apply the joint compound to the bottom of the canvas in fluid motions. As you work up to the top of the frame, add less and less.
- Continue to layer the joint compound to create interesting textures.
- Let dry for 16 hours.
- Add more if needed and let dry before painting.
Reapply White Paint

- Use a 2-inch paint brush to gently apply white paint to the entire piece.
- Let mostly dry.
Add New Paint Color

- Lightly apply the paint color of your choice to a dry brush and add the color randomly to the canvas, blending with the white paint. Small artist brushes can be used with both colors to add details as desired.
- Let dry.
Wrap and Gift

Once the art is completely dry, about 24 hours later, wrap the gift in ribbon or twine of your choice and give to the lucky recipient.
Creating your own DIY textured art is a fun and simple project that's perfect for gifting for Mother's Day, Christmas and beyond. The Home Depot is your DIY headquarters. Looking for a product to complete your project? We have options to deliver online orders when and where you need them.