How to Plant Spring-Flowering Bulbs

Last updated July 25, 2024
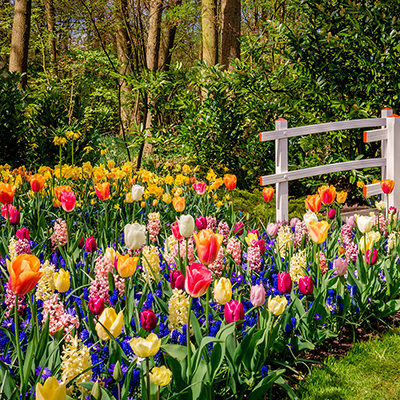
For a spring full of bright daffodils, tulips and crocuses, plant bulbs in fall. These spring-flowering bulbs need a cold winter in the ground to bloom at their best when the weather warms.
Pop the little miracles into the soil in fall and like magic, richly colored flowers will emerge in early spring, often before the snow has even melted from the ground. In addition to tulips, daffodils and crocus, look for more spring bloomers like hyacinth, grape hyacinth (muscari), lilies and peonies.
Follow a few time-honored tips and take the time to pick the best bulbs and prepare the soil when planting bulbs in fall for spring blooms.
Difficulty:
Beginner
Duration:
Under 2 hours
Table of Contents
Pick the Right Bulbs
Pick the Right Site
Prepare the Soil
Add Fertilizer
Position the Bulbs
Add Soil and Water
Pick the Right Bulbs

When selecting flowering bulbs, pick those that feel firm, not dry or spongy in the package. Avoid any with signs of mold.
Buy bulbs that bloom early, mid and late spring, to increase total bloom time. Buy more than you think you need for maximum impact. Place bulbs in a cool location until it’s time to plant.
Daffodils, muscari, snowdrops, crocus and peonies (sold as bare root tubers), come back year after year in most zones. Check instructions on the package and online before buying.
Like tulips, you'll want to grow daffodils by the dozen because they're strong and reliable. Read more about planting daffodils in fall.
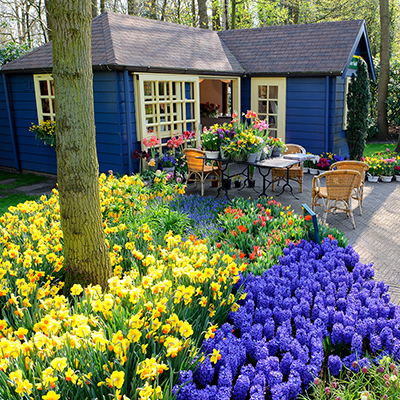
Hyacinth, with its glossy leaves and colorful, bell-shaped flowers, bring a fragrant perfume in your garden.
Pick the Right Site

Where you plant bulbs is everything. Spring-blooming bulbs demand excellent drainage. Ideal places include slopes, berms, raised beds and any other spot where water can drain freely.
In addition to well-draining soil, the site should receive 6 to 8 hours of sunlight. More sun equals more blooming beauties.
Also, avoid the common mistake of planting spring-blooming bulbs closer than 4 feet from a house. The home's warmth will cause them to grow prematurely, harming their ability to bloom well and stay healthy year after year.
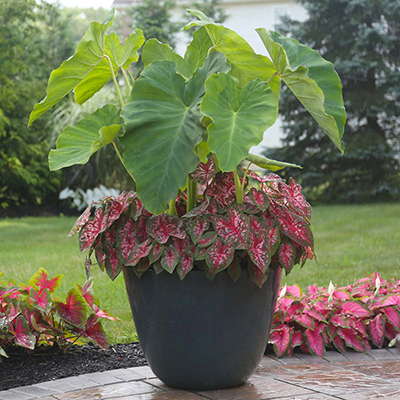
Bulbs love containers, too! Plant as you would in-ground, being sure to add fertilizer and top with mulch. Move to a sunny location in late winter and wait for the blooms.
Prepare the Soil

Plant spring-blooming bulbs in fall, as soon as possible after receiving them so they don't dry out. You can plant them any time until the soil freezes.
Since bulbs need good drainage, prepare the soil well. Dig to a depth of at least 18 inches, working in compost or sphagnum peat moss to improve soil texture.
Some other steps to follow to prepare your soil include:
- Remove large rocks and debris. This helps ensure the roots won’t get stuck as they grow.
- Add compost to improve your soil texture and add nutrients for healthy growth
- Keep the garden bed loose and fluffy. Avoid compact soil to give your bulbs room to spread out.
Add Fertilizer

Add to the planting hole a fertilizer made specifically for bulbs. Although bone meal is a popular bulb fertilizer, it is not a complete fertilizer for bulbs. Consider adding other fertilizers like an all-purpose slow-release formula to supplement it.
Position the Bulbs

Position the bulbs, pointed end up, to the depth specified. As a rule, plant tulips and hyacinths 6 to 8 inches deep; daffodils 6 to 9 inches deep; and crocuses, glory-of-the-snow, snowflakes, grape hyacinths, snowdrops and squill 3 to 5 inches deep. (Those depths refer to the bottom of the bulb; that is, the base of the bulb should be planted at that depth.) When you buy bulbs, they usually come with information about the ideal conditions for growth.
Rows are best for planting a large number of bulbs. Smaller bulbs can be planted close together at around four inches apart. Larger bulbs should have at least five and up to eight inches between them.
A bulb planting tool or auger makes quick work of planting large quantities of bulbs.
Add Soil and Water

After the bulbs are planted, water the garden bed well. Check the moisture level of the soil each day through the fall. Keep the soil moist without overwatering. Use a watering can with a gentle pour or a hose nozzle on a soft setting. This keeps the soil loose and light. Keep your soil watered until frost to encourage as much root growth as possible.
Tip: For additional protection in the long winter ahead, blanket the bulbs with a layer of mulch.
Tips for Successful Bulb Planting

Follow these tips for successful bulb planting in fall:
- Dig down before a freeze. In colder climates, plant bulbs in fall six to eight weeks before the ground freezes.
- Give bulbs a chill. In warmer climates, flower bulbs need to chill out in a refrigerator for 6 to 10 weeks before planting. Just keep bulbs away from ripening fruit such as apples to prevent spoilage.
- Avoid early sprouting. Avoid planting bulbs when temperatures are too warm because it could cause fall-planted flower bulbs to sprout too soon and be damaged by frost.
- Protect tulips. Tulips are deer candy so plant them close to the house for protection. Deer repellant can help protect bulbs.
- Group bulbs. For the most natural look, group bulbs in a pyramid, rectangle or circular shape.
- At the first signs of a new spring season, or when you notice new shoots, remove your mulch layer and add a sprinkling of fertilizer. Fertilize before the bulbs start to flower. Fertilizers can prevent bulb growth if used after the flowers have bloomed.
Knowing how to plan spring-flowering bulbs lets you fill your garden with color. After a long winter, bright bursts of beautiful flowers add warmth and happiness to your outdoor spaces. Following these simple steps will set your garden up for success. Whether you need the right tools, flower bulbs or garden soil, The Home Depot delivers
online orders
when and where you need them.