How to Prepare a Subfloor for Tile Installation
Last updated September 7, 2023
Preparing a subfloor is an essential step for installing floor tile. It provides a level surface that will allow the tiles to properly stay in place. This guide will show you how to prepare your subfloor for a tile installation project to ensure that it’s fit to support ceramic or porcelain tile.
Difficulty:
Intermediate
Duration:
Over 1 day
Table of Contents
What is a Subfloor?
Prepare a Wood Subfloor for Tile
Attach Backer Board to Wood Subfloor
Prepare a Concrete Subfloor for Tile
Level Concrete Subfloor and Install Crack Prevention
What is a Subfloor?

A subfloor is the bottom-most structural level of your floor. It supports your decorative floor finish, whether it’s carpet, hardwood, vinyl, laminate or tile. For more information, download our PDF about types of subfloors.
- Preparation for installing floor tile depends on the type of subfloor in the room you are tiling. Concrete subfloors are prepared differently than wood subfloors.
- The subfloor must be able to hold the weight of the tile and preparation materials required to complete the installation.
- Underlayment is the material placed on top of the subfloor that assists in the installation of the tile or other type of flooring.
Prepare a Wood Subfloor for Tile

A successful tile installation project requires a level surface.
- Check for dips in the floor by sliding a 4-foot to 6-foot straight edge in different directions all around the room. Mark any uneven spots you find so that you can make them level.
- Fill seams in the subfloor with caulk. Tape off any affected vents with painter’s tape.
- Sand down any uneven or high spots. Keep in mind, because you're applying backer board, a primer product is unnecessary for wood subfloors.
- Pour the liquid underlayment into any dips in the floor. It will seek its own level, and once dry will create a flat and even surface.
Tip: Make sure the subfloor will not deteriorate when it gets wet. Particleboard is not an acceptable subfloor material for tiling projects. Oriented strand board (OSB) and exterior-grade plywood will work if first covered with a latex-modified mortar and a tiling backer board.
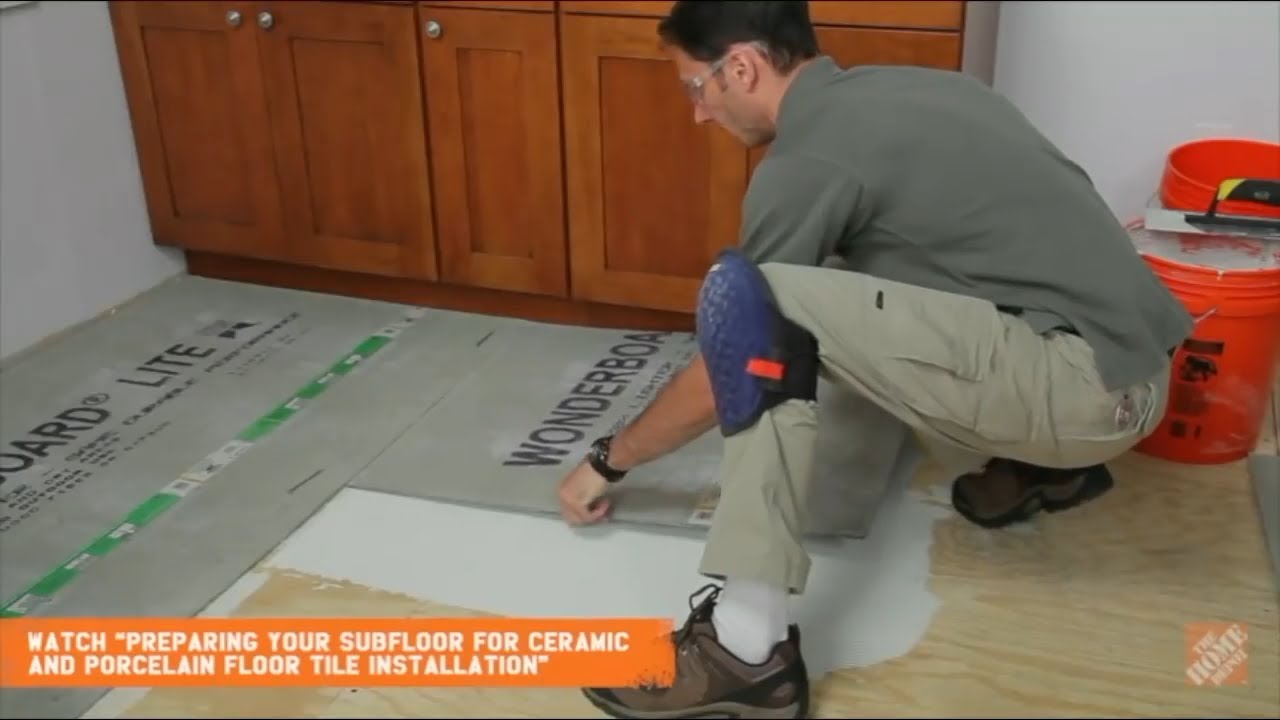
Attach Backer Board to Wood Subfloor

Install a cement-based backer board following the manufacturer’s instructions. This provides a solid surface under the tile that prevents flexing that could lead to cracking.
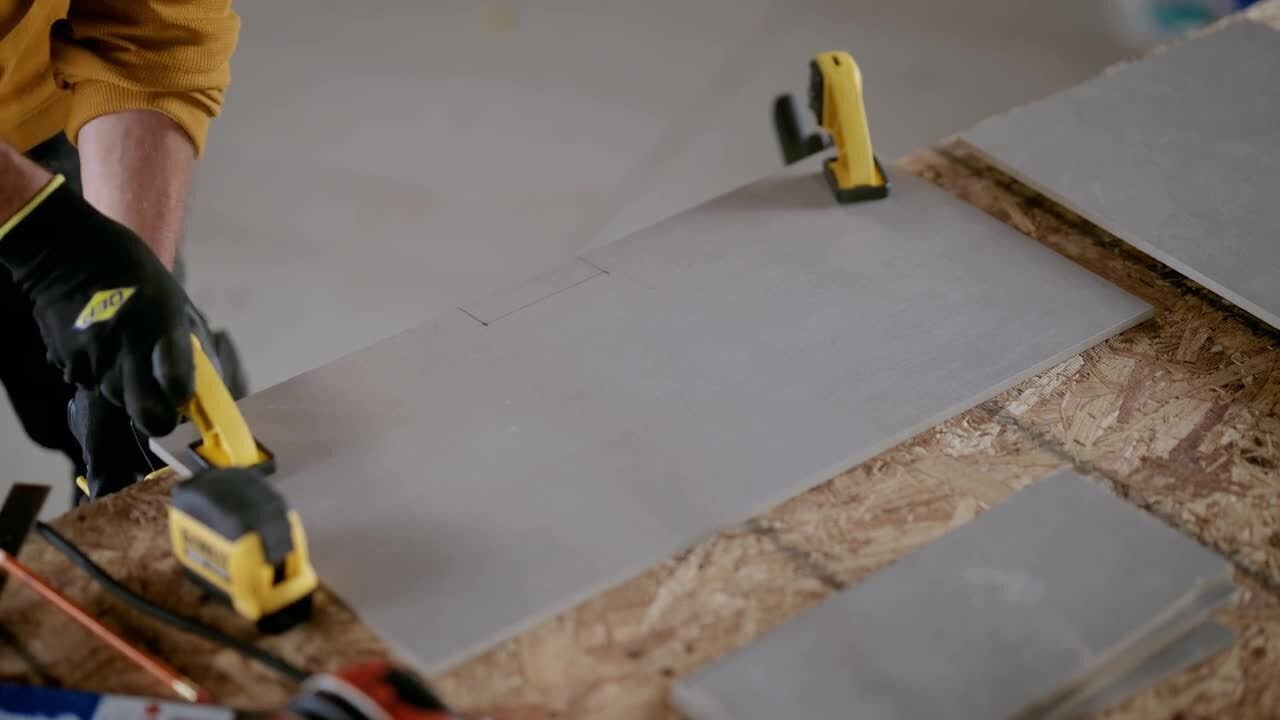
Backer board panels typically measure 3-feet by 5-feet and can be trimmed as needed. To cut backer board, measure and mark the size you need. Cut and score along your line with a carbide backer board cutter and a straight edge. Depending upon the manufacturer, you may need to score both sides of the board. Press down with your hand and knee on the edge of one side of the line and lift the opposite edge to snap the panel.
- Use a polymer-modified thin-set – a type of mortar – to attach the backer board to the subfloor. The polymer-modified thin-set provides additional strength and helps eliminate any movement between the backer board and the subfloor.
- Follow the directions on the packaging to properly mix the thin-set mortar. Wear safety glasses. Use a large bucket and a drill with a mixing paddle. Clean the mixing paddle promptly so the mortar does not harden on it.
- With a trowel, scoop out and spread enough mortar on the wood subfloor to cover an area slightly larger than your first piece of backer board.
- Comb the mortar with the notched edge of the trowel at a 45-degree angle to the floor. Make sure the trowel lines go in the same direction. Work quickly while the mortar is wet.
- Place the first sheet of backer board on the mortar.
- Walk gently on the panels to set them into the thin-set. Then, screw the backer board into the subfloor using special backer board screws. Use 1 5/8-inch screws for 1/2-inch backer board. Use 1 1/4-inch screws for 1/4-inch backerboard.
- Drive screws every 8 inches around the perimeter of each board, 1/2-inch from the edges and 2 inches from the corners. Some backer board manufactures have identified the locations on the backer board where the screws need to be placed.
- Expect to use 54 to 60 screws per sheet of backer board. Every screw head should be flush with the panel. Use a drill with a clutch to speed up driving the backer board screws.
Continue this process to lay the rest of your backer board panels, leaving a 1/4-inch gap at the walls. Place 16d common nails between the sheets of backer board to create a gap of 1/8-inch between them.
- Arrange the panels so that the ends are staggered and don’t align with each other. In other words, be sure that no four corners of the backer board touch. Also, if your subfloor runs east to west, lay your backer boards in the opposite direction, north to south.
- Leave a 1/4-inch gap between the edges of the backer board and the walls to allow for subfloor expansion and contraction.
- After all backer board sheets are in position, pick up the 16d common nails laid down between them. Then reinforce the joints with self-adhesive alkaline-resistant fiberglass tape specially made for backer board.
- Cover the tape with thin-set mortar and level it with a straight edge. If you use non-adhesive tape, you’ll want to first fill the gaps with mortar before setting the tape in the mortar. Then cover the tape with another layer of thin-set and level.
- Smooth any ridges or high spots. Feather the edges of the thin-set across each board to make the surface as smooth as possible.
- Allow the thin-set to dry before proceeding, usually between 24 and 48 hours. Check the package for specific drying times.
Prepare a Concrete Subfloor for Tile

As with a wooden subfloor, a concrete subfloor must be level for successful tile installation. Additionally, steps must be taken to ensure that a concrete floor will create a solid bond.
Your concrete floor should be clean, dry, flat and free of adhesives. Residue from strippers or cleaners should also be cleaned and rinsed with water. A concrete floor must be free of adhesives so that the tile will bond to it the right way.
- To prepare your concrete subfloor, make sure that it can accept water penetration. Test by sprinkling water on various areas of the subfloor. If water penetrates and leaves a wet spot, then a good bond can be achieved. If the water beads, adhesives or other contaminants are present. They may cause loss of bonding. Contaminants should be removed before installation.
- The concrete must be free of efflorescence or salts on the surface. It must not be subject to hydrostatic pressure or moisture penetrating the slab from below. Concrete subfloors should have a coarse finish to form the bond with the thin-set. Smooth concrete slabs must be etched or roughed up using chemical or mechanical methods to achieve a good bond.
- Slide a 4- to 6-foot straight edge in different directions all around the room to check how level the floor is. If there are hollows and valleys, fill with a self-leveling underlayment made for this purpose.
- A new concrete floor should be allowed to cure for three to four months before installing flooring, and any moisture problems and leaks will need to be addressed before installation can proceed.
Level Concrete Subfloor and Install Crack Prevention

A self-leveling compound can be poured over the entire surface if the subfloor has several high and low spots. If you have only a few uneven spots, you can treat just those areas.
- Mix the leveler in a bucket according to the manufacturer’s instructions. Wear rubber gloves and safety glasses. If you’ve made any adjustments to your floor, you must allow them to completely dry before installing the new floor. Follow the manufacturer’s instructions, but this usually takes several days.
- If there are cracks larger than 1/8-inch in your concrete subfloor, those should be patched and filled with a cement patching compound.
- Concrete subfloors move, shift and crack over time. To prevent that movement from creating cracks in your grout and tile, install a crack prevention membrane after the concrete subfloor is clean, flat and free of cracks larger than 1/8-inch. You can either roll on a liquid latex membrane or use a peel-and-stick crack prevention mat over the entire concrete subfloor.
After learning how to prepare a subfloor for tile, be sure you have the right amount of materials to continue your project. When you’re ready to determine how much tile you need, don’t guesstimate, calculate. Know exactly how much you need with our tile calculator.