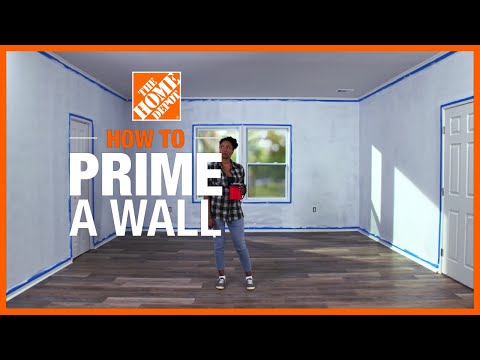
How to Prime a Wall
Published February 12, 2024
Take time to learn how to prime a wall and achieve professional-looking results on your painting project. Priming walls is an important step of painting that can increase paint adhesion, produce a uniform finish, improve sheen and block stains.
This guide will teach you how to prime walls for painting.
Difficulty:
Beginner
Duration:
Over 1 day
Table of Contents
Priming Considerations
Purchase Primer
Prepare the Wall
Cover Other Surfaces
Dampen Roller or Brush
Cut-In Corners and Spot Prime
Priming Considerations

If you’re wondering, “Do I need to prime before painting?” know that priming walls adds texture to them. When applied over primer, the paint can adhere to the surface better. Whether you’re learning how primer should look on a wall or how to prime new drywall, primer helps paint produce a good finish on the wall. It also helps cover existing paint colors and blemishes.
- Wall surfaces like drywall, masonry and wood are porous. If you don't use primer, they can absorb paint unevenly. You might end up adding more coats of paint than you planned to.
- On walls that are already painted with a glossy finish, or when using latex paint on top of an oil-based finish, a new coat of paint applied directly on top might have trouble adhering without a coat of primer for it to hold onto.
- When painting over a dark-colored wall, a coat or two of primer provides a clean and neutral canvas for a lighter paint color to refresh your room.
- Primer is typically less expensive than paint. Using primer instead of several coats of new paint may lower the cost of your paint job.
- Primer works well to cover previous paint colors and flaws or spots on the wall. But if your walls are in great shape and the new coat of paint is a similar color to the old one, you may not need primer.
Purchase Primer

Water-based latex primer and oil-based primer are both suitable for priming interior walls. Latex primer is considered an all-purpose primer and is easy to clean up with water. Oil-based primer is also versatile. It's the preferred choice for blocking stains, wood tannin and for covering porous wood surfaces.
Be sure to have enough paint primer before starting your project. Trying to figure out how much primer you need? A gallon of primer will cover between 250 to 400-square feet of surface. Two coats of primer may be required over heavy stains or tannin-rich wood.
Most primers can be tinted to help ensure good coverage for the finish coat. Bright or deep colors require a tinted primer. A store associate will determine the amount of tint to add to the primer following the manufacturer’s specifications and based on the color of the topcoat being used.
Prepare the Wall

As you learn how to prime a wall, it will need some prep work. Remove any HVAC registers, outlet covers, light switch plates, and nails or other hanging hardware. Then inspect walls for cracks, holes, dents or other imperfections.
- Use caulk or a lightweight spackling compound and putty knife to fill and repair any holes or imperfections.
- Remove excess spackling with the putty knife. Let dry completely.
- Use a small piece of very fine 220-grit sandpaper or a sanding sponge to smooth the repaired areas flush with the surface.
- Wipe the walls clean with a damp towel or sponge and allow them to dry.
Cover Other Surfaces

The next step as you figure out how to prime a wall is to protect any surfaces that you don’t plan to paint.
- Use painter’s tape to mask off moulding, trim, windows and the ceiling.
- Cover the floors with a drop cloth to protect them from paint drips and splatters.
- Move furniture out of smaller rooms. In larger rooms, move furniture to the center of the room and cover the pieces with additional drop cloths.
Dampen Roller or Brush

It is difficult for dry rollers and dry brushes to absorb primer. Dampen your paint roller or brush to get off to a fast start. Use water if applying latex primer. For alkyd or oil-based primer, use paint thinner or mineral spirits.
Brush out the liquid on a clean piece of cardboard to remove loose bristles. Squeeze out excess from a roller by rolling on cardboard or a towel.
Cut-In Corners and Spot Prime

A key technique when applying primer to walls is the "cut in." Cutting in is basically outlining the wall with a 2 to 3-inch band of primer around the edges.
Pick your starting point and cut in. Use a 2-inch nylon-polyester paint brush or corner pad to apply primer at all corners or places where walls, moulding and ceilings meet.
Next, brush primer on areas of walls and trim that need special attention. These spots can include joint compound, patches in drywall and plaster, areas of bare wood exposed by scraping or sanding, and any places treated with stain blocker.
When applying primer, wear safety glasses or goggles to protect your eyes.
Roll on the Primer

For the larger spaces of the wall, apply primer using a 9-inch paint roller with a 3/8 to 1/2-inch high quality roller cover.
- Fit the moistened roller cover onto your paint roller.
- Stir and pour the mixed primer into a paint tray.
- Dip the roller into the primer, making sure it’s completely covered.
- Pass the paint roller over the ridged area of the paint tray a few times to remove excess primer.
- Start with a single vertical strip at the cut-in corner.
- Apply the primer in 3- x 3-foot sections. With a fully loaded paint roller, work top to bottom, rolling back and forth across the wall in a series of V or W-shaped strokes until the section is covered.
- Roll in one section at a time, moving from high to low and from one side of the wall to the other.
- Reload your roller and move to the next section, covering only as much as you can finish while the primer is still wet. Always overlap areas of wet primer.
- If a second coat of primer is necessary, apply it after the first coat has dried according to manufacturer’s instructions.
Sand Primer

Once the primer is applied, the surface of the wall needs to be smoothed out to become ready for a coat of fresh paint. You’ll need to know how to sand primer once it dries.
The drying time for primer varies depending on a number of factors, including temperature, humidity and air circulation. Follow the manufacturer's guidelines on the primer can.
- After the primer dries, lightly sand away bumps and ridges using very fine grit sandpaper folded into quarters.
- When the grit of one section of sandpaper becomes covered with dust, switch to an unused section and continue.
- Wipe the wall clean with a damp towel or sponge and allow it to dry before painting.
Priming a wall is the first phase of your painting project. Using primer before you paint leads to better results. A base coat enables better topcoat adhesion for an even finish on your wall.
When you're ready to start your project, shop online for the supplies you need to prime a wall. The Home Depot delivers online orders
when and where you need them.