How to Rebuild a Shut-off Valve

Last updated September 7, 2023
Shutting off the water supply to a sink or toilet is the first step for many repair and installation projects. If the water still trickles after you've turned off the supply, the shut-off valve stem may be to blame. Fortunately, fixing the problem is a job you can complete yourself, often in an hour or less. This guide teaches you how to rebuild a shut-off valve.
Difficulty:
Advanced
Duration:
2-4 hours
Table of Contents
Learn the Parts of a Shut-Off Valve Stem
Prepare Your Work Area
Turn Off the Main Water Supply
Unscrew the Stem
Loosen the Gland Nut
Wipe Off the Shut-Off Valve
Learn the Parts of a Shut-Off Valve Stem

Getting to know the parts of the valve stem will make easier to perform this job. The shut-off valve stem is the front part of the valve. Its job is to open and close the shut-off valve.
Over time, pieces of the valve stem can wear out. When this happens, the shut-off valve may not close fully. As a result, water can still get through and that leads to a drip or trickle.
Here are the parts of a shut-off valve involved in stem rebuilding:
Handle: The handle is at the front of the shut-off valve stem. On multi-turn valves, the handle turns continuously, and you need to turn it many times to open or close it. With quarter-turn valves, the handle turns only a quarter of a turn.
Stem unit: The stem is the back part of the handle. You can't see the stem when a shut-off valve is fully assembled.
Seat: The seat is the opening on the body of the valve
Washer: The washer is a thin plate with a hole in the middle. It slides onto the stem unit and fits onto the threaded end of the unit. The hardware fits into the seat of the valve.
Gasket: This ring fits onto the stem to create a tight seal to help prevent leaks
Tip: Buy a stem repair kit to get the parts and hardware you need for a stem replacement. Most include a stem, a washer and a gasket. Both quarter-turn and multi-turn kits are available. Buy the kind that matches your shut-off valve.
Prepare Your Work Area

Although it’s unlikely, leaks can occur while you’re repairing your shut-off valve. Preparing your work area can save you the hassles of a messy cleanup if this happens. Spread plastic sheeting under the sink or around the back of the toilet and put a cleaning bucket under the valve. This way, water will have somewhere to go and debris won't end up on your floor.
Tip: If it's dark under the sink, use a work light to make it brighter.
Turn Off the Main Water Supply

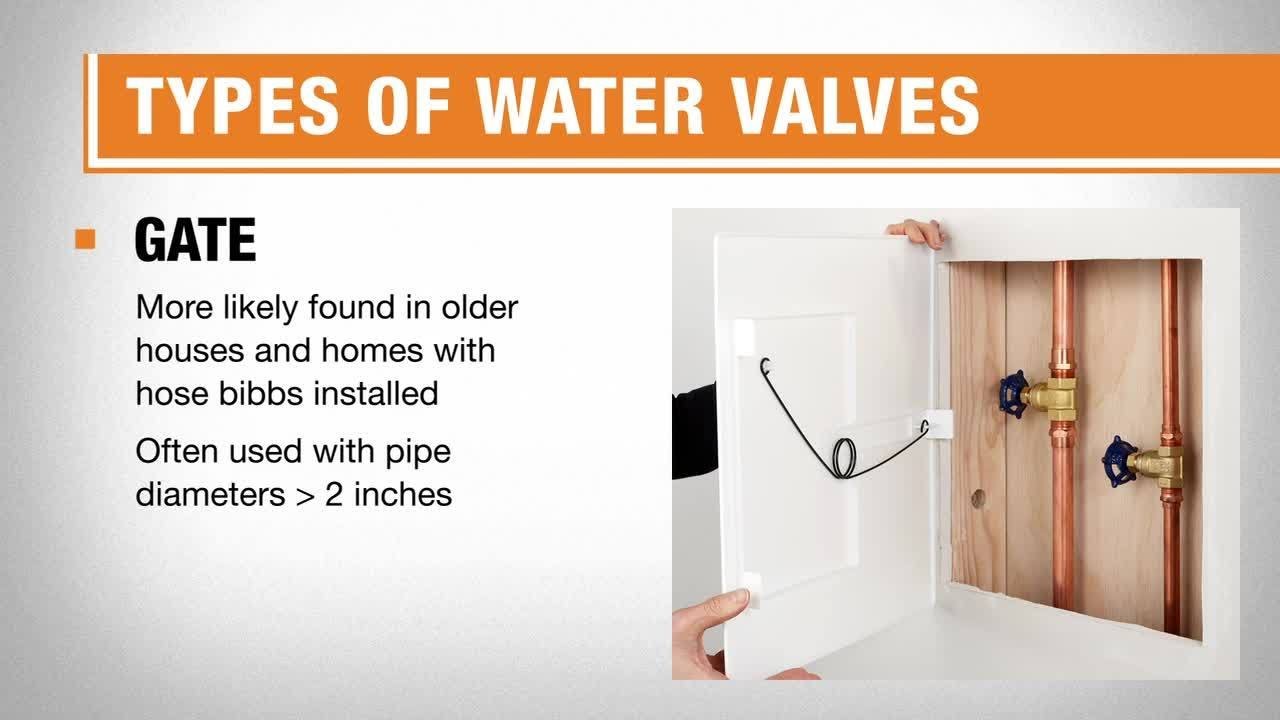
Before you go further, shut off the main water supply to the house. To do this, find the main water shut-off valve. If you're unsure where it is, walk the inner perimeter of your house on the side facing the street. The main water valve is often in the basement if your house has one.
Your property inspection report may also state the location of the valve. If you can’t find it, contact the water company.
Once you locate the valve, turn the handle to the left to close it and turn off the water. Then, check to make sure the water is off. If water still flows, there is likely a problem with your main water supply shut-off valve.
Unscrew the Stem

Use a screwdriver to loosen the screw that holds the handle in place. Once the screw is loose, pull on the handle to remove it.
Check the screw for signs of wear and tear. Most stem repair kits will include a replacement screw that you can use if you need a new one.
Loosen the Gland Nut

Behind the handle is a large nut called a gland nut. Grip it with an adjustable wrench and loosen it.
Turn the gland nut by hand until it comes off. Set the gland nut aside because you'll need to put it back on soon. Then, slide the stem out of the valve.
If the gasket or washer is missing from the old stem, unscrew the aerator on the faucet. The aerator is at the end of the spout and you can remove it by twisting it. If you find pieces of the gasket or washer in the aerator, clean it out to improve water flow.
Wipe Off the Shut-Off Valve

Clean your shut-off valve while you have it taken apart. Remove any debris by wiping off the part that remains in place. Use a cleaning rag or paint rag.
Assemble the New Stem

Put the pieces of the stem repair kit together by following the manufacturer's instructions. Check that the parts are secure, then screw the stem into the shut-off valve. You can usually do this by hand.
Tighten the Nut

Fit the gland nut over the stem. Begin to tighten it by hand. When it no longer moves, use an adjustable wrench to give it a final turn.
Reconnect and Test

Place the handle back on the shut-off valve. Use a screwdriver to put the screw back in to secure the handle.
Turn the main water supply back on. Twist the handle on the sink or toilet shut-off valve to shut off the water. Check to see if the dripping or trickling has stopped. If it has, clean up the bucket and plastic sheeting.
If the problem persists, you may need to replace the entire valve.
Rebuilding a shut-off valve is a simple first step that you can take to fix problems with your sink or toilet. With a stem repair kit and a few basic tools, the job is a DIY project that doesn’t take very long.
Ready to get the tools and materials you need to make plumbing repairs? The Home Depot delivers online orders when and where you need them.