How to Refinish a Deck

Last updated March 21, 2024
Decks are extensions of your home's living space. When your deck becomes worn from exposure to harsh weather, it's time to give it new life by refinishing the deck.
Refinishing a deck is more cost-effective than replacing a deck. Often, a good cleaning and finish with stain or sealant will renew your deck. There are five easy steps to refinishing a deck. Begin by getting prepared, then clean and inspect the deck. Choose your stain or sealant, sand the deck surface, then stain or paint the deck and seal.
Read on for details on how to refinish a deck.
Difficulty:
Intermediate
Duration:
Over 1 day
Table of Contents
Get Ready to Refinish
Clean and Inspect the Deck
Choose the Stain, Sealant or Coating
Sand the Deck
How to Seal or Stain a Deck
Get Ready to Refinish

Check the weather. The deck will need a couple of days to dry after being washed. The stain or paint will need time to dry, too.
The instructions here are written with pressure treated wood in mind. Other types of popular decking boards will require variations but the process is similar.
You’ll need a few tools:
- Pressure washer (optional)
- Water hose with spray nozzle if not using a pressure washer
- Broom
- Leaf blower (optional)
- Paint roller or garden sprayer to apply cleaning agent
- Stiff bristle brush with extension handle
- Paint scraper
- Hammer
- Driver for deck screws
- Power sander
- Sandpaper
- Painter’s tape
- Plastic sheeting or tarps
- Painting or staining equipment
- PPE – dust mask, eye protection, hearing protection if using power tools, work gloves
- Knee pads will also be helpful if you’ll be sanding or detail cleaning
Select a cleaning agent that addresses the needs of your situation. If there’s no mold, you don’t need to apply a cleaner that kills mold.
We’ll talk more about stains and coatings in a later step, since you may need to clean the deck first to determine how you want to refinish it.
Clean and Inspect the Deck

An attractive, long-lasting finish begins with a deck that has been cleaned and prepped for refinishing.
- Clear the deck of all outdoor furniture, toys, potted plants, grills and other objects.
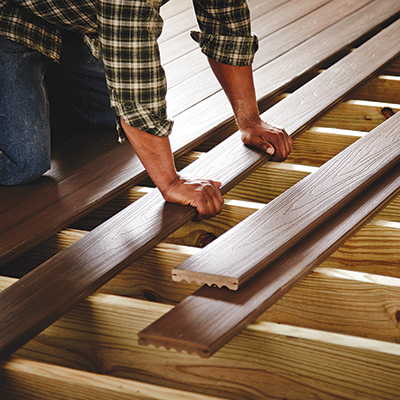
- Inspect the deck, handrails and steps. Replace damaged or rotten boards.
- Make sure no nails or screws are standing out above the surface.
- Splinters are a big consideration. Deck boards can begin to separate between the grain. If the grain runs out on the edge or face of a board, it can become a sharp protrusion that can cause injuries. Look for areas like this and give them special attention.
- If boards have bowed or cupped, pulling nails loose, remove the nails and replace with deck screws. If the nail can’t be pulled out, drive a screw near it and then use a hammer and nail set to drive the nail below the surface of the wood.
- Cover nearby plants or shrubs with plastic sheeting or tarps. This will make sure they don’t get spattered with cleaner or stain.
- Apply painter’s tape to the house, where the deck meets it, to protect paint and trim work. The house can also be protected with plastic sheeting, if needed.
- Clean the deck by applying a biodegradable deck cleaner.
- Scrub with a stiff bristle brush, using an extension handle, if necessary. Do not use a metal bristle brush.
- Wash with a hose and sprayer or a pressure washer.
- If old paint is flaking away, a pressure washer will help remove it.
- Take care with a pressure washer as it can damage wood that has been out in the elements. Start slow and at low pressure with a wide fan nozzle.
- After cleaning, consider applying a wood brightener to the surface to improve the deck's appearance.
- If you maintain your deck regularly, a refresh can be as easy as a good cleaning and inspection.
- Rot is a result of wood soaking up water and staying wet over time. To prolong the life of exterior wood, pay special attention to damaged areas and the ends of the boards. These two areas will soak in more water than undamaged faces.
- If water is standing in a portion of the deck it needs to be addressed. The boards in the low area can be loosened, and a shim can be placed beneath the boards to promote runoff. A drainage hole can be drilled. Or the gaps between the boards can be increased.
- Often, rot is caused by leaves or other debris holding water. Removing leaves and debris is an easy way to prolong the life of a wooden deck.
Choose the Stain, Sealant or Coating

Here are some tips to help choose the appropriate type of exterior wood coating for your specific project.
- Conduct a water drop test by dripping a few drops of water in several places on the deck. If the boards absorb the water, the wood is dry and can benefit from sealing for protection. If the water beads, the wood is sealed and may only need cleaning, unless you want to change its appearance.
- Stains color the wood and give your deck a new look. Many new types of exterior wood stain are formulated with sealants, so you may only need to apply one product. Read the labels and talk to a knowledgeable associate in The Home Depot’s paint department.
- Semi-transparent stains or sealers let the wood grain show through and can be most effective on pressure treated lumber.
- Opaque stains will cover color and shade differences in the wood for a more uniform appearance.
- For wood that has surface damage that can’t be sanded away, consider a thick deck coating that conceals damage. It’s a paint rather than a stain but it can be the easiest way to bring new life to a deck.
- Choose exterior finishes. They’re designed to stand up to weather and sunlight.
Sand the Deck

Allow the deck to dry before sanding.
Sanding is an important step in refinishing a wood deck.
The effects of weather and sunlight, as well as the deep cleaning that was just completed, will raise the grain of the wood. If the deck is to be stained, it’s best to sand the wood smooth.
If the grain is deeper than you can sand or there is splintering or other superficial wood damage, consider using a deck repair paint. These products are thick coatings designed to fill cracks and extend the life of a wooden deck. They can’t fix structural damage or rot, but they can improve the appearance of worn wood. Some of these coatings include slip-resistant granules.
If you’re changing to a new stain color, you’ll want to sand away all of the old stain.
Here's how to sand decking:
- Check again that all metal fasteners are below the surface off the wood. Nothing sheds a piece of sandpaper like a nail head peeking out from the floor.
- Use a belt sander or orbital sander to remove any old gloss and smooth out any rough areas on decking boards.
- Move the sander along the direction of the wood grain.
- You may need to use a sanding sponge on the railings or balustrades.
- Lower grit numbers are more aggressive and will remove material faster. Use a low grit like 60-80 on rough areas. Then progress to higher grits like 120-150 if desired. How smooth to sand is a personal preference once splinters and roughness has been removed.
- Handrails may warrant extra attention and finer sandpaper grits.
- After sanding, sweep, blow, or vacuum the deck thoroughly to remove the dust. Leaving dust on the surface will not allow the new finish to adhere completely.
Safety Tip: Always wear a dust mask and safety goggles to protect your eyes when sanding.
How to Seal or Stain a Deck

Before staining the deck, make sure to wait for at least two days after washing before applying stain or sealant.
How to seal or stain a deck:
- Begin by applying deck stain or sealant to handrails using a paintbrush, starting at the top and working down to the deck surface. You can also apply stain with a paint sprayer.
- Use a natural-bristle paintbrush to apply oil-based products and a synthetic-bristle brush to apply water-based stains.
- Then stain or seal the surface decking boards with a flat paint-pad applicator. Let the stain soak according to instructions and remove excess with a rag.
- Stain needs time to absorb into the wood, but dries quickly, so avoid applying the stain in direct sunlight.
- Porous wood may require a second coat of staining sealer for even coverage.
- Most decks do not require sealant on the underside, especially when made of pressure-treated wood.
- Stay off the deck for a full day to ensure it dries completely.
- Remove painter’s tape, return furnishings to their desired place and enjoy the results of your deck restoration.
Tip: Apply deck stain with your exit in mind, such as ending at the steps, so you don’t have to track through wet stain.
When you learn how to refinish a deck, you will help it last longer. Maintain the deck to keep it looking attractive. Keep the deck swept and perform regular inspections for signs of wear and tear. Replace damaged deck boards as needed. Periodically rearrange outdoor furniture to prevent sunlight from creating mismatched color patches. And give the deck annual cleanings with a cleaner that removes mildew.
You can rent the tools you need for refinishing a deck from The Home Depot. You can also shop for refinishing supplies on The Home Depot Mobile App and have them delivered to your home.