How to Tile Your Mudroom

Last updated September 7, 2023
A mudroom is a high traffic area that's great for collecting wet and dirty items like umbrellas, boots and rain coats. However, it can also attract messes like dirt and mud from your shoes. Installing tile flooring in your mudroom will give you a waterproof surface that’s easy to clean and very durable. Tile is also a great option for your walls. This guide will teach you how to tile your mudroom.
Tip: Larger tiles mean there are fewer grout lines making maintenance and cleaning easier. Larger format tiles are those where any edge is greater than 15 inches. A medium-bed mortar must be used when installing these tiles. This mortar will compensate for the irregularities in the tile and substrate. It’s also formulated with non-sag and non-slip properties for wall installation.
Difficulty:
Intermediate
Duration:
Over 1 day
Table of Contents
Surface Preparation
Plan the Tile Installation
Mix the Mortar
Cut the Tiles
Set Tile on the Wall
Set the Floor Tile
Surface Preparation

- Before taking on any tiling project, the surface needs to be clean, solid and smooth. Use the appropriate cleaning supplies to tidy the area.
- The floor of the mudroom must be level since any imperfections or bumps will be seen in the tile after installation. For wall installation, the wall must be straight and able to hold the weight of the heavier tiles.
- Use a self-leveling underlayment if you have uneven or damaged floors. It will seek its own level in a matter of minutes. Once cured, it will provide you with the flat, smooth surface you’ll need to tile your mudroom.
Plan the Tile Installation

- As with floors, the walls of the mudroom should be smooth and crack-free. Start by applying spackle to any holes or cracks.
- Lightly sand the entire wall surface with 80-grit sandpaper for better adhesion.
- The tile should be adhered to the wall starting from the center of the wall out. Measure the width of the wall and mark the midpoint.
- Use a chalk line to mark a vertical line from the midpoint. Use a level to check that it’s plumb. Then continue that same line across the floor with the chalk line.
- You now have your starting points.
Mix the Mortar

- Many mortars come in powder form and need to be mixed with water before application. Follow the product’s instructions for the proper water-to-mortar ratio.
- Pour the needed water into a large bucket first, followed by the mortar and mix using a 1/2-inch drill fitted with a paddle attachment.
Tip: Once the mortar is thoroughly mixed place the paddle in a second bucket of water. This prevents the mortar from hardening on the paddle.
Cut the Tiles

- Mark the length needed for each tile. Use a wet saw to cut the tile with the finished side up. Place the tile firmly against the guide and turn the saw on. Don’t try to speed the job by pressing hard on the saw. Let the blade do the work.
- A wet saw will give you cleaner cut lines with less chipping than using a manual tile cutter.
- Large format tiles can be slightly cupped, which means they vary in thickness from the end of the tile to the center. When the thinner edge is placed next to the thicker middle, it creates an uneven surface referred to as "lippage.”
- You should plan to offset the tile by thirds, not halves, since the half offset would align the thickest and thinnest parts of the tiles.
Set Tile on the Wall

- The larger and heavier the tile, the thicker the mortar should be applied to the wall or floor. Carve 1/2-inch notches through the mortar with a trowel before setting the tile in place. Back-butter each tile before it's set to ensure full coverage on the back of each tile.
- Begin setting the cut tile at the base of the wall of the mudroom. Set the first tile straddling the center line. Work your way out to the left and right of the center line. Work in small sections at a time so the mortar doesn’t dry out.
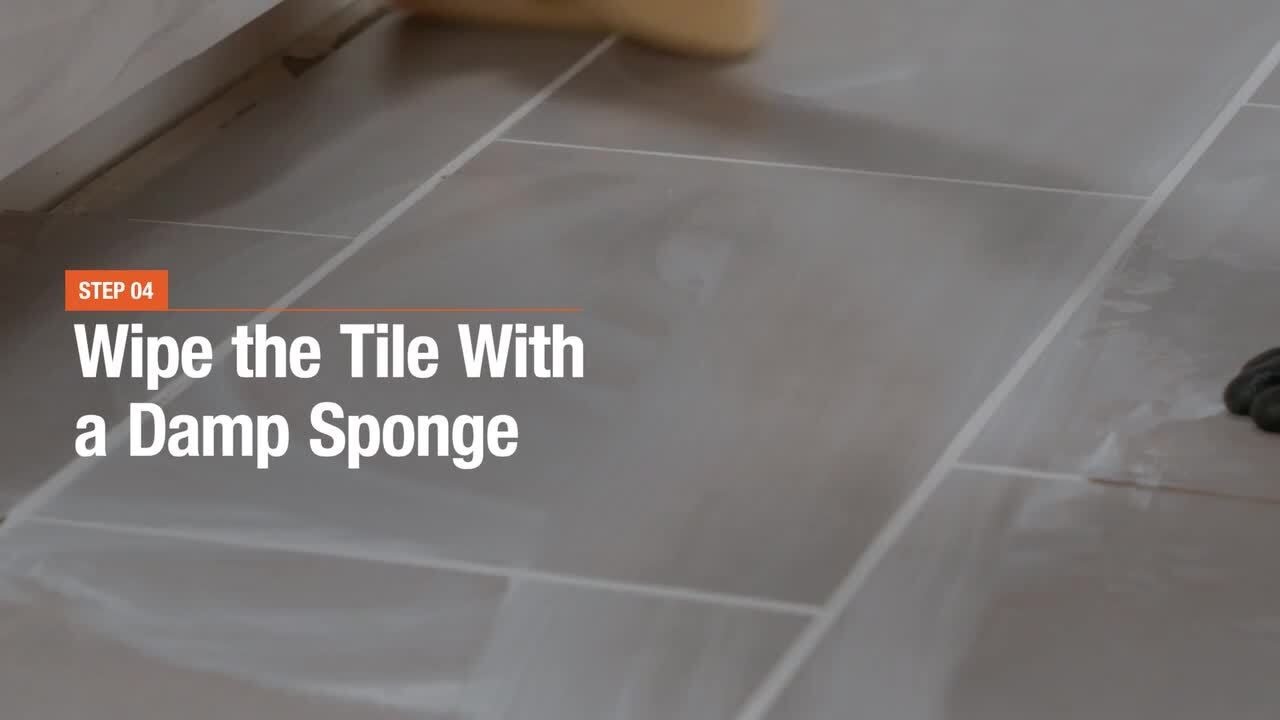
- Place 1/4-inch spacers between the tiles. They’re set to keep a uniform gap between them. This gap will be needed to allow for the natural shifting of the wall and floor. Use a damp sponge to wipe any excess mortar from the surface of the tiles before it hardens.
- Continue staggering the joints, offsetting each adjacent tile by about a third of a tile until you have reached the ceiling.
- When cutting the last row of tiles, remember to allow for a 1/4-inch gap along the walls and ceiling.
Set the Floor Tile

- Once you have set the wall tile, sweep any debris from the floor of the mudroom. Apply a waterproof underlayment to the floor. This will prevent any cracking in the surface of the subfloor during its natural shifting. Cracking in the subfloor could lead to cracked tile or grout. Follow the product’s application instructions and allow it to dry.
- The process for tiling the mudroom floor is very similar to the wall. Starting from at the base of the tiled wall, dry fit your planned pattern staggering the joints by roughly one third of the tile’s length. Start at the center of the mudroom wall. Align the floor tiles so they match the grout lines of the wall tile.
- Apply mortar notching at 1/2-inch and set the tile using spacers to maintain a consistent 1/4-inch gap between tiles. As with the wall tile, back-butter each tile to even out the tile's surface before setting. Leave 1/4-inch gaps around the edges of the floor to allow for shifting.
- Allow the mortar to set and cure according to the manufacturer’s instructions.
Apply Grout

- Once the tile has been installed, remove the spacers.
- Before applying grout, the mudroom tiles should be wiped clean with a damp sponge. Scoop a generous amount of grout onto a rubber float and begin filling the joints. Be sure to fill them completely and work in small sections at a time so you can remove the excess before the grout begins to form a skin.
- Drag the float diagonally across the tiles to remove the excess while keeping the joints full. Dispose of this excess grout so you don’t dry out the remaining grout in the bucket. Wipe the tiles with a semi-wet sponge to remove residue.
- Wet the sponge regularly and change the rinse water often. Any remaining water or light residue on the surface can be removed using a microfiber cloth. Be careful not to remove any grout from the gaps as you clean. Allow the grout to harden according to the manufacturer’s instructions before allowing foot traffic.
- A porcelain tile can feature the look and feel of real wood, while offering the durability of tile. Plus, porcelain tile is waterproof so you can bring the beauty of real wood to any indoor or outdoor living space.
Learning how to tile a mudroom will help you give it a surface that’s easy to maintain. Floor tile can be mopped clean and wall tile can be quickly wiped off. In just minutes, a messy mudroom can sparkle once again. Don’t like the look of ceramic tile or vinyl tile? Choose a porcelain tile styled to look like wood.
When determining how much tile you need for your mudroom project, don't guesstimate, calculate. Find out exactly how much tile you should have with The Home Depot's tile calculator.
Ready to find the supplies you need in your local store? Use The Home Depot Mobile App to locate products and check inventory. We'll take you to the exact aisle and bay.
If you’re not ready to start on a new DIY project, you can still enjoy the benefits of a tiled mudroom. Leave your next tile job to the professionals. Schedule an appointment today for tile installation.