How to Use a Miter Saw
Published November 20, 2023
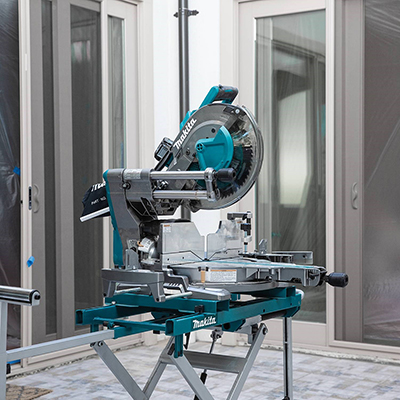
Power miter saws are designed to make angled cuts for moulding, trim work, rafters and other general carpentry applications. The saws also make straight crosscuts and, when equipped with the right blade, miter saw uses are versatile, making them an important part of a tool arsenal for professional carpenters as well as DIYers.
This guide will teach you how to use a miter saw and offers miter saw tips and tricks for proper and safe operation.
Difficulty:
Beginner
Duration:
Under 2 hours
Table of Contents
Types of Miter Saws and Cuts They Make
How to Make a Miter Cut
How to Make a Bevel Cut
Proper Setup and Miter Saw Safety
Locking and Unlocking Miter Saw Features
Types of Miter Saws and Cuts They Make

The first step of learning how to use a miter saw is to understand the difference between a miter cut and a bevel cut.
- A miter is an angled cut made across the face, or width, of a board.
- A bevel is an angled cut made through the thickness of a board.
- Any miter saw can cut a miter and a bevel, depending on how the board is placed onto the saw.
Compound miter saws can complete both types of angles with a single cut. This type of miter saw has an adjustment mechanism to swing the blade from left to right. Additionally, the blade can be tilted so that it cuts at an angle instead of straight down.
Some types of miter saws feature a sliding arm that allows the blade to extend, which gives you the ability to cut boards that are wider than the miter saw blade. A stationary arm limits a cut to the diameter of the blade.
Miter saws can be corded or cordless, and each type has its advantages. Corded miter saws have more power, and they work continuously when plugged in. But they require an electrical outlet, and they’re bigger and harder to store. Their cords can also be tripping hazards. Cordless miter saws, on the other hand, are lighter, more portable and battery operated. However, they can’t be used indefinitely without charging, and their lack of power makes them unsuitable for thick materials.
Chop saws are often mistaken for miter saws, but they differ in two important ways. Chop saws usually only cut straight down, at a ninety-degree angle, while a miter saw uses its machinery to cut at various angles. Also, chop saws generally have a lot more power, so they’re often used to cut metal objects instead of wood. When deciding between a chop saw vs. miter saw, consider the type of material you’re cutting and whether you need angled cuts.
How to Make a Miter Cut

Always keep safety in mind when learning how to use a miter saw. Read more about the safe use of this tool in Step 4.
For a miter cut:
- Connect saw to a power supply and turn on the power switch.
- Measure and mark a line across the stock to be cut.
- Place the board onto the saw and flush against the saw fence at the back of the base.
- Loosen the handle on the miter gauge at the front of the saw, depress the lock handle and pivot the blade to the desired angle.
- Tighten the handle on the miter gauge.
- Lower the handle to check the point where the blade meets the wood.
- Adjust the wood placement as necessary and clamp the board or brace firmly into position with your hands at least six inches away from the blade.
Tip: The board that extends beyond the miter saw base must be supported. Adjust the extension supports on the miter saw stand, if using, or stack scrap pieces of wood on the work surface in order for the entire length of stock to remain level.
- Keep one hand on the board to be cut and raise the handle with the other hand.
- Engage the trigger and allow the motor to reach full operating speed.
- Carefully lower the handle to bring the blade to the wood and continue so it passes through the board.
- Do not force the blade or apply too much downward pressure. Let the saw do the work.
- Release the trigger when the blade has completed the cut.
- Allow the blade to stop rotating completely before raising the handle.
Tip: When a project calls for multiple cuts of the same length, save time by using a stop block temporarily secured to the saw fence with double-sided tape. Place the end of the board to be cut gently against the block so each subsequent piece is the same length.
How to Make a Bevel Cut

For a bevel cut using a standard miter saw:
- Place the marked board on its edge – not flat – against the saw fence.
- Adjust the gauge at the front of the saw to the correct angle.
- Ensure that the blade meets the board at the correct position.
- Clamp or brace the board.
- Pull trigger from the upper position and lower the handle to complete the cut.
For a bevel cut using a compound miter saw:
- Place the marked board face-up, or flat, onto the saw base and its edge pushed against the fence.
- Adjust the bevel gauge at the rear of the saw and tilt the blade to the correct angle.
- Use the gauge on the front of the saw to set the miter angle, if needed, for the cut.
- Make appropriate adjustments and follow the above steps to complete the cut.
Tip: Settings for common miter-bevel combination cuts and other miter saw uses can be found in charts that are often included with operation guides for compound miter saws.
Proper Setup and Miter Saw Safety

Safe operation is the most important part of learning how to use a miter saw.
- Keep the saw unplugged when not in use.
- Miter saws should be bolted to a stable work surface or securely clamped onto a miter saw stand.
- New miter saws are adjusted at the factory but vibration during transport can knock the saw out of alignment. Before beginning your project, check to see that cuts are square when the gauge is set to 90 degrees. Refer to the manufacturer’s guide for instruction on fine-tuning blade alignment.
- Never clamp both sides of the board being cut.
Avoid dangerous kickback. Always use sharp blades that are intended for the material to be cut. Typical miter saw uses involve cutting wood but can be used for other materials when the saw is equipped with an appropriate blade. Follow the manufacturer’s guidelines.
Miter saws are powerful tools and care should be used to prevent serious injury when operating them.
- Keep hands away from moving blades.
- Do not wear loose clothing when operating the saw.
- Wear safety glasses to protect your eyes from dust or flying debris, use appropriate ear protection to dampen the loud noise and a dust mask to avoid inhalation of sawdust.
- Bystanders should also follow these safety guidelines.
Locking and Unlocking Miter Saw Features

Power miter saws typically have several safety locks. Refer to the manufacturer’s operation guide for specific information on how to unlock a miter saw. In general:
- The trigger can be locked by inserting a pin through a hole that prevents it from being engaged.
- Up and down motion of the handle is secured with a pin located at the top of the tool's arm that slips into a slot near the motor when in the down position.
- On models with a sliding arm, forward-and-back movement can be restricted by tightening a wingnut to clamp the motor and blade housing to the arm bars.
- The miter gauge is unlocked to adjust its angle by loosening the knob and depressing the locking level. To lock into place, release the lever and tighten the knob.
Now that you know how to use a miter saw, it’s time to put it to use with a new project. Locate products and check inventory with The Home Depot Mobile App. We'll take you to the exact aisle and bay.