How to Use Levels and Carpenter Squares

Published September 25, 2023
If you know how to perform all four basic essential construction tasks, you are well on your way to success for building projects.
The old carpenter’s adage of “measure twice, cut once” is very appropriate here. Always double check your work with squares, tape measures and levels before cutting, drilling or securing fasteners.
It’s a lot easier to take a little extra time measuring now than taking a lot of extra time and effort later to undo poorly constructed structures, and then redoing them again the right way.
This guide shows the correct way to measure, mark, square and plumb for use in various construction projects.
Difficulty:
Beginner
Duration:
Under 2 hours
Table of Contents
Marking a Crosscut
Using a Framing Square
Using a Carpenter's Level
Using a Line Level
Marking a Rip Cut
Marking a 45-Degree Miter
Marking a Crosscut

Marking for a crosscut is a three-step operation. First, square the end of the board you will be cutting. Then hook the tape measure on the end of the board and extend the tape until you reach the length for the crosscut. Make a "V" mark with a sharp pencil.
Mark the waste side of the board with a large "X." Hold the point of the pencil on the point of the "V" and slide a layout square along the edge of the board until it touches the pencil tip without moving it. Draw a straight cutting line along the edge of the square.
Using a Framing Square

The framing square is also known as a carpenter's square or steel square. It has two flat steel blades that join at a 90 degree angle. The longer, wider length is called the blade. The skinny shorter length is called the tongue. The framing square has ruled graduations on all sides of the tongue and blade. Use a framing square to establish right angles and mark cutt-off work on wide stock.
To use a framing square to square two boards:
- Hold the framing square inside or outside the joint.
- Look along the lengths of the tongue and blade.
- If you have gaps anywhere along either edge of the framing square, your boards need adjustment.
- Pull or push one or both boards until the framing square fits snugly and there are no more gaps.
Using a Carpenter's Level

A level, spirit level or bubble level is a measuring tool used to establish whether a surface is a true vertical or a true horizontal. It consists of a length of plastic, metal, or wood with two or more vials that have a bubble and liquid in them. The vials have markings that indicate when the bubble is in the center of the vial. A centered bubble indicates true vertical or true horizontal.
Use a 4-foot carpenter’s level for framing whenever you have room for its length. Warps or waves in the boards can throw off a shorter carpenter's level.
Digital levels replace the bubble with an electronic display.
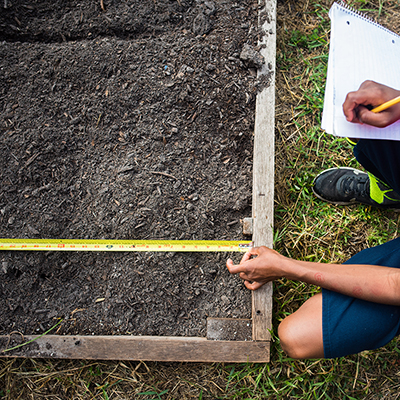
Using a Line Level

A line level is useful for finding level over a long distance.
In the most basic use, a stake is driven at each end of the work area. A string is tied to one stake and then pulled tight at the other stake. A line level is suspended from the string, which is moved up and down until the bubble is in the center. Then, the string is tied to the second stake. Using a measuring tape, the distance from the string to the ground tells how deep to dig or how high to fill to make the ground level.
When planning a garden, pouring a foundation, or setting up a new playground, multiple stakes, strings, and levels can be used to find level across large polygonal areas. Slope can also be figured for effective water runoff.
Marking a Rip Cut

Begin by marking the width of the cut on both ends of the board. Then hook a chalk line tightly on the marks and snap the line.
If the cut runs parallel to the edge of the board, draw the cut line by holding a pencil against a square at the proper width. Pull the square and pencil down the length of the board.
Marking a 45-Degree Miter

Miter cuts are angled cuts and are most often made at 45 degrees. Start by measuring the longer side of the miter and setting your combination square or layout square on that mark. Then draw the cut line.
Angles Other than 45 or 90 Degrees

A rafter square can be used to find and mark a wide range of angles.
- Place the pivot, which is usually marked as such, against the board's edge.
- Pivot the square until the desired angle marking touches the same edge of the board.
- The opposite short leg of the triangle will cross the board at the specified angle.
Using a Laser-Guided Level

Make quick work out of establishing horizontal level lines with a laser level. Set the unit on a tripod and position it to throw the laser beam at the level point. Mark the position of the line with a carpenter’s pencil.
Using a Post Level

A post level will allow you to plumb posts in two planes at the same time (that is, on X and Y axes). Strap the level to the post so you can watch the vials while you move the post. Brace the post when the bubbles in both vials are centered.
You can accomplish DIY projects with ease when you have the right tools and information. This guide covered how to use levels and carpenter’s squares so you can take on new projects with precision. Use The Home Depot Mobile App to locate products and check inventory. We’ll take you to the exact aisle and bay.