How to Use Swaging and Flaring Tools for Copper Pipe and Tubing

Published September 5, 2023
Flaring and swaging are ways of widening copper pipes and tubes. Knowing about the tools that do these jobs and being able to use them is helpful for plumbing and welding projects. Once you understand how the tools work, you can use them to make new connections and save time and money when doing jobs. This guide will teach you how to use swaging and flaring tools for copper pipe and tubing.
Difficulty:
Intermediate
Duration:
Under 2 hours
Table of Contents
What are Flaring Tools?
What are Swaging Tools?
Preparing the Copper Tubing
Place the Tubing in the Flaring Tool
Flaring the Tube
Swaging With a Punch Tool
What are Flaring Tools?
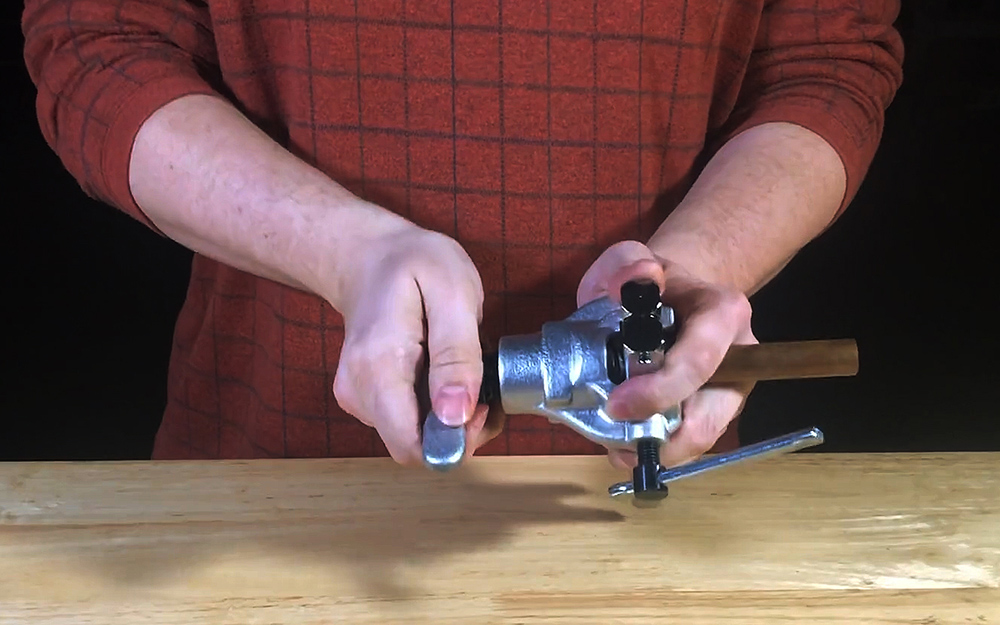
- Flaring tools use pressure to make a fabricated mechanical joint for joining or sealing copper tubing with a flare connection. Flaring allows you to connect tubes to each other or another kind of fitting.
- Flared ends tend to have a conical shape.
- The most popular flaring tool for copper tubing is the bar-type tool. It has include multiple bits to accommodate different pipe or tube sizes.
- Tubing and piping flares are not interchangeable. Tubing flares have a 45-degree angle while piping flares have a 37-degree angle.
Use the right type for your material to get best results.
What are Swaging Tools?

Swaging tools use pressure to expand or stretch the end of a piece of copper tubing. Once you use these tools, a tube can fit over another of the same diameter. Then, you can make a permanent soldered connection between them. While flared ends look like a cone, swaged ends are cylindrical.
When you swage, you increase the diameter of the tubing without having to use extra fittings. After welding, swaged copper tubes are unlikely to leak or come apart.
The types of swaging tools for copper pipe include spike-shaped punch tools, manual tube expanders and feed screw tools similar to flaring bars.
Tip: Often, a flaring tool kit will come with swaging bits or die blocks to convert a flaring bar into a swaging bar.
Preparing the Copper Tubing
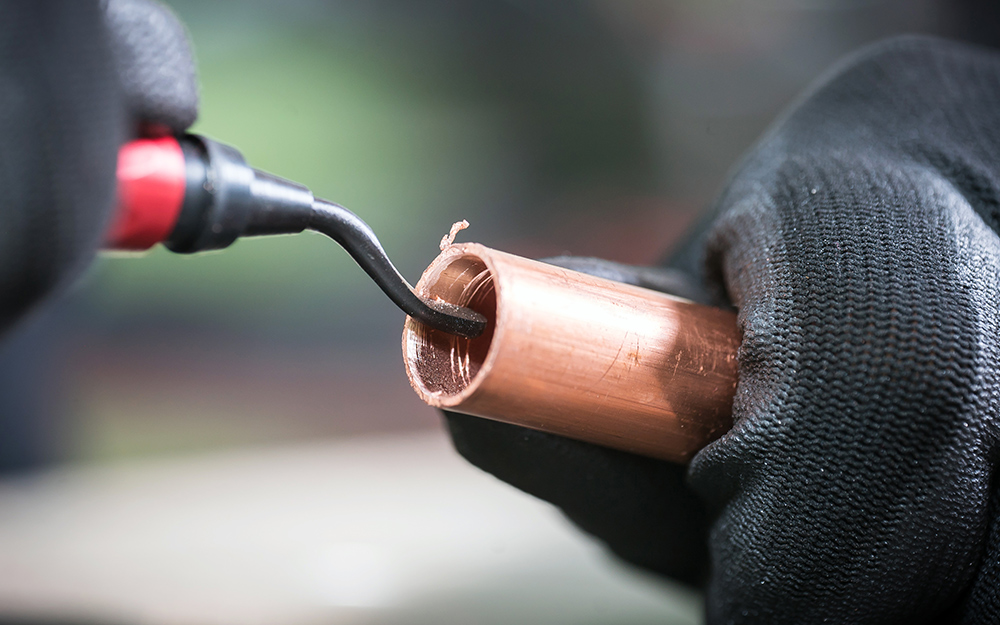
Before using flaring and swaging tools, prepare the length of copper pipe or tubing to be shaped.
Measure the copper tubing and cut to the desired length with a tubing cutter.
There are a few kinds of cutters. Some slice automatically, while others require you to spin or twist. Follow the instructions from the cutter manufacturers to trim the pipe or tube properly.
Bits of metal debris can get in the way of connection. Remove any excess metal with a deburring tool. To do so, hold the blade at an angle and slide it along the end of the pipe or tube. Continue scraping away burrs until the metal is smooth.
Tip: Before cutting metal for any project, measure twice for accurate results.
Place the Tubing in the Flaring Tool
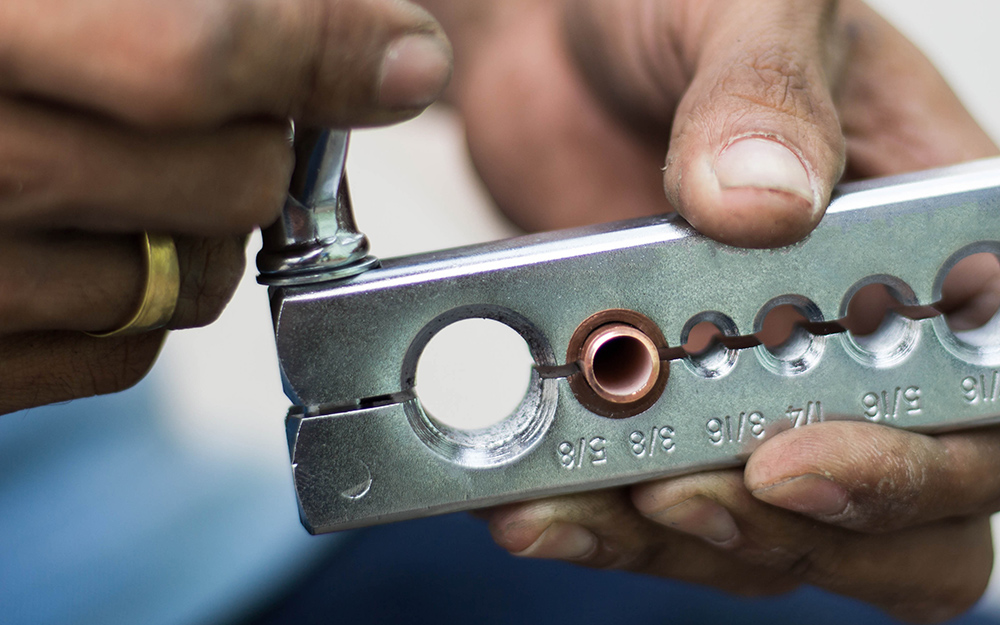
- When flaring, begin by choosing the tool accessories that match the diameter of the tube to be flared.
- Place the tubing inside the die block or clamp of the flaring tool. The end of the tube should extend about 1/8 inch (about the height of a nickel) from the flaring tool.
- Tighten the wing nuts to secure the tubing in the tool.
Tip: Place a drop of oil on the flaring cone to smooth the process.
Flaring the Tube
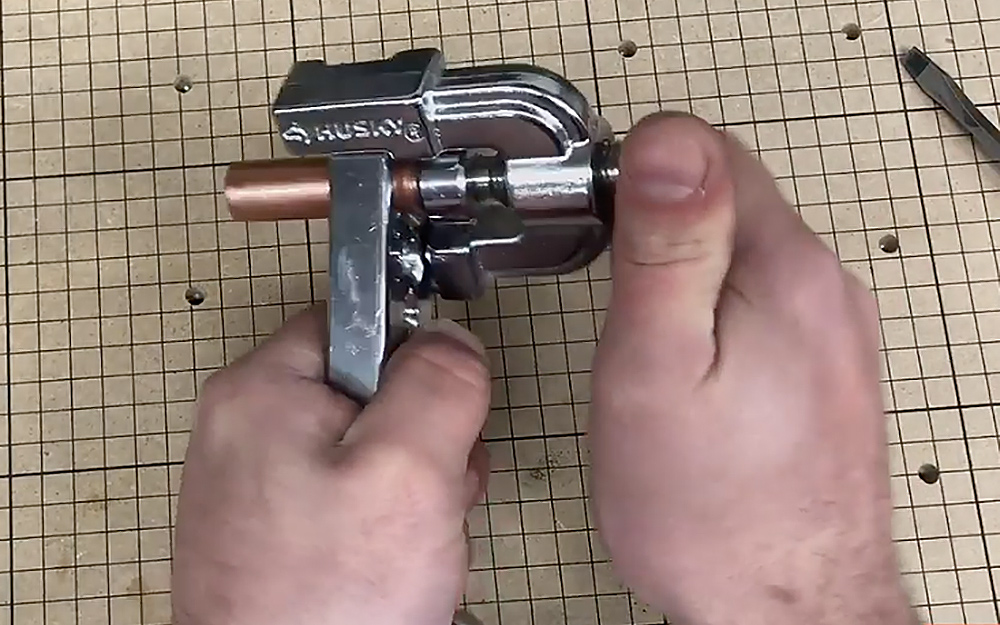
- Place the flaring nut over the end of the tube. Center the flaring cone over the tubing.
- Tighten the flaring tool to lower the press into the tubing until it forms a flare. Do not over-tighten, which risks splitting the copper.
- Loosen and remove the flared tubing.
Tip: If you have a kit with swaging accessories and want to swage a tube, follow the same steps, replacing swaging bits for the flaring bits.
Swaging With a Punch Tool
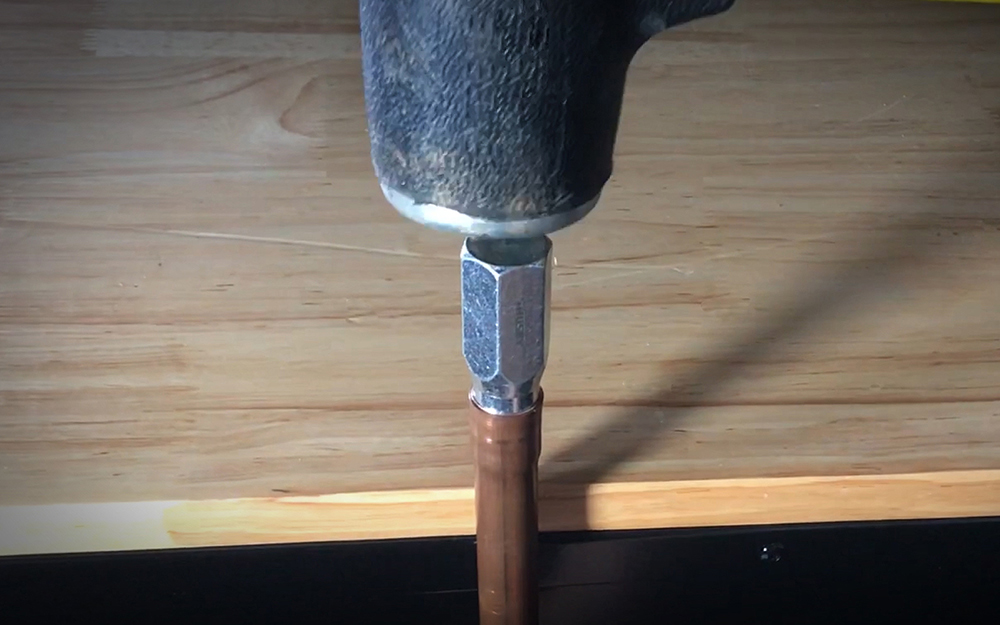
A punch swager is among the simplest and least expensive tools available for swaging.
- Secure the tube in a vise or hold by hand in a firm grip.
- Matching the diameter of the tube to the appropriately sized punch, put the narrow end inside the tube. Make sure that it’s aligned perfectly straight.
- Strike the end of the punch with a hammer until the tube meets the stop.
Swaging with a Tube Expander
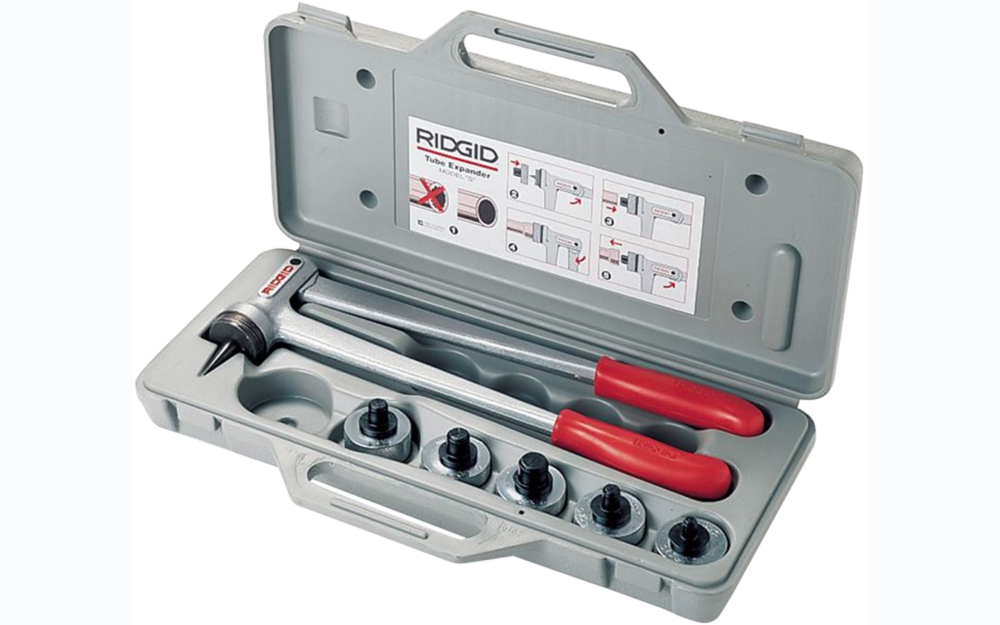
A tube expander makes it easy to swage tubing of different sizes.
- Attach an expander head that matches the diameter of the tube to the end of the tool.
- Fit the head into the end of the tube and gradually squeeze the handles.
- Release when the end of the tube is fully swaged.
When you know how to use swaging and flaring tools for copper pipe and tubing, you can join pieces without extra fittings. With some practice and the right tools and materials, you can swage and flare pipes and tubes in a couple of hours. You'll have more control over your home plumbing and welding projects.
Ready to get swaging and flaring tools and everything else for your DIY projects? The Home Depot delivers online orders when and where you need them.


