How to Weatherproof Your Front Door
Last updated September 7, 2023
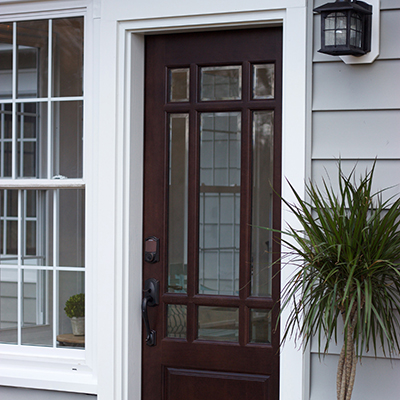
If you’ve noticed cold drafts around your entrance, your front door is likely the reason. Small gaps in the door jambs let cold air in during winter and cool air out in warm months. This makes your home heating and cooling system less efficient all year long. Weatherproofing your front door helps to keep your household more comfortable. It can even help lower energy bills. Follow this guide to learn how to weatherproof your front door.
Various tools will be needed, depending on what problem needs to be fixed. You will need a tape measure and a level to get started, followed by safety glasses, hearing protection and a dust mask, depending on what tools are used.
Difficulty:
Intermediate
Duration:
2-4 hours
Table of Contents
Prepare the Door
Adjust and Level The Door
Adjust Strike Plates and Latches
Install Weather Stripping
The Bottom Edge of the Door
Prepare the Door

Take the time to prep your door and door jamb to make the installation process easy. Follow these quick steps to get your door ready for new weather stripping:
- Measure the perimeter of the door. Many kits are sized for a standard door that is 80 inches tall and 36 inches wide or less. If your door is larger than that, you may need to buy longer pieces of weatherstripping.
- Clean the door, jamb and threshold: Look for dirt, dust and debris. Check in corners, along edges and around the threshold. A clean surface makes it easier to attach new materials.
- Check for damage: Look for any areas on your door that are damaged, like bumps, dents or cracks. A bent or warped door will require more attention.
- Look for gaps: Use a level to find out if your door is plumb or if you need to make any adjustments before weatherproofing.
Adjust and Level The Door

If you find your door or hinges are uneven, inspect the hinges. You can take steps to even out the gaps around your door, making it easier to install weather stripping. Follow these steps to level your door:
- Check to see if screws are tight. If not, try tightening them.
- If any screws are missing, replace them.
- As a security measure, now would be a good time to replace one screw in each hinge and both screws in the strike plates with 4-inch screws.
- If the screws will not stay tight because the wood is stripped, there’s an easy fix. Remove the screw, apply wood glue to a wooden golf tee and drive it into the hole. Cut the tee off flush with the surface and drive the screw. No tees? Use several wooden toothpicks.
- If tightening the screws doesn’t fix the door alignment, the next step is to adjust the knuckles on the hinges.
- Remove the pin from one hinge and leave the door closed.
- Using an adjustable wrench, tighten the jaws on a hinge knuckle that is attached to the door jamb.
- Being careful to only move it slightly, bend the knuckle away from the door. Repeat with the remaining knuckles on the jamb half of the hinge.
- Replace the pin and test.
- Repeat if necessary, this time bending the door side knuckles towards the door.
- These steps will make a hinge tighter; if the hinge needs to be looser, bend the knuckles in the opposite direction.
- If adjusting knuckles doesn’t work, try adding shims behind the hinges.
- Remove the hinge from the jamb: Take off the hinge that needs to be shimmed. If you’re shimming more than one hinge, only remove one at a time.
- Reinstall the hinge: Drill the hinge screws through the hinge and shims to attach to the door frame. Then attach the hinge to the door.
- Cut the shims: Push the wooden shim between the hinge and the jamb. Use a utility knife to cut the shim to the length of the hinge. Use a shim behind every screw location.
Tip: Use a level to check the door as you work.
Adjust Strike Plates and Latches

The strike plate is the piece of door hardware that attaches to the door jamb and holds the latch of a doorknob. Once you level your door, you may need to move the strike plates and latches for them to properly latch. To adjust the strike plate and latch, follow these steps:
- Tighten the screws: First, try tightening the mounting screws of the strike plate with a screwdriver. Loose screws can cause them to sag. Close the door to see if this corrects the problem.
- If the screws will not stay tight because the wood is stripped, there’s an easy fix. Remove the screw, apply wood glue to a wooden golf tee and drive it into the hole. Cut the tee off flush with the surface and drive the screw.
- Look at the latch: If the door still isn’t latching, figure out if the strike plate is too high or too low. Close the door from the inside, watching how the latch lines up with the plate.
- Adjust the strike plate: Use a rotary tool with a metal cutting burr to enlarge the hole. Or remove the strike plate by loosening the screws. File the latch hole so the strike plate can sit lower or higher. If the strike plate needs to sit higher, file the top edge. If it needs to sit lower, file the bottom edge.
- Replace the strike plate: Put the strike plate back in the hole on the door jamb. Use masking or painter's tape to hold it in place and gently close the door. Make sure the latch clicks into place with the new position.
- Some wood may need to be removed for the latch to operate with the plate in its new position, use a chisel to enlarge the hole.
- Changing the position of the plate may also mean there's empty space behind it. This can be filled with a high strength wood filler that can be drilled. Or, a piece of wood can be cut to fit and glued in place.
- Secure the strike plate: Once your strike plate is in position, drill pilot holes and then screw it back into place.
Install Weather Stripping

Use your door measurements to purchase the correct amount of weather stripping materials. Weather strips should be installed on the top, bottom and latching side for the best results. Start at the bottom and work your way up.
- Many doors manufactured since 2000 have “kerf” weatherstripping. A kerf is the slot left by a saw blade. Kerf weatherstripping has a piece that slips into a kerf that is cut around the stop moulding on both sides and the top of the door jamb. This style of weatherstripping is easy to replace without tools.
- Some weather strips have an adhesive backing. If you’re using adhesive weather stripping, slowly pull the backing off as you place the strips.
- Another type of weatherstripping is held in place by driving screws through a metal strip that holds a rubber seal against the door.
Tip: Once installed, slightly open the weather stripping to create a tighter seal. Move your hand around the door to check for any gaps or drafts.
The Bottom Edge of the Door

Now that you've taken care of the sides and top of the door, it's time to look at the bottom edge.
- Try to slip a sheet of paper under the door. If it slides through, there is an air gap that needs to be filled.
- If air is flowing under your door, check the threshold to see if the rubber seal is damaged or has become flattened over time.
- If the threshold is in good shape but the seal is bad, the seal can be replaced with a new one.
- If the threshold is damaged, it may need to be replaced.
- If the threshold is in good shape and the gap persists, adding a door sweep is the easiest way to fix it.
- Door sweeps, also called bristle sweeps, add another layer of protection from the outside air.
- Some door sweeps attach using screws.
- Other types of sweeps attach onto the bottom of the door.
- Some easily slip onto the bottom edge and require no tools.
- Most bristle sweeps come as kits with all the materials you need for installation.
Ready to find the supplies you need in your local store, or need help identifying a tool or material for weatherproofing your front door? Use The Home Depot Mobile App to locate productsand check inventory. Or, find products fast withimage search. Snap a picture of an item you like and we'll show you similar products. We'll take you to the exact aisle and bay.