A Beginners Guide to Building Cabinets

Last updated August 21, 2024

Jonny Lambert is the mind behind Jonny Builds. Once he built his first bed, and successfully completed his first build, this opened the door for so many potential projects and this fueled a passion to continue to create so much more. He uses his platforms to teach his audience how to make furniture and crafts with wood, metal, and everything in between. His projects are wide ranging in design style from Modern, to Rustic, to Industrial, and anything else that he finds interesting and unique.
A Note From The Home Depot
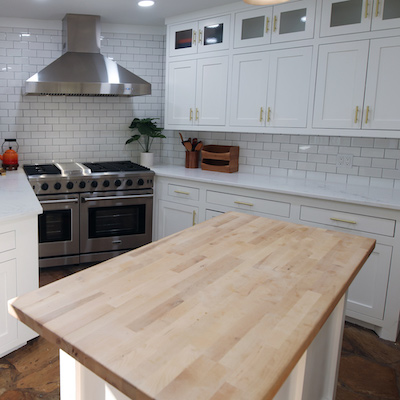
Using common power tools and supplies from The Home Depot, Jonny Lambert from @JonnyBuilds created his new kitchen cabinets from scratch! Follow along as he guides us through a 3-step, beginner friendly guide of his process.
Table of Contents
A Beginners Guide to Building Cabinets
Face Frame
Step 2: Cutting Plywood
Step 3: Assembly
A Beginners Guide to Building Cabinets
If you’ve never built a cabinet before, the project of building cabinets for your kitchen can seem quite daunting. Luckily, once you break it down step-by-step as outlined in this blog, I’m confident any DIYer can build their own cabinets from scratch using common power tools! As always, everything you need to build cabinets can be found at your local Home Depot, or online at HomeDepot.com.

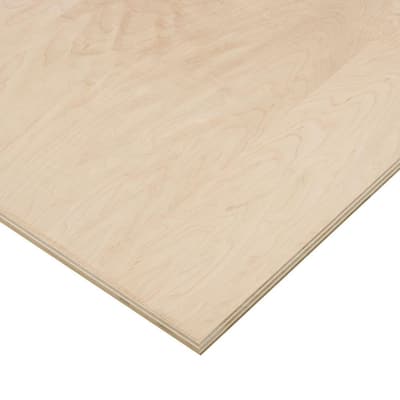
Let’s break it down. A cabinet is essentially a plywood box, typically made with ¾ inch furniture-grade plywood. In my case, I used maple pure bond plywood from The Home Depot. Maple is my go-to plywood if I’m going to paint given the closed grain of the exterior veneer.
Once you’ve selected your preferred plywood, you can start to plan your build. While I said a cabinet can be thought of as a box, it can actually be even simpler.
Most cabinets don’t have a plywood panel across the back, but rather a few 3-inch stretchers that allow you to attach it to the studs behind the drywall where it's installed. It’s also good to remember that there are lots of different ways to build cabinets, but I’m going to walk you through what I believe to be the most approachable way to give you accurate, repeatable results.
Face Frame
It may seem counterintuitive to begin with building the face frames, but this method ensures the most accuracy. First, make sure you’ve measured and re-measured where your cabinet is going. You’ll use these dimensions to build the face frame.
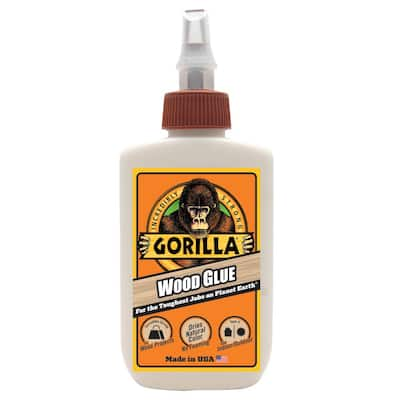
For my face frame I used ¾ maple , but poplar is also a popular choice and option for face frames. After you’ve cut your frame pieces to size, I find the best method is to assemble with pocket holes and wood. Add wood glue and clamp the face frame pieces flush with one another before driving in the pocket screws. This prevents any unwanted slipping during assembly and keeps everything nice and square.
Just like that, the most difficult part is done!


Step 2: Cutting Plywood
It’s important to use a cabinet-grade plywood so the adhesives used to adhere the plies together are safe for indoor use in your home. I recommend Purebond plywood which you can find at The Home Depot in 4 ft x 8 ft sheets. Upper cabinets are typically 12 inches deep, and lower cabinets are typically 24 inches deep, but these dimensions can vary. You must account for the face frame, so you’ll be cutting strips of plywood to either 11¼ in or 23¼ in.
Pro Tip: Planning ahead for your rip cuts to break down the plywood means you can get 4 rips for an upper cabinet or two rips for a lower cabinet from a 4x8 sheet of plywood.
Next, you’ll cut strips of plywood to 1½ inches, and these will serve as the supports for the top panel, the lower panel and any shelves in between. Using this method of building cabinets, you don’t have to cut any dados or rabbets in the side panels, which makes assembly quicker. From there, rip strips of plywood to 3 inches wide, and these will serve as the back stretchers.

Step 3: Assembly
As we start assembly, you’ve already cut your side panels to the proper height, and your shelves, cabinet top and bottom boards to width. The width for these vertical pieces is equal to the desired width of your cabinet minus 1½ inch to account for the plywood side panel thickness.
The top panel support gets attached ¾ of an inch below the top of the side panel. The bottom panel support gets attached flush with the bottom of the cabinet, which allows the bottom panel to sit up 1½ inch from the bottom. This allows space for the face frame. Check for any other side support needed for interior shelving based on your space’s needs.
Next, cut in pocket holes on the shelves and upper/lower panels to attach these to the side panels. Attach the panels to both side panels by placing on top of the supports, attaching with glue and brad nails, and finally driving in the pocket screws. From there, cut the back stretchers to proper width and cut in pocket holes to attach inside the cabinet.
Lastly, add a back stretcher under the top panel, above the bottom panel, and under any shelf panels. Now all that’s left is to attach the face frame with some glue and pin nails, fill any gaps with wood putty, and user a sanderto smooth everything down.
I hope this step-by-step helps you see how simple making accurate, square cabinetry can be! All of the materials including plywood, glue, pocket hole screws and jigs, and the tools necessary to complete this project can be found at The Home Depot. Happy building!


This post was created in partnership with The Home Depot. The author may have received compensation for this article and associated images or video, potentially in the form of products and/or services. All expressed opinions and experiences are the author’s own words.