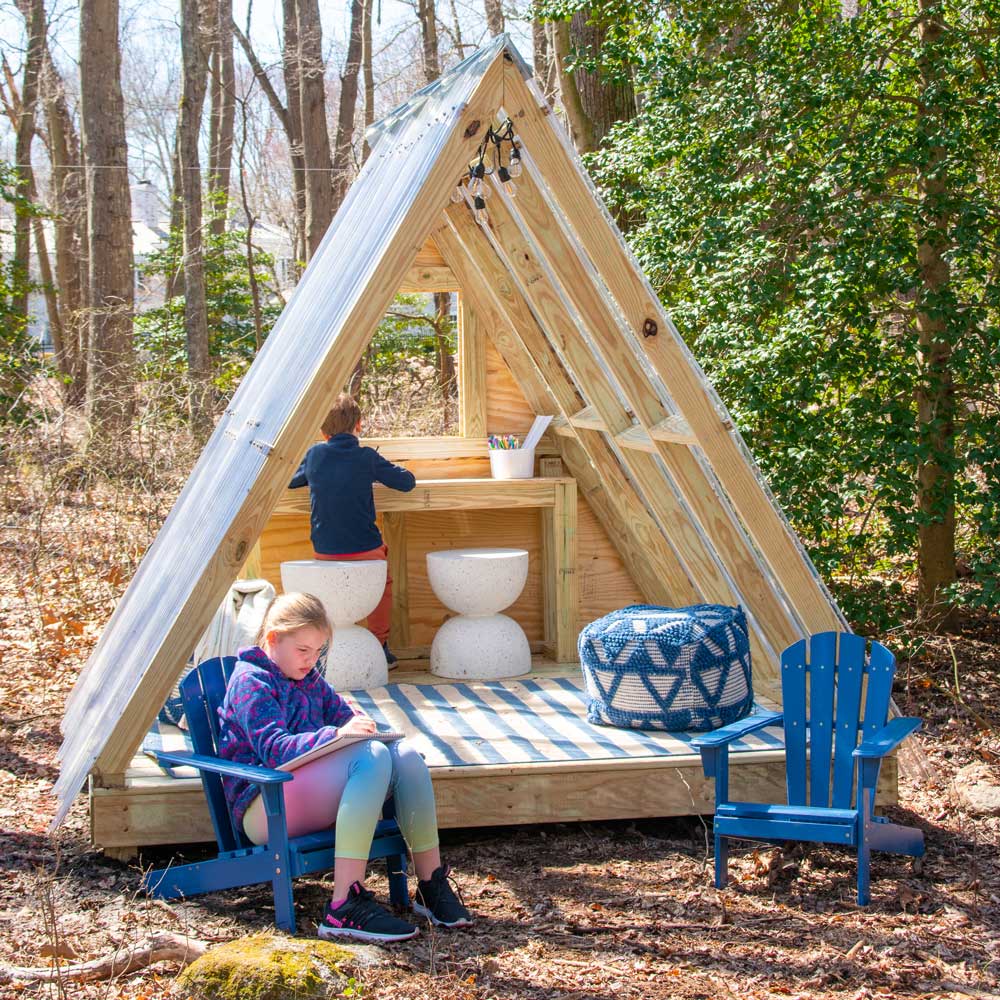
DIY Luxury A-Frame Playhouse
Last updated August 21, 2024

Charlotte Smith shares her chaotic and color-loving adventures in DIY and design on her blog, At Charlotte’s House. Charlotte writes about fixing up her 1850’s historic home, her five small children, and bringing flea market and vintage décor into a modern home. Her design style is fun, personal, and… sturdy! Charlotte has appeared in print and online in Better Homes and Gardens, Fairfield Magazine, Houzz, Good Housekeeping and more. Each month you can catch her on News 8’s CT Style and on WWLPs Mass Appeal. Other on-camera appearances include Rachael Ray, Flea Market Flip and the Hallmark Channel’s Home and Family show.
A Note From The Home Depot
Have you always wanted a chic and stylish playhouse for your kids to treat as their own oasis?
Charlotte Smith from At Charlotte’s House shows you how to create a gorgeous A-Frame Luxury playhouse with help from The Home Depot!
Keep reading to see how she did it.
Table of Contents
How To Build A DIY A-Frame Playhouse
Clear the Area
Mark the Four Corners and Dig Holes for Posts
Set Corner Posts
Build the Playhouse Base
Build and Assemble the A-Frame
How To Build A DIY A-Frame Playhouse
My kids and I made this fun A-Frame playhouse for our backyard playground.
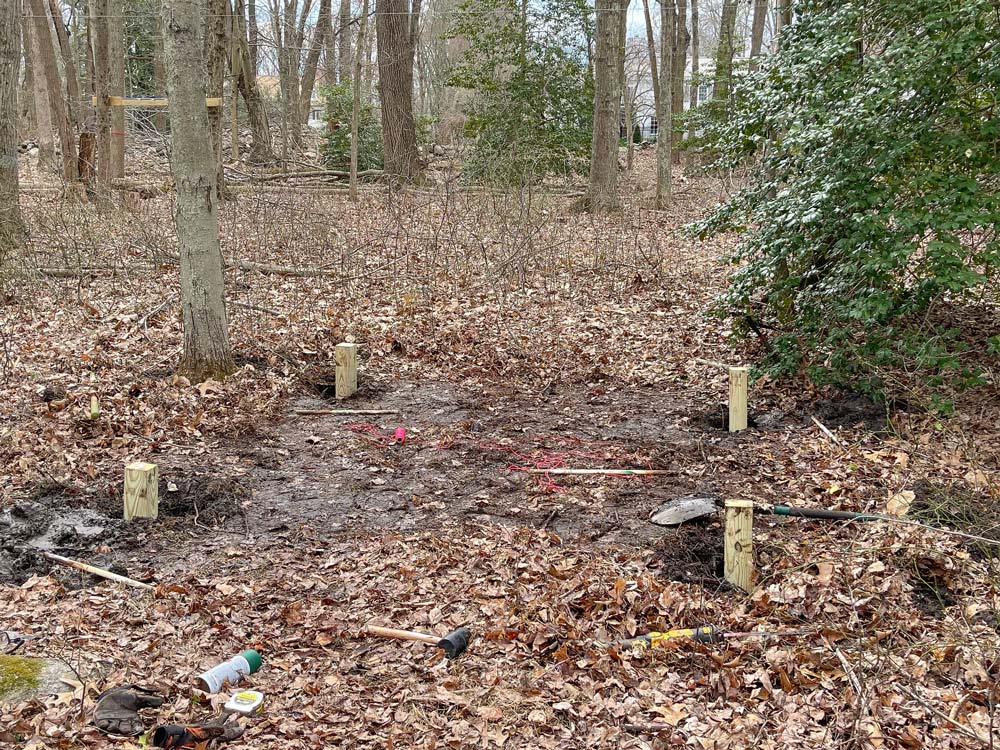
This empty clearing behind our house is the site of the playhouse my kids and I have planned for our outdoor playground. We’re partnering with the Home Depot to bring our playhouse dreams to life! For big projects like this, I involve the kids whenever I can, but there are definitely parts of it that are easier for all of us if I tackle them solo… like the preparation of clearing the area and digging holes for the corner posts. Full materials list at the end of this post!
Clear the Area
I planned the playhouse with lumber in mind so the dimensions are all close to 8 feet to allow for 8-foot dimensional boards. I'm using pressure-treated wood which is definitely more expensive but also means it can be in contact with the ground and hold up to the elements without too much maintenance. I measured an 8x8 foot square and raked away the leaves and debris to make room for the playhouse platform that will be the base. I could have put down a weed barrier, but I’m hoping that without any natural light, anything growing underneath won’t come back this spring.
Mark the Four Corners and Dig Holes for Posts
Once I’d located the four corners, I marked them with dowels and ran a line around the perimeter so I could check for squares. If the diagonals are the same distance, that's how you know you have a perfect square.
I marked corners with spray paint and started to dig. Roots and rocks are pretty common here in Connecticut, so this was definitely the hardest part of this project. 0 out of 10 stars.
Set Corner Posts
For the corner posts, I used a single 4x4x8 pressure treated post cut into four 24-inch sections. I secured each post with quick-set concrete. They’re in the ground about 16 inches and then I poured the concrete into the hole around each post and added water. I mixed the water around a little bit and left it to set up overnight before coming back to build the platform.
Build the Playhouse Base
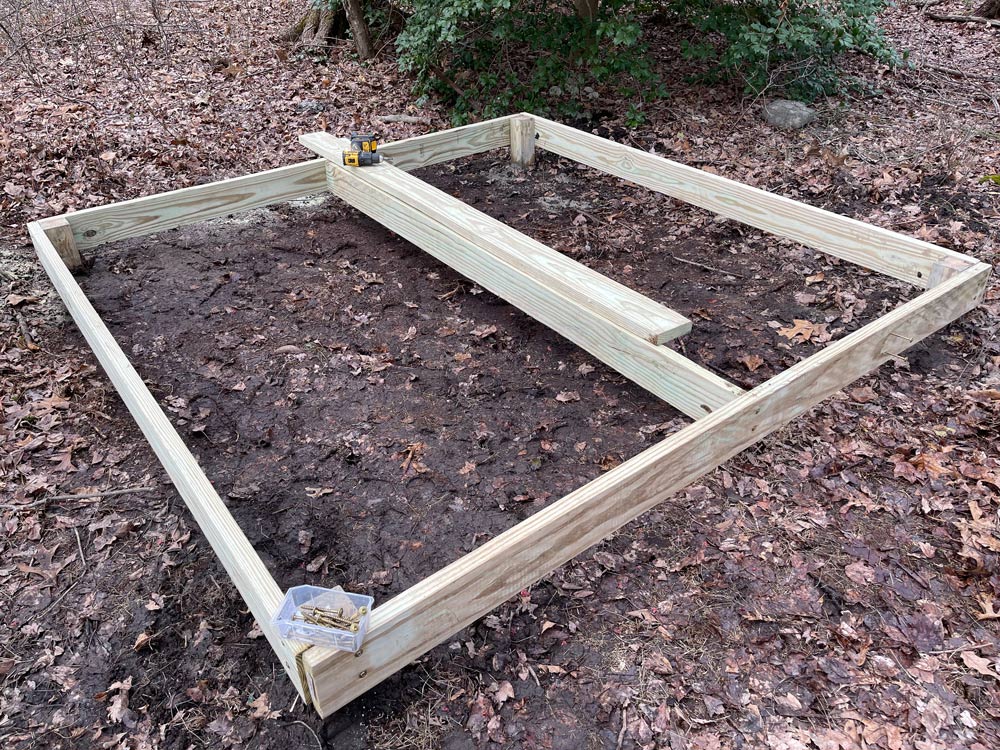
This playhouse will neither be high off the ground nor carry a lot of weight, so I felt comfortable using heavy-duty power lag screws through 2x6 boards (versus something sturdier like carriage bolts). I made sure the boards were all level before screwing them in place. When I’m working solo, I will often drive the screws into the wood just a little bit before lifting the board into place. I screw in one screw on each side at a time, checking for level again, and then tighten everything up.
I added three 2x6 boards as cross beams for some added support. It was helpful to have my quick square and a 4-inch handheld circular saw on site to trim off any excess material so each board could fit perfectly. I used power lag screws to attach these cross beams but joist hangers would work also!
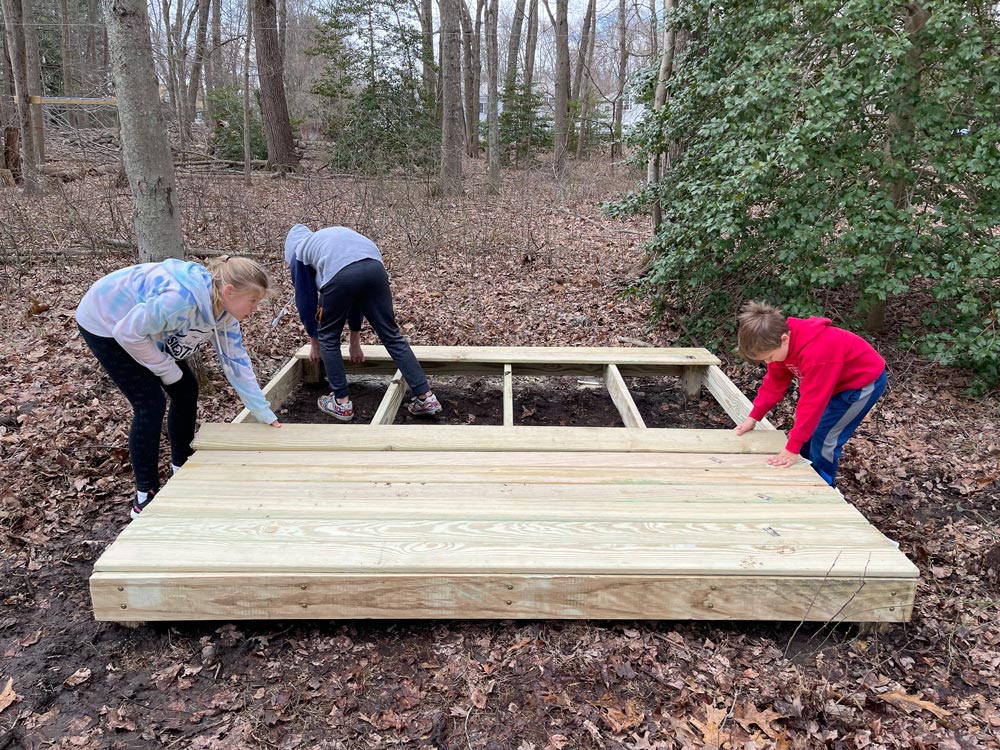
It was finally time for the kids to get involved… They helped me carry all the deck boards out to the woods and took turns laying them out and screwing them in place. When working with the kids, I get the screws started and then make sure each child feels comfortable pulling the trigger on the drill as they apply pressure to the screw in the screws. The pressure-treated wood took a little more muscle to screw into but they all figured it out!
Build and Assemble the A-Frame
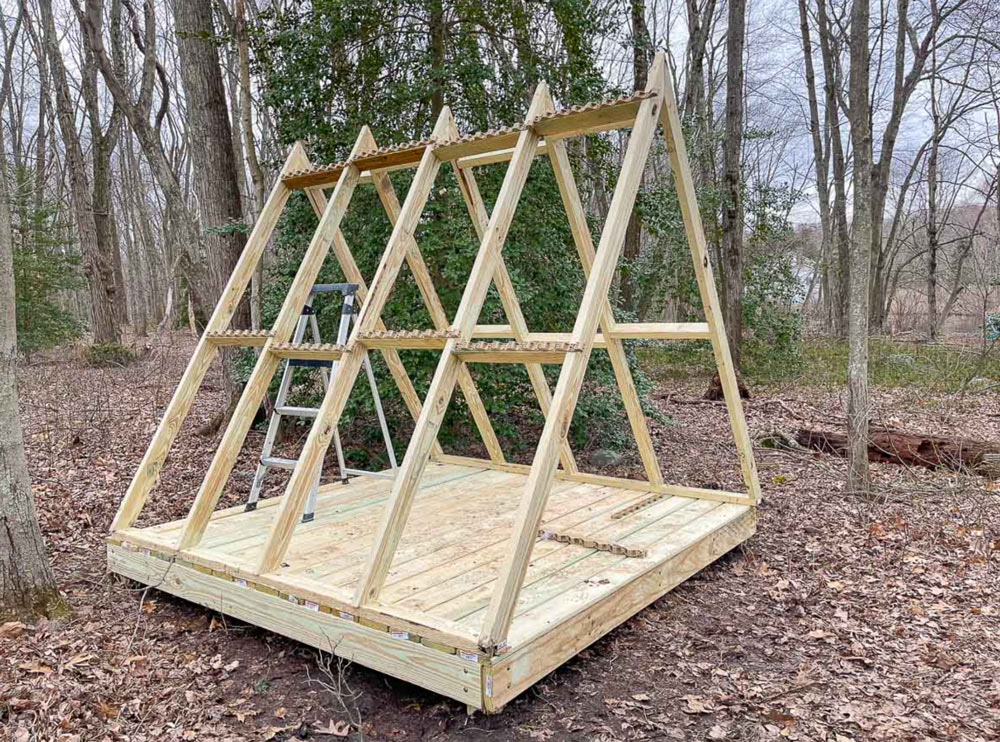
Time to assemble the A-frame. Because this is essentially an equilateral triangle, the angle of the lower corners needs to be 60 degrees and the angles for the top corner will be 60 degrees cut in half (30 degrees) since the two boards will meet in the middle. To achieve these angles with my 2x4s, it meant cutting the top of each board at 60 degrees and the bottom of each board at 30 degrees…channeled my high school geometry class.
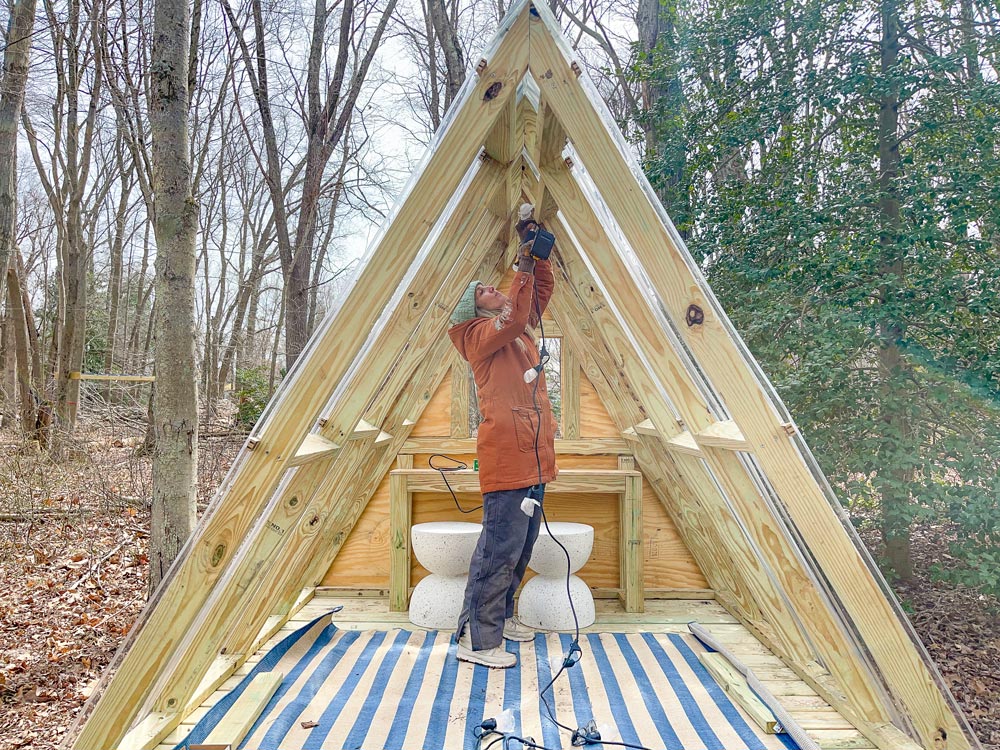
I built each side of the A-frame first using heavy-duty exterior construction screws as if I was framing a wall. The bottom of each side rests on a 2x4 that will be screwed into the platform. The top edges of the A-frame walls will just rest against each other and will also be secured with the exterior construction screws. I needed some help hoisting the two sides into place, but they fit together perfectly and I was able to secure them to the platform while my husband held each wall steady. Then I held the first side in place so he could lift the second wall onto the platform, line the two sides up, and screw it into the base as well.
Add Roof to the A-Frame Playhouse
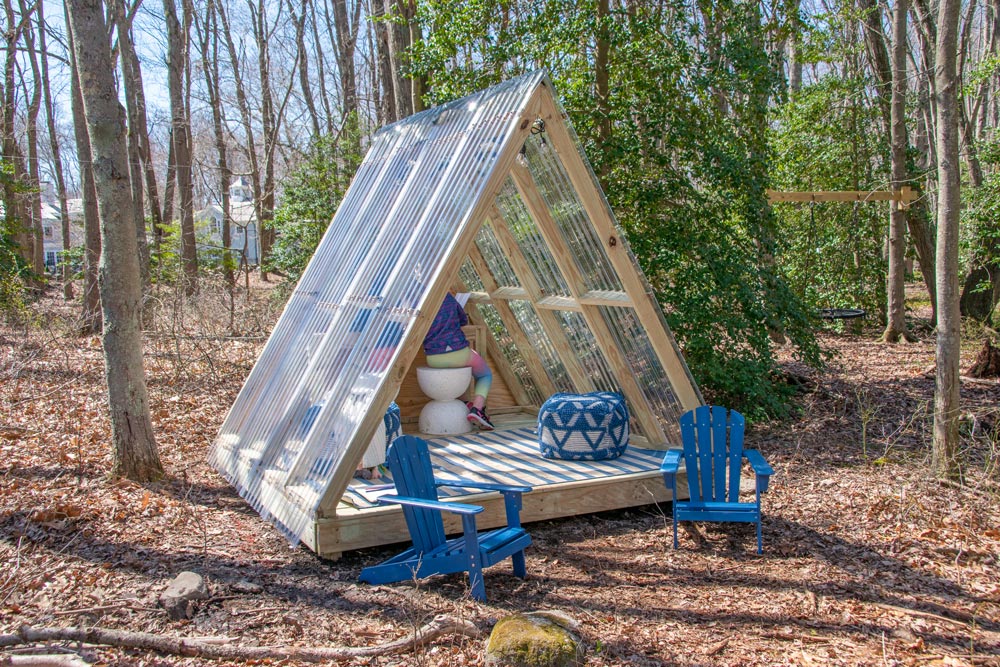
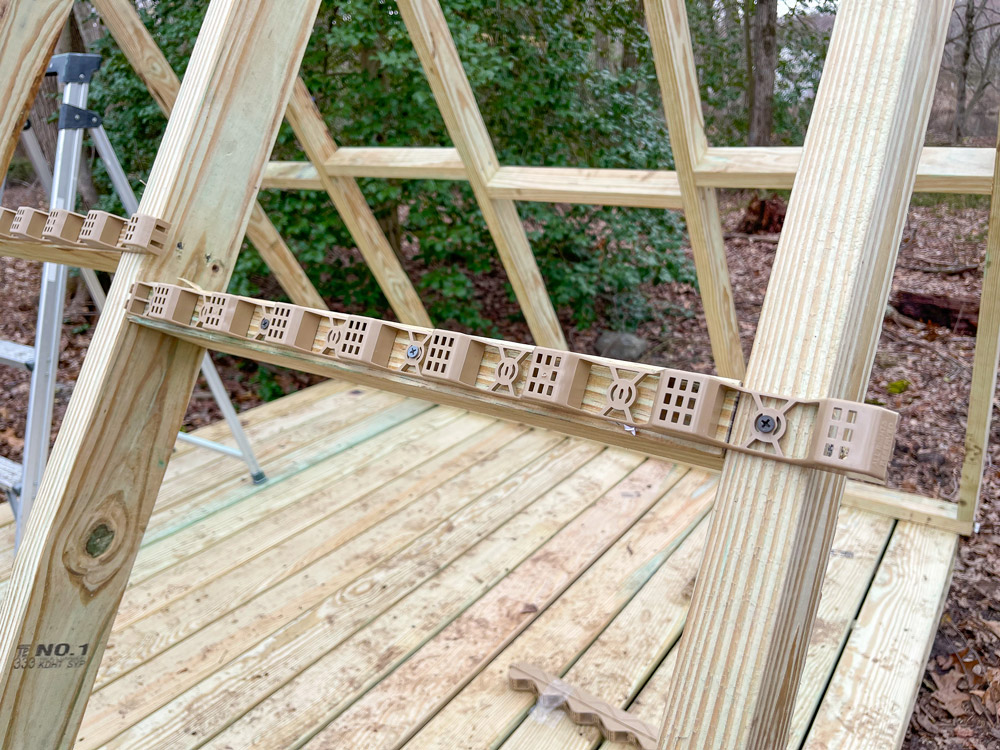
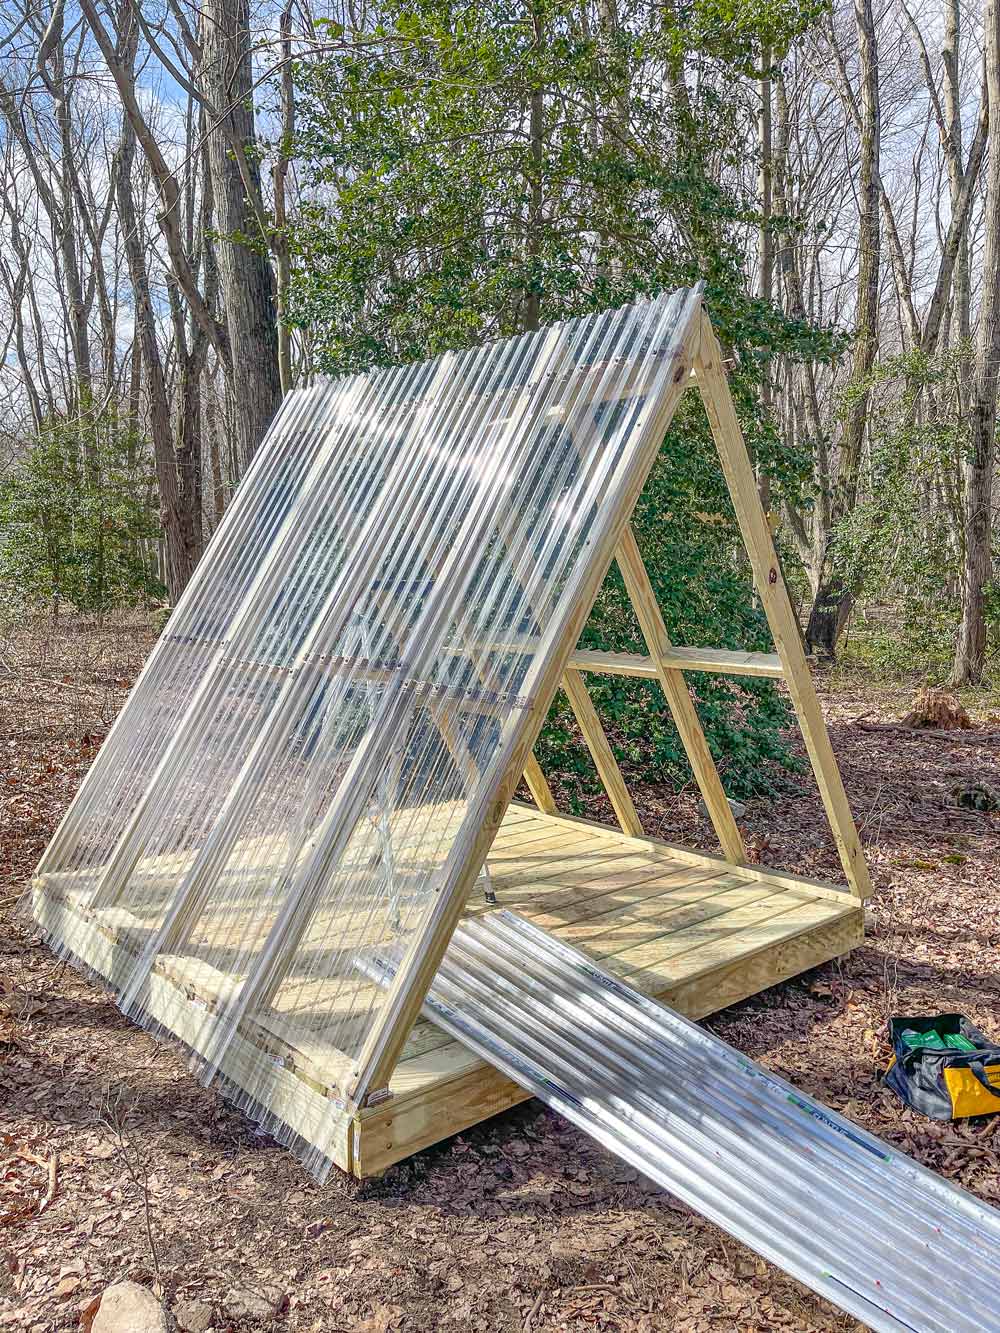
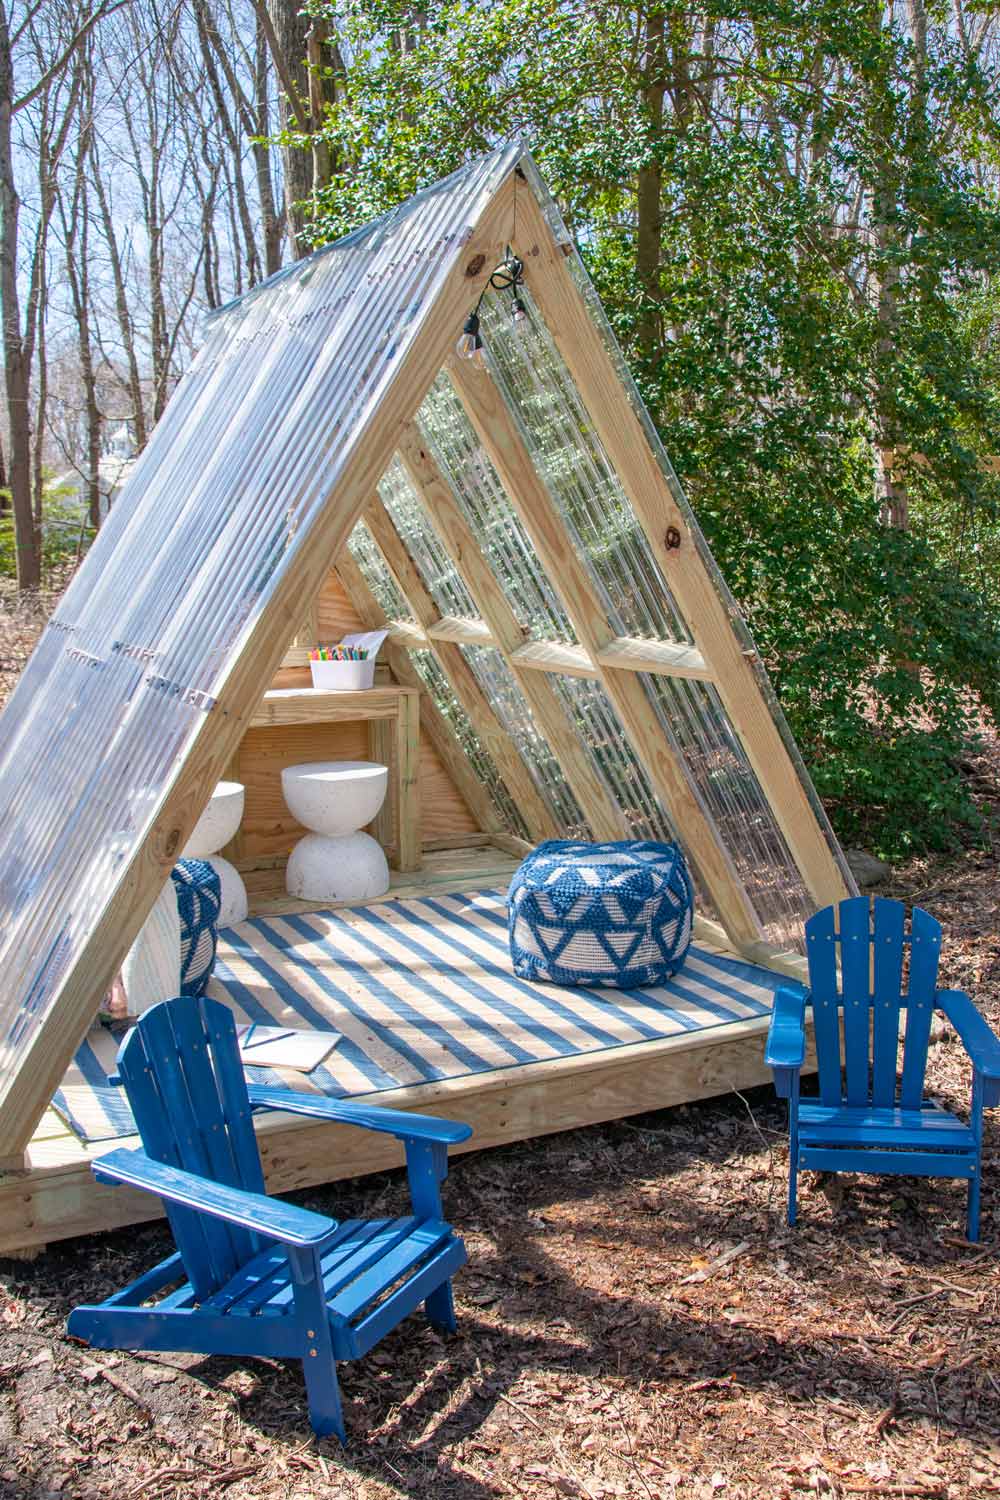
My son and I made a playhouse at our old house and used these same corrugated plastic panels. They’re fairly cost-effective and make for the most magical ambiance inside the playhouse since you can look up through the roof to see the sky and the clouds and trees above. I had to cut the panels down to size since they come in 12-foot lengths. I have a Dremel Ultra Saw with a plastic blade but any small saw should work. To attach the plastic roofing to the A-frame, you need special screws that come fitted with a rubber gasket. I also mounted special plastic support pieces to the 2x4s which support the contours of the corrugated roof and then screwed the plastic roofing in place. To close up the peak where the two plastic sheets meet, I screwed on a pair of plastic roof caps.
Add Back Wall and Built-In Desk to Playhouse
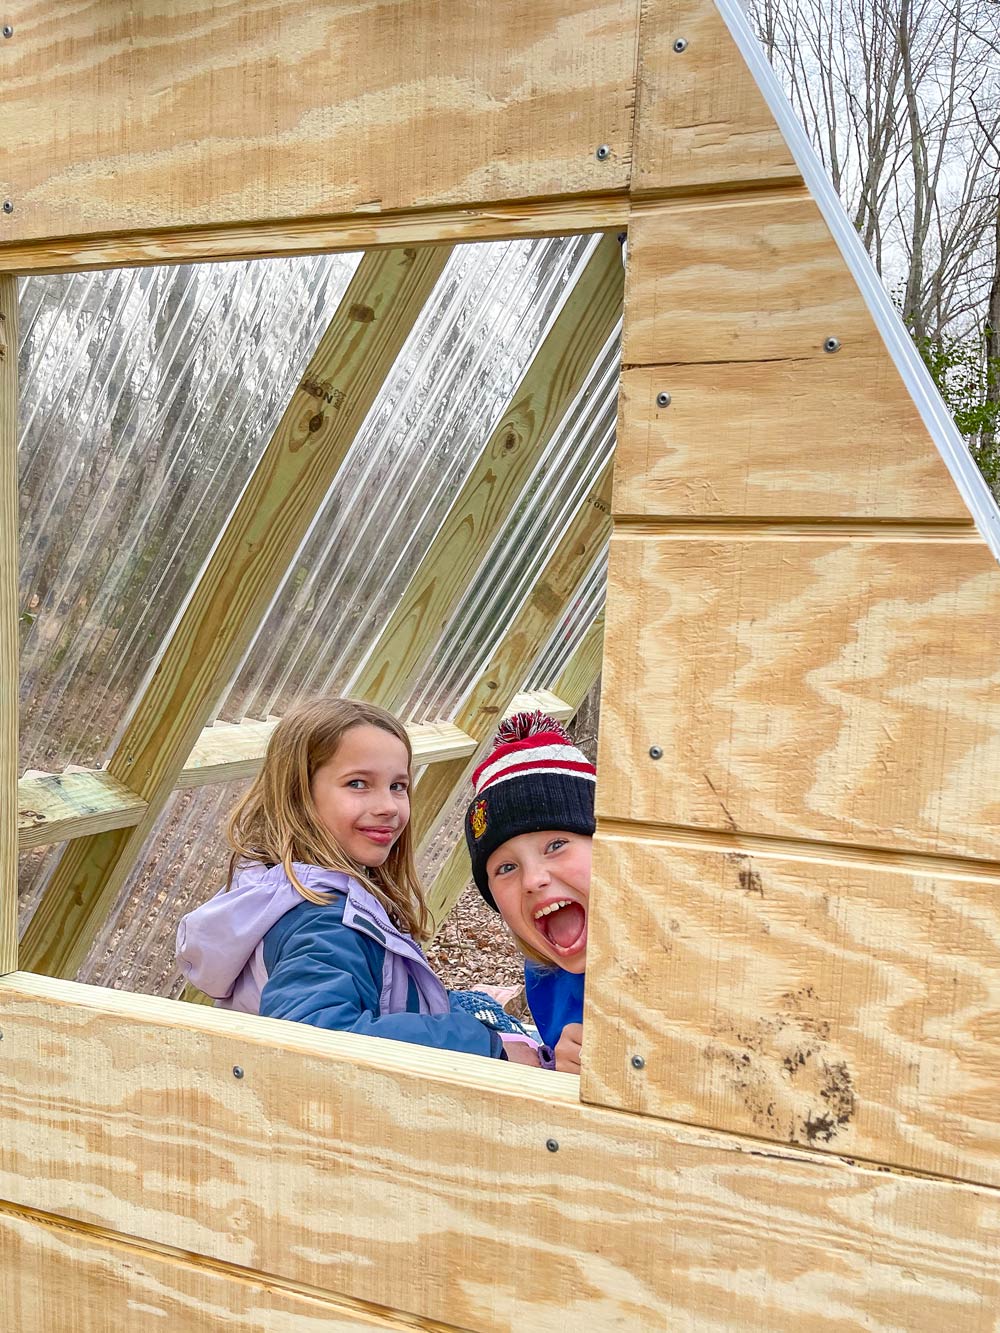
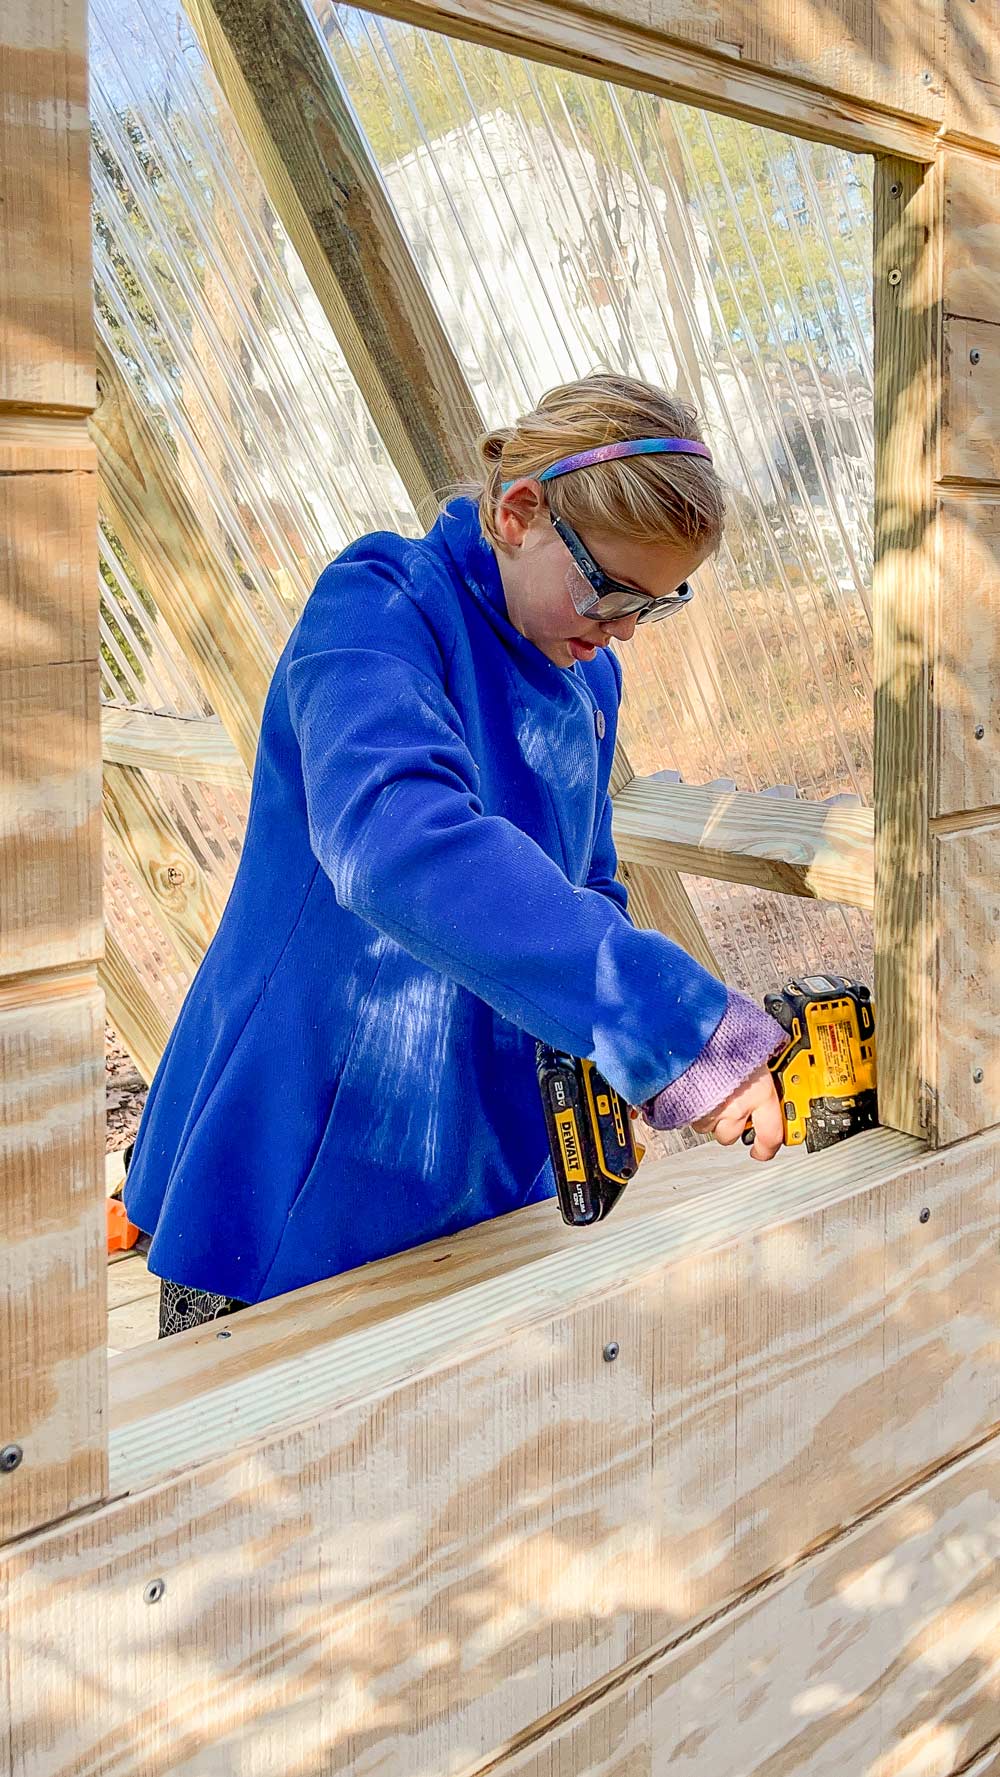
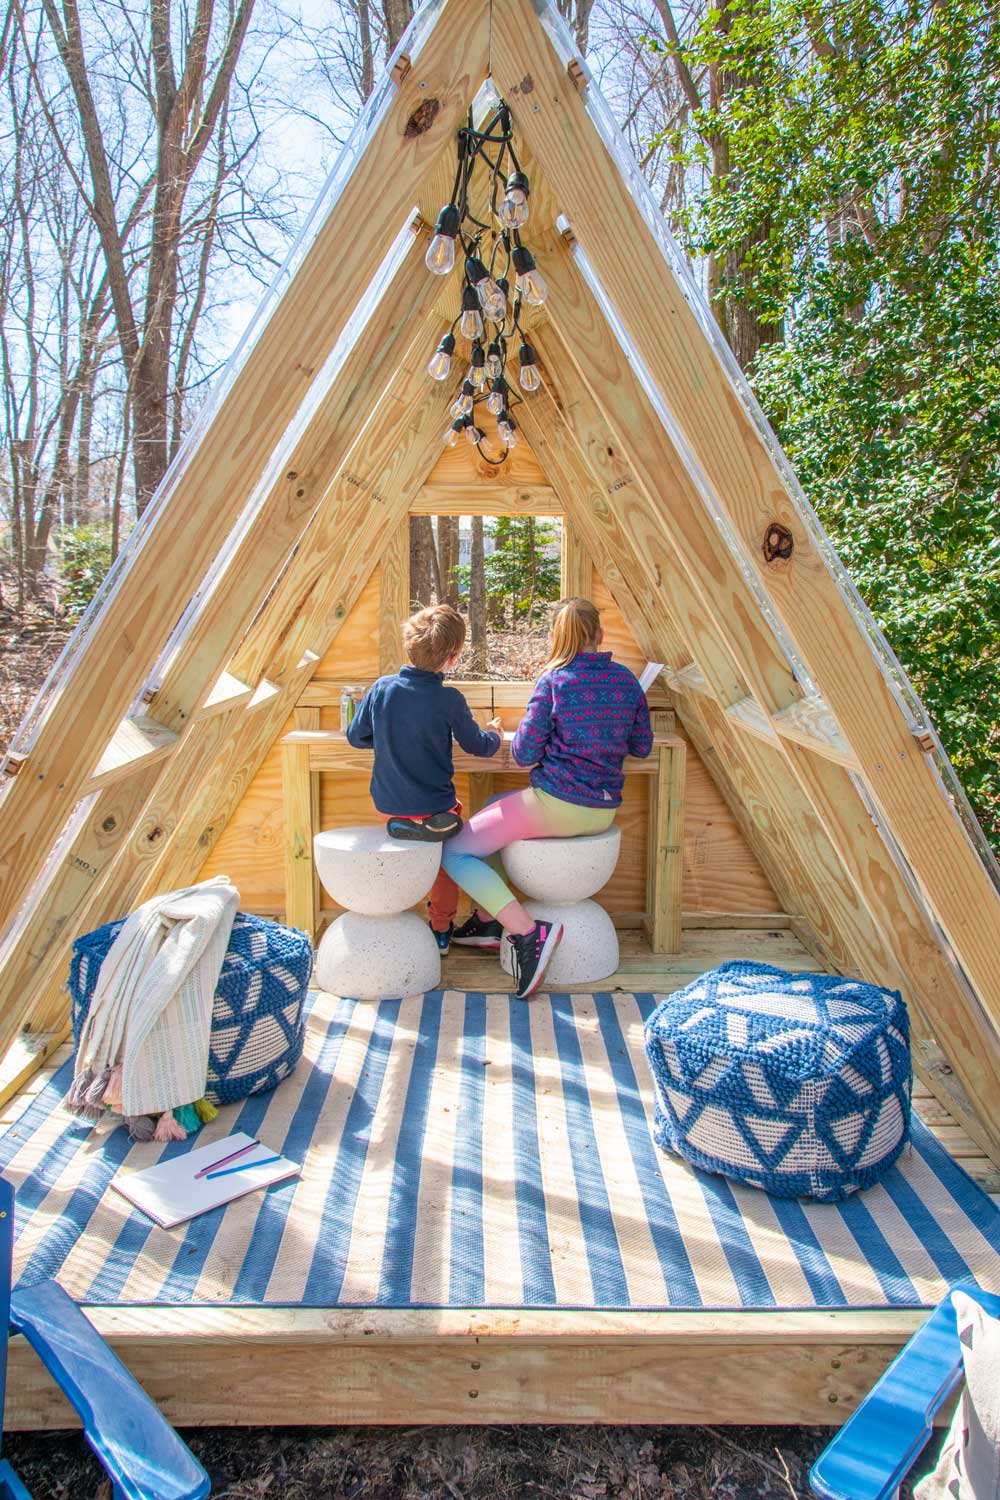
We didn’t want to close up the house entirely, but the kids had a few requests to make a basic playhouse feel a bit more lux… they wanted a place to draw and create, lights, and cozy seating. I loved the idea of building a desk into the back wall, but first, we had to frame it all out. I used leftover 2x4s to create a window and some framework so that I could cut a 4x8 sheet of exterior siding down to size. When the girls got home from school, they helped me screw the back wall in place.
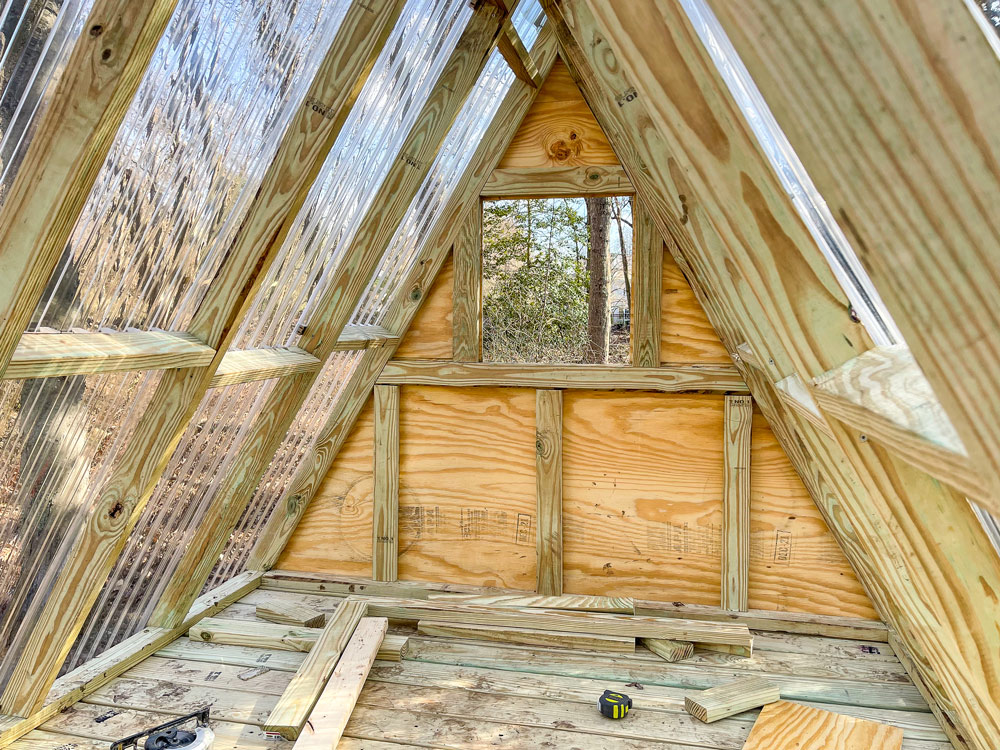
Martha and I used the Kreg jig to add pocket holes to build the deck itself. We anchored the legs and cross supports to the back wall and she finished the desk off by screwing in the top piece.
Add Finishing Touches to Playhouse
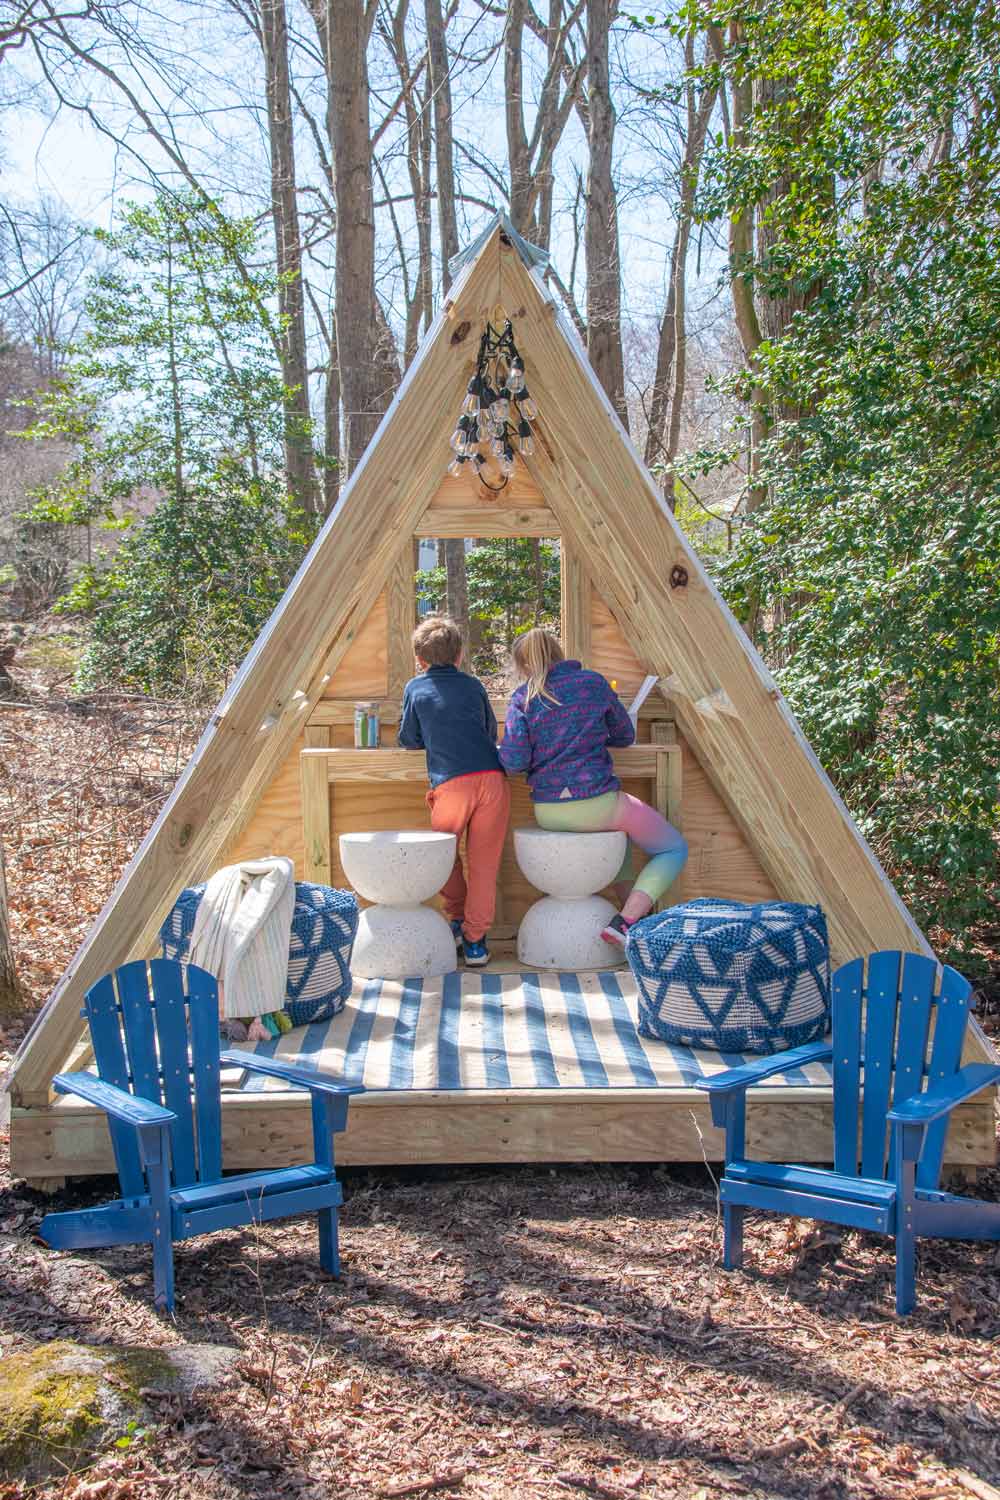
We picked out an outdoor rug to add a little color to the space and brought out a pair of poufs that we already owned.
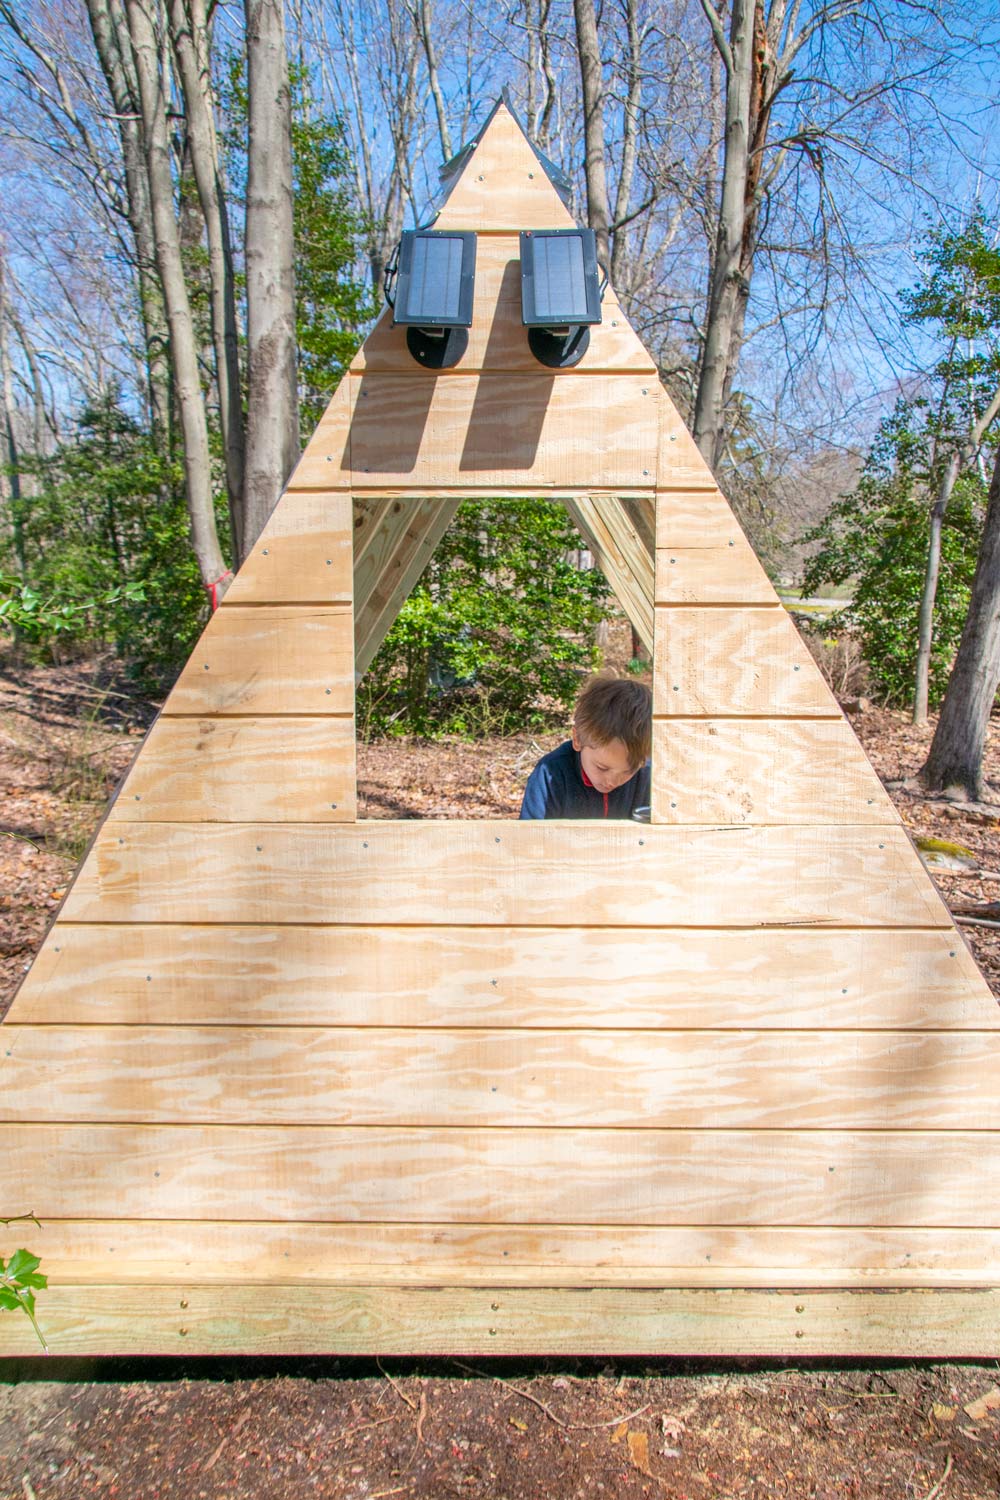
Two fiberglass garden stools are perfect as seating for the desk. I picked up two strands of solar lights and mounted the charger on the backside of the playhouse. Time will tell whether they can pick up enough sunlight once the leaves come in… we may have to twist off the charger panel and bring it into the sun once the trees fill out but I can't wait to see the string lights illuminated through the trees. I used screws to attach the lights along the top eaves of the house and they look great tucked up in there.
The last project we did for the house was to paint and assemble a pair of small Adirondack chairs so the kids could have a place to sit and relax. I primed and spray painted the slats before we assembled which means I could get paint in every nook and cranny. I put together the first one to make sure there weren’t any surprises and then I sat back and let Martha assemble the second one pretty much on her own! She had to check the pictures on the instructions, look for the right pieces, and then carefully follow each step to match the directions!
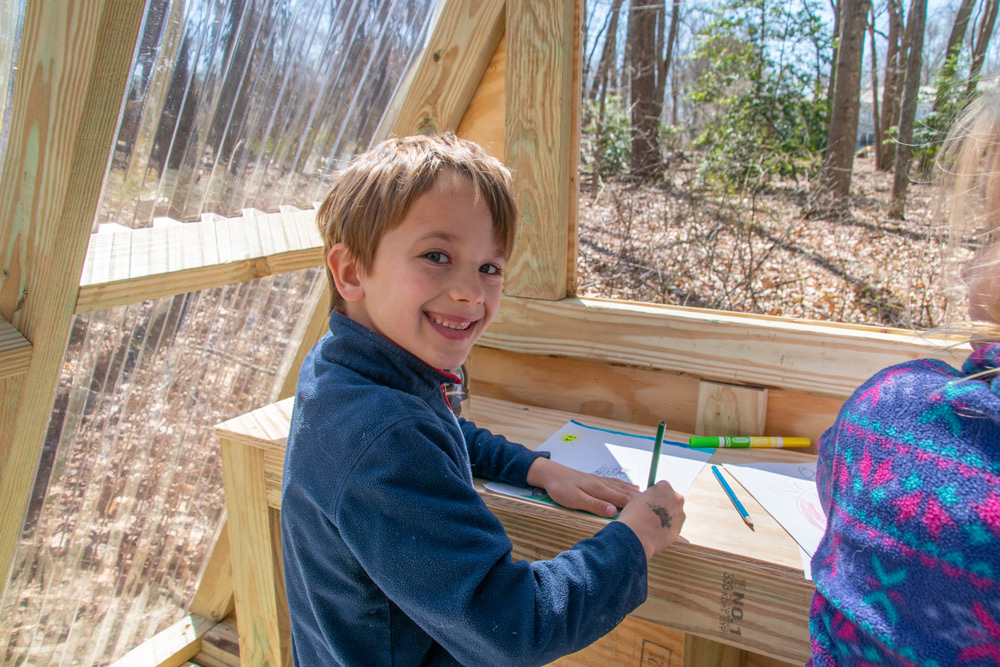
There’s no question that this was a more extensive project for all of us so the kids couldn’t help out as much as they normally do. But I still included them in each phase of the project whether it was asking for them to help bring materials out to the woods or just explaining each step. I’d love to think that one day they’ll look back at this A-frame playhouse in the woods and remember all the boards they helped screw in place and all the brainstorming that went into our sweet little backyard wonderland.
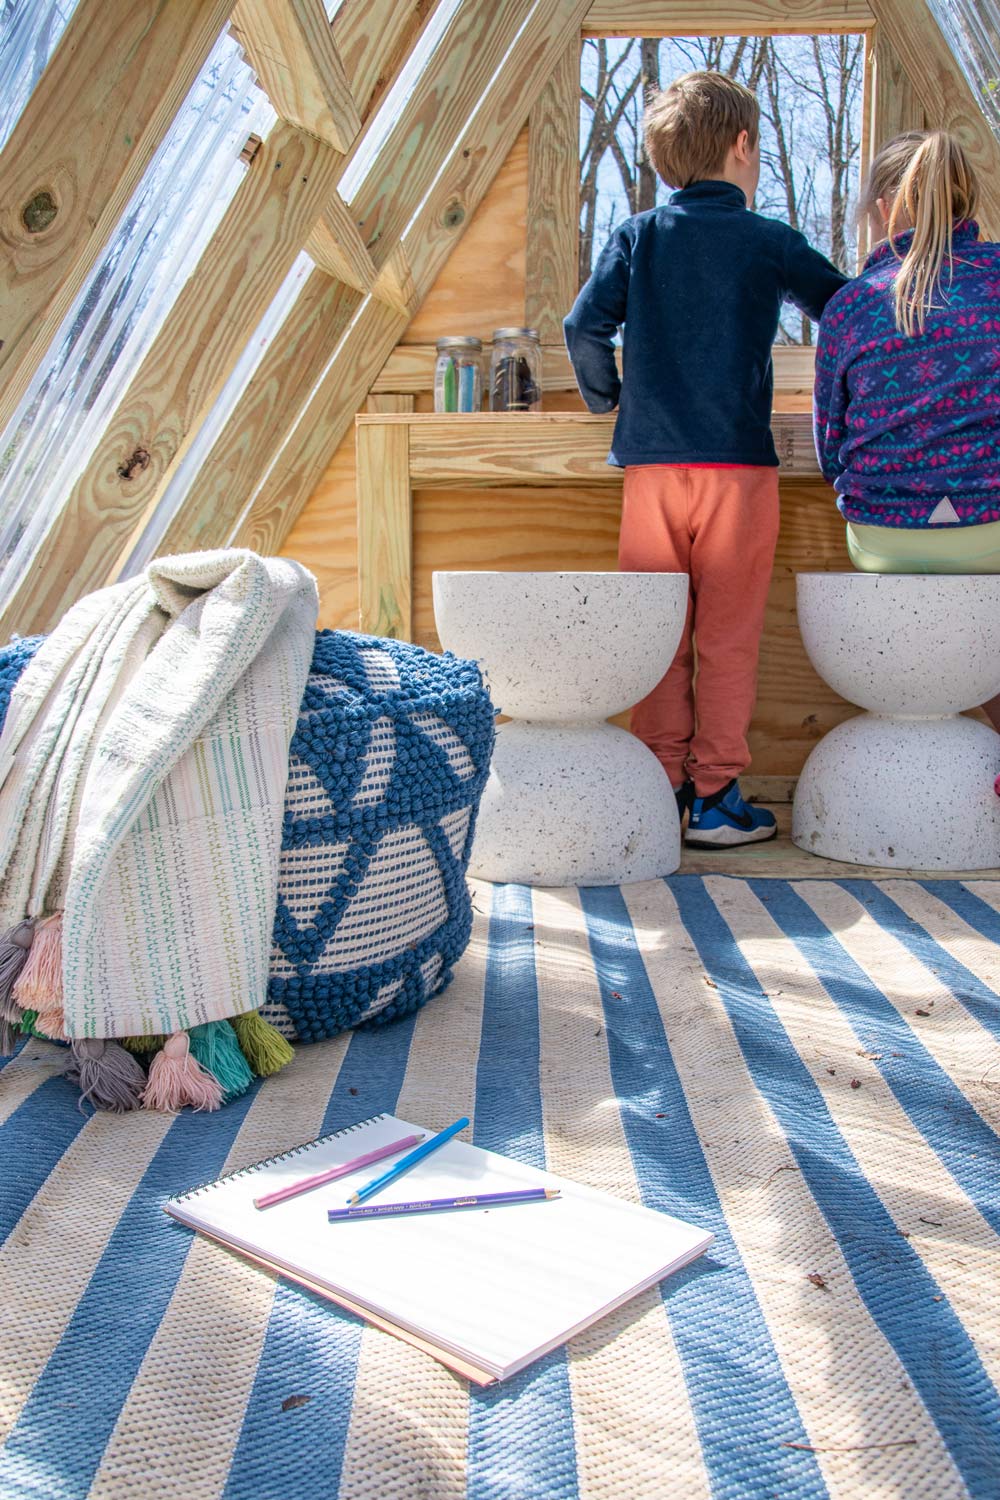
My three youngest kids are CRAZY about this new playhouse. We already have a zipline, a swing and some monkey bars out in the woods so this luxury playhouse is the icing on the cake. They bring out their drawing supplies, have some snacks sealed in mason jars so the animals can’t get them, and generally hang out back there. I can’t wait for the summer to arrive so they can dream up all sorts of adventures for their wooden playhouse!
Check out HomeDepot.com for more DIY On Trend ideas!
This post was created in partnership with The Home Depot. The author may have received compensation for this article and associated images or video, potentially in the form of products and/or services. All expressed opinions and experiences are the author’s own words.


