DIY Tile Fireplace Makeover

Last updated August 21, 2024

As a mother to three girls, Joni Lay is an expert on life with little people. She has a passion for creating dreamy, inspired spaces that are kid friendly, but not juvenile, that adults and children alike will enjoy. Her blog, Lay Baby Lay, is filled with inspiration for simple do-it-yourself projects, thoughtfully curated ideas for children's rooms and playrooms, and a dose of her experience throughout the crazy but wonderful journey of being a mother. Her hope is to leave her readers inspired and equipped to make their homes bright and happy spaces where their families can grow and thrive. Joni lives in Atlanta with her husband, Chip, and their three daughters Vivi, Brigette, and their newest little addition, Ellie James.
A Note From The Home Depot
Joni Lay of Lay Baby Lay used these beautiful peel and stick tiles to give her tile fireplace a total transformation in just one hour. Read how this simple, refresh brightened up the whole living room!
Table of Contents
DIY Tile Fireplace Makeover
DIY Tile Fireplace Makeover

I just finished updating my tile fireplace with Home Depot’s peel and stick Smart Tiles. The process was so simple and mess-free, and the end result is beautful. I’m excited to share the steps with you here so you can do the same in your home!

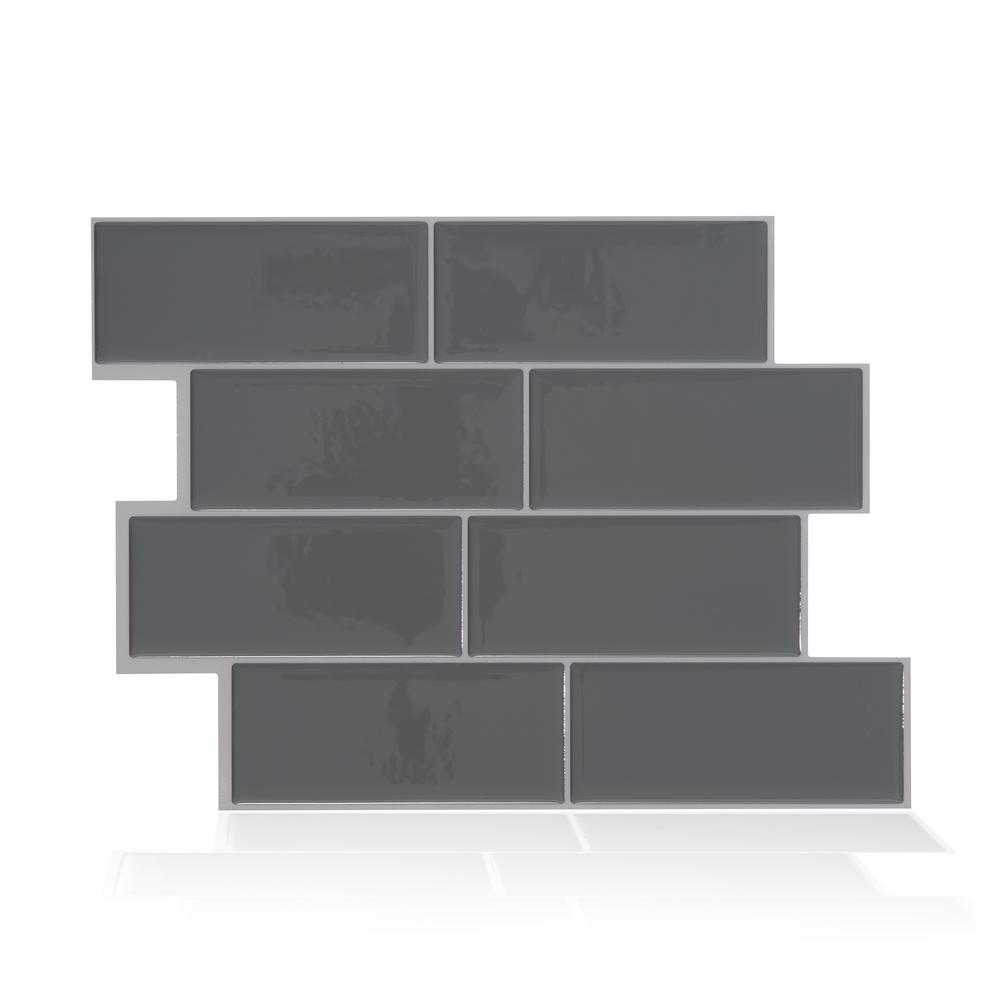
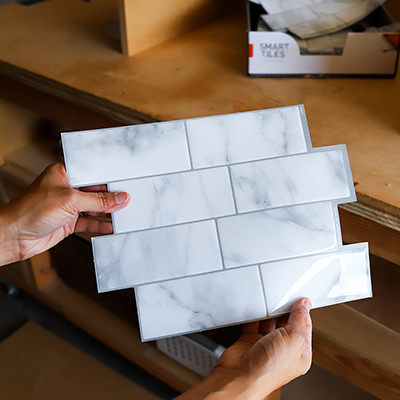
These peel and stick tiles have a high-end look, are heat and humidity resistant, and will stay in place as long as you want them. They are a great solution when you want to update old tile fireplaces without the expense and mess. All you need to get started are the tiles of your choice (I went with the Metro Grigio – that lovely gray!), some scissorsand a sharp utility knife.

This is what I started with; many of these tiles were broken and cracked. Plus, I was really tired of the dark black. It made the whole room feel darker to me! To get started, I cleaned the tiles and wiped them down so they were dry and clean.

Next, I pulled out my tools and the tile, and I was ready to get to work!

I started in the top left corner. To begin, pull back the paper from the corner of the tile until it is about a third of the way pulled back, and stick the exposed adhesive to your surface. Then, pull back the rest of the backer. Smooth the tile down with your hand. My tile fireplace has a little space between the mantel and the tile, so I was able to stick part of it behind the mantel to start.

The peel and stick tiles have a little extra space on one side so you can overlap them slightly so there are no gaps. Super easy! Plus, they are very tacky and stick well to a surface, but you can peel them up and re-position as needed, so don’t be afraid of making a mistake.

My fireplace also has a rounded edge, so I just smoothed the peel and stick tiles over the rounded edge. They stick perfectly, so it’s a seamless looking replacement.

I ended up using the scissors more than the utility knife, but use what you are comfortable with! For the sides, I held up one of the peel and stick tile panels, marked where the edge of the old tile was and trimmed the tiles so they would fit perfectly. You could also lay the tile down first and then trim with a sharp utility knife if you prefer. They are really easy to trim!

The whole project took me about an hour, start to finish, which is pretty great considering how involved it would have been to remove and replace the old tile fireplace.

The new tiles look amazing, and it’s really hard to tell they are peel and stick! I honestly wouldn’t notice if I hadn’t been the one to do it. I love how the grey Metro Grigio color lightens up the room so much!

I’m so happy I was able to use these peel and stick tiles to transform my old tile fireplace! I have had such a hard time with this room because it felt like everything I did just didn’t really mesh well with the old black tile. Now it feels so much happier and inviting!

Thanks so much to The Home Depot for working with me on this, and helping me to brighten up our living room!
Follow our Inspiring Tiles board on Pinterest for more tile inspiration. Find more tile ideas on The Home Depot Blog.
Find more easy-to-install, peel-and-stick Smart Tiles at The Home Depot.
This post was created in partnership with The Home Depot. The author may have received compensation for this article and associated images or video, potentially in the form of products and/or services. All expressed opinions and experiences are the author’s own words.