Fighter Pilot Box Costume
Last updated August 21, 2024

Amy Baesler is the tool lover behind Hertoolbelt, a DIY & woodworking blog. Hertoolbelt focuses on home improvement projects, woodworking, home decor, tool reviews and crafts.
A Note From The Home Depot
Creating an out-of-this-galaxy DIY just got easier. In this blog post, Amy Baesler shares step-by-step instructions so you can recreate this fighter pilot box costume. To explore official Star Wars products available at The Home Depot, click here.
Table of Contents
Fighter Pilot Box Costume
Grab Your Tools and Materials
Step 1: Main Box
Step 2: Create the Nose
Step 3: Thrusters
Step 4: Make the Wings
Fighter Pilot Box Costume
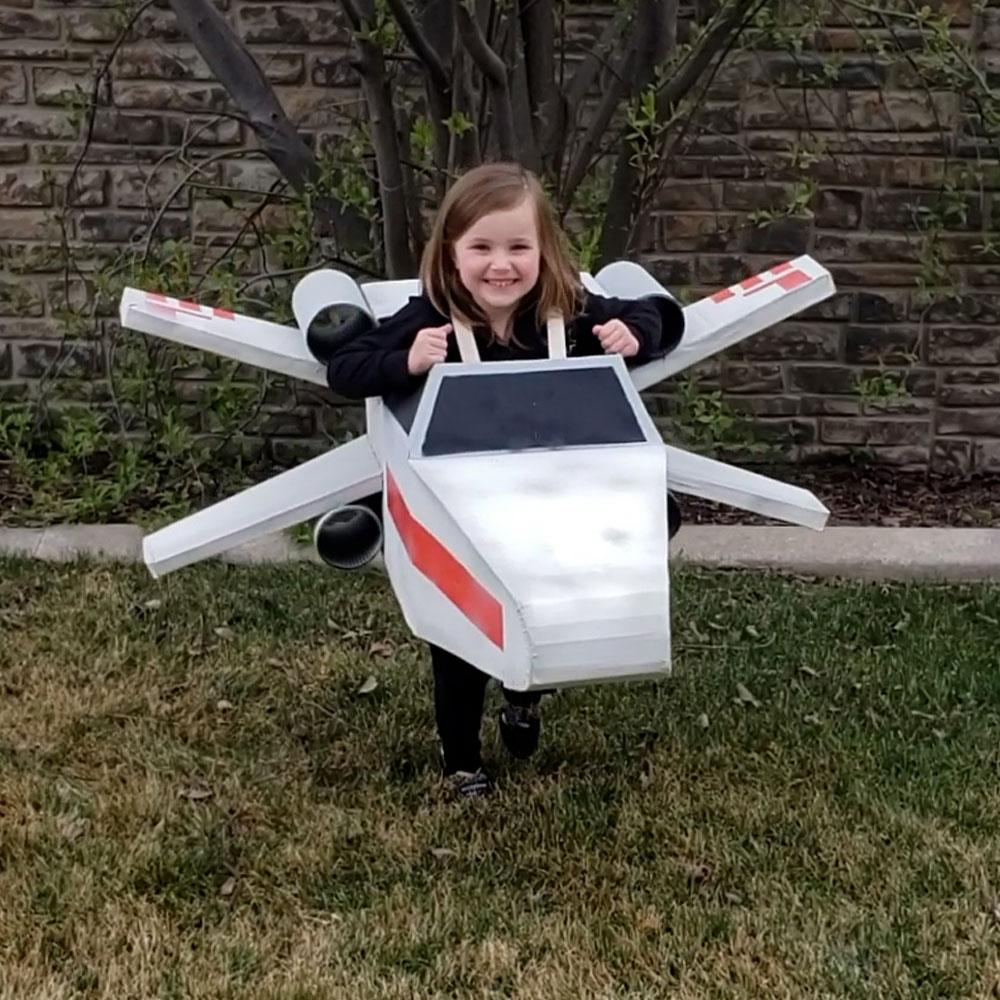
Create your own fun space-themed costume simply out of moving boxes. This rocket is a fun project for your space and science fiction enthusiasts.
Grab Your Tools and Materials
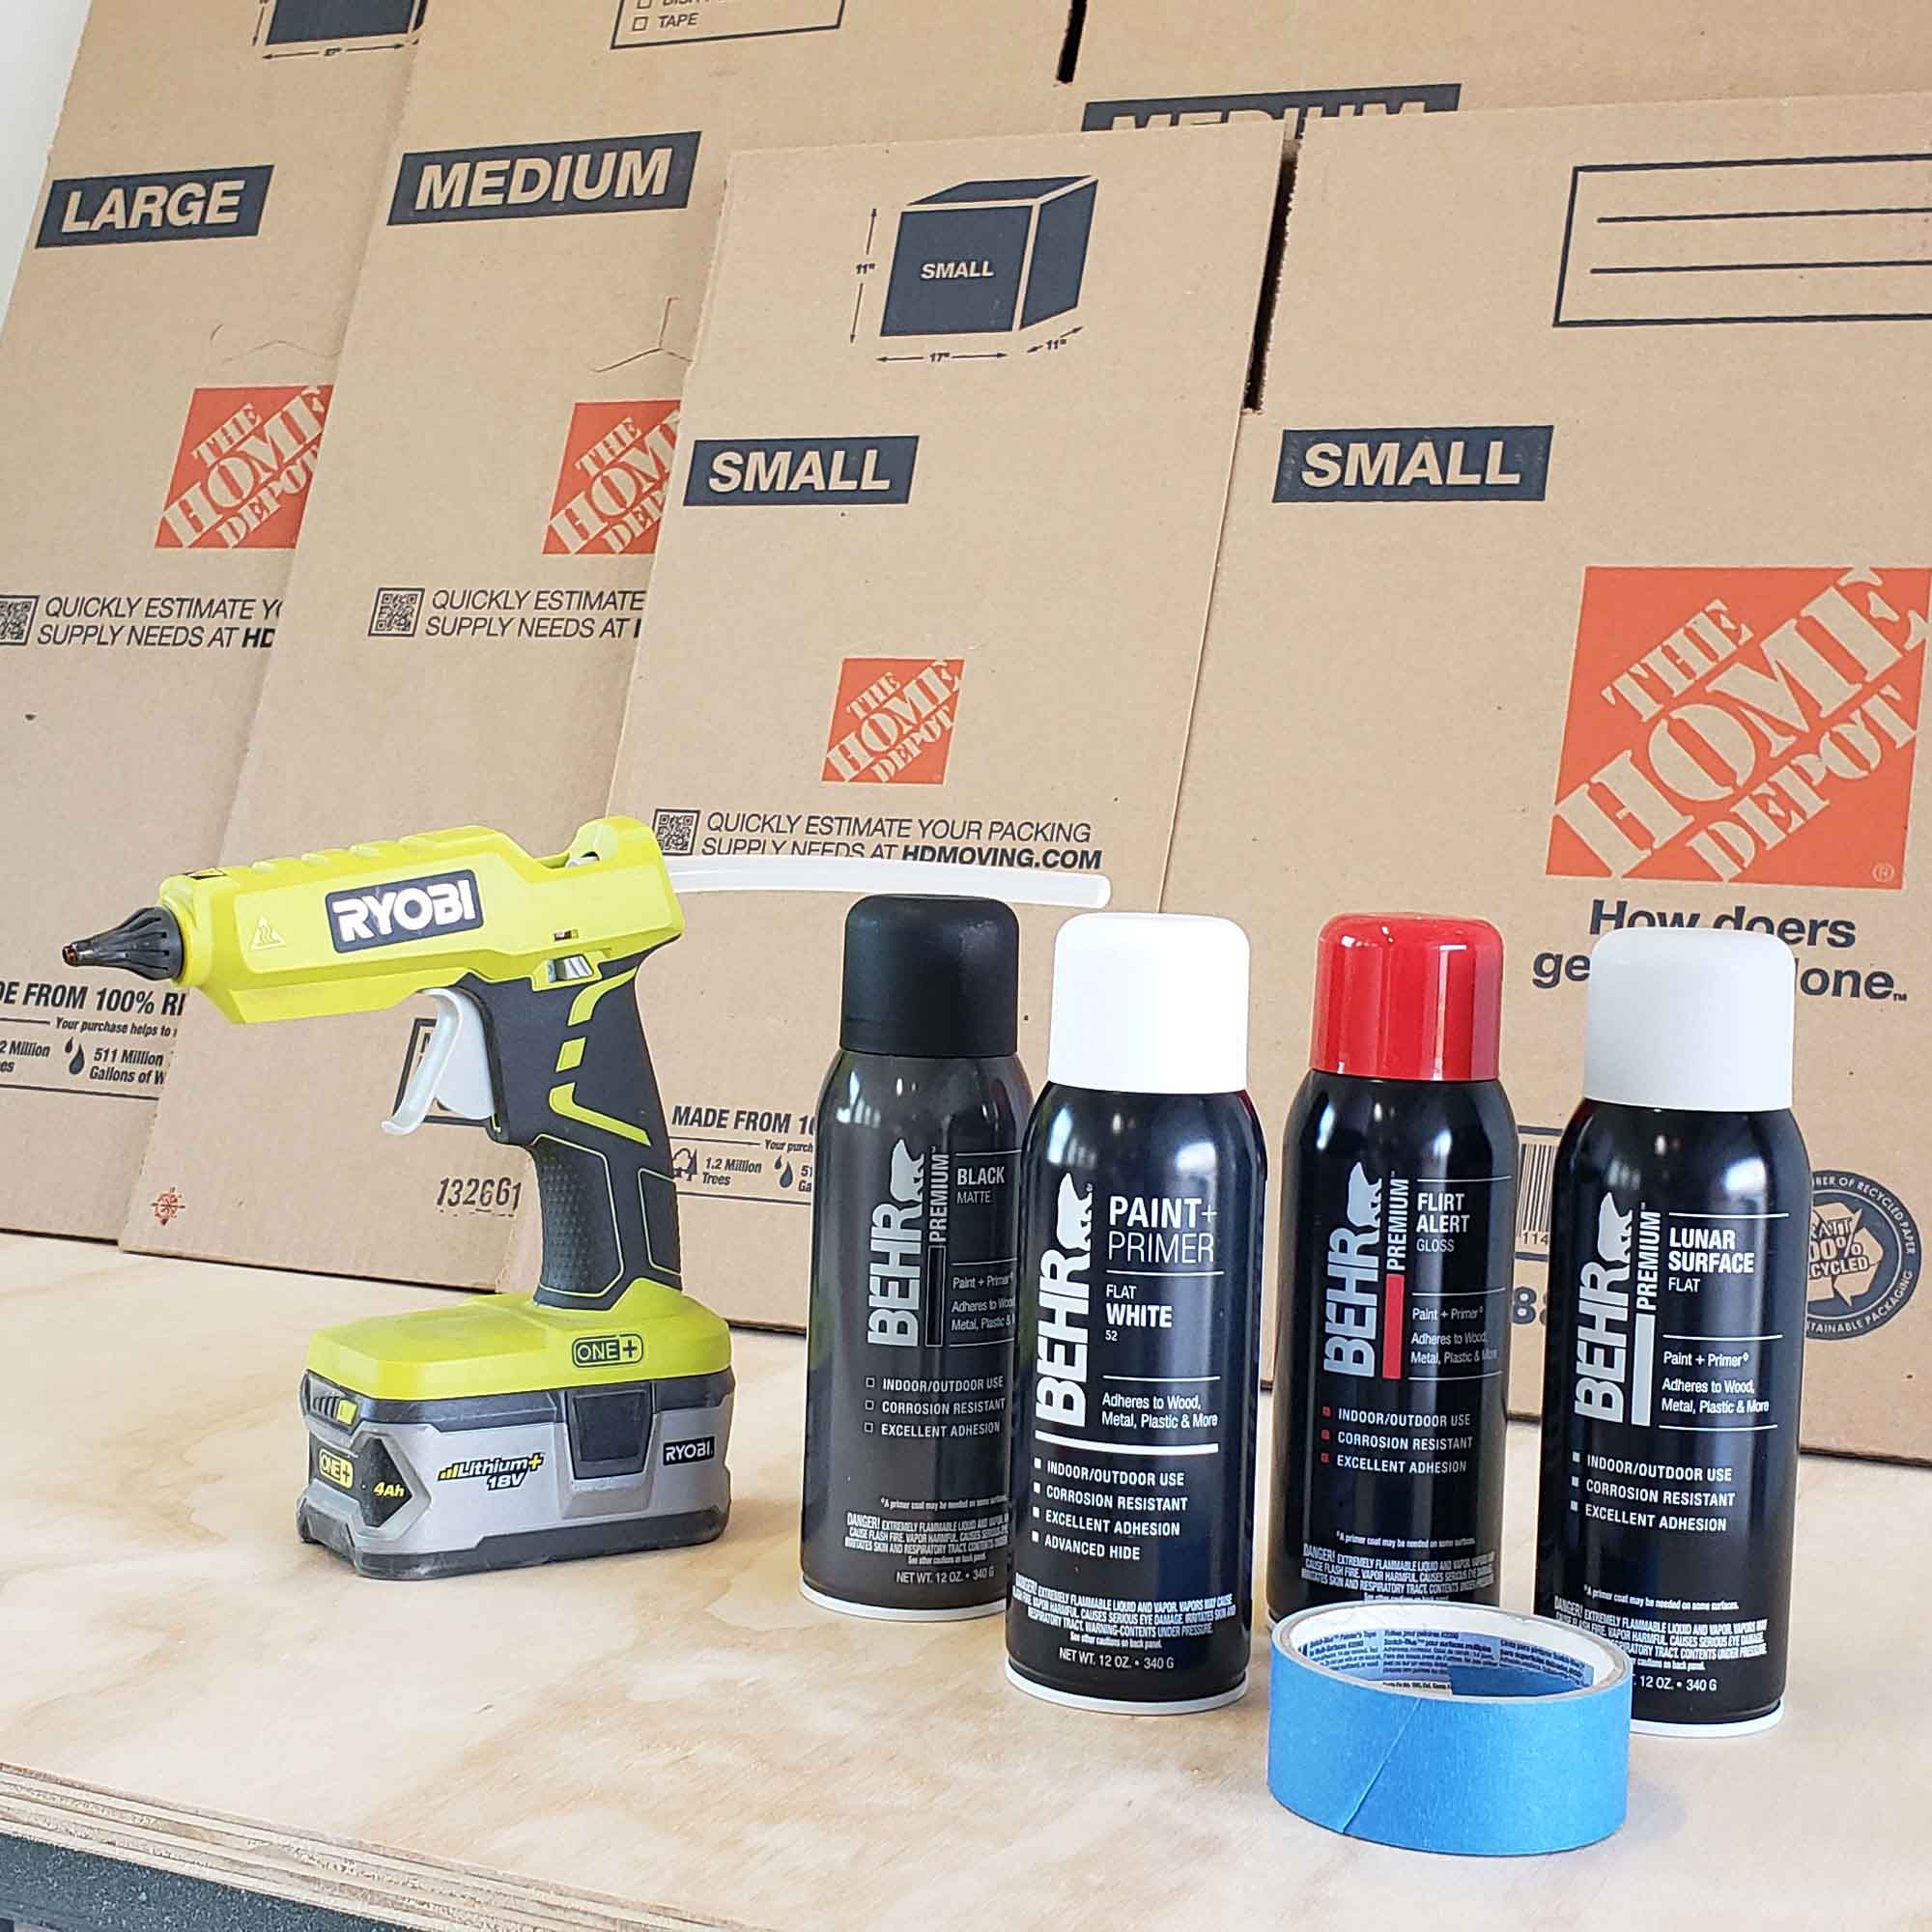
Tools:
- Razor Blades
- Hot Glue Gun
- Ruler
- Straight Edge
Materials:
- 1 Medium Shipping Box
- 1 Small Shipping Box
- 1 Large Shipping Box
- 1 Self Stick Single Face Roll
- Hot Glue Sticks
- Painters Tape
- Rope/Straps
- Spray Paint Primer
- Behr White Spray Paint
- Behr Black Spray Paint
- Behr Gray Spray Paint (Lunar Surface)
- Behr Red Spray Paint (Flirt Alert)
Step 1: Main Box
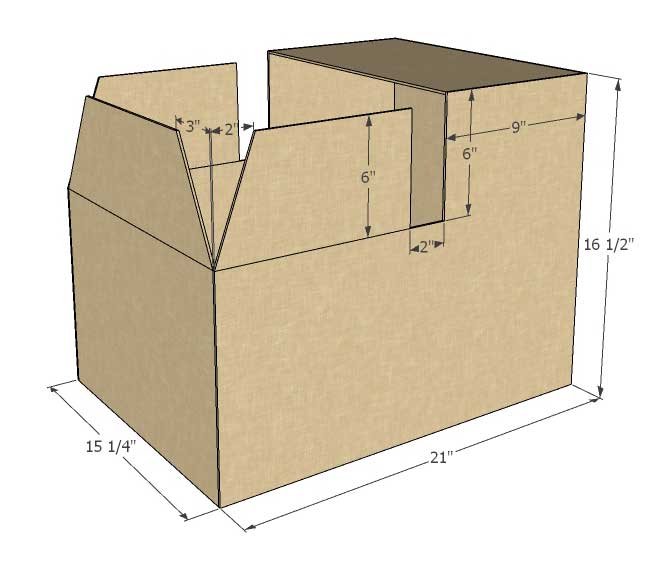
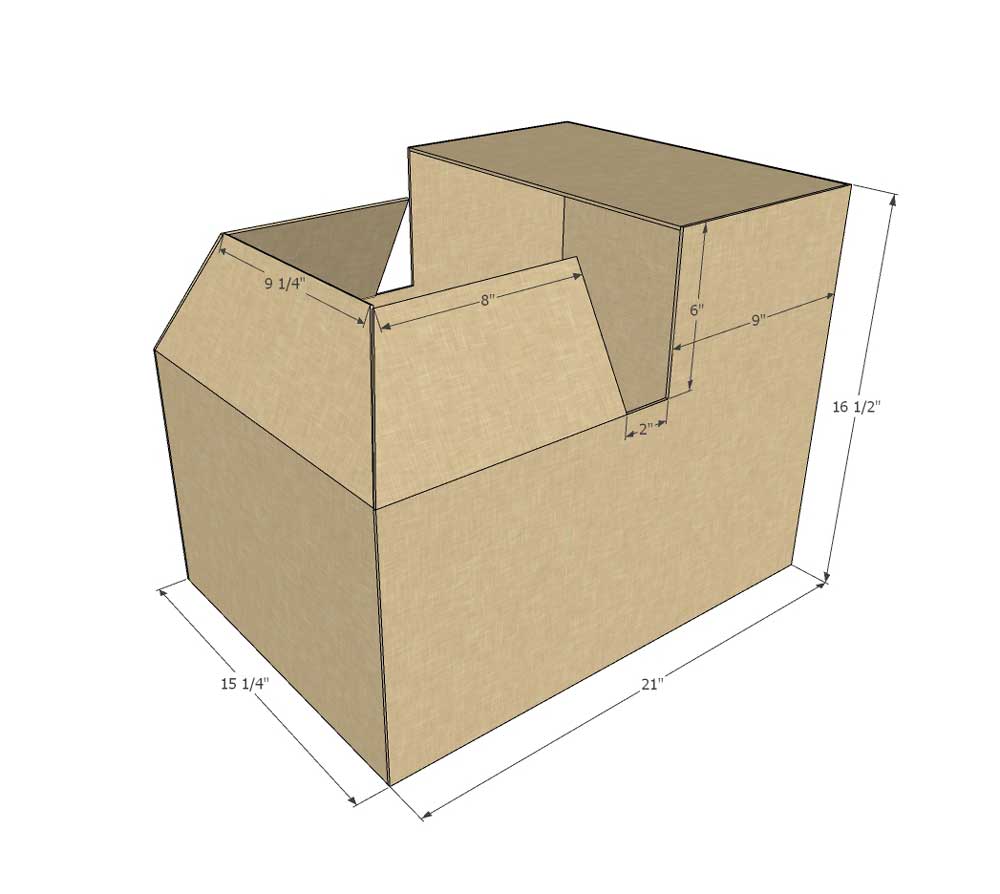
Assemble a medium cardboard box (approximately 15 ¼” x 21” x 16 ½”). Cut top and bottom of box leaving 9” x 15 ¼” in the back. Cut down 6” from box top at 9” from back and 11” from back.
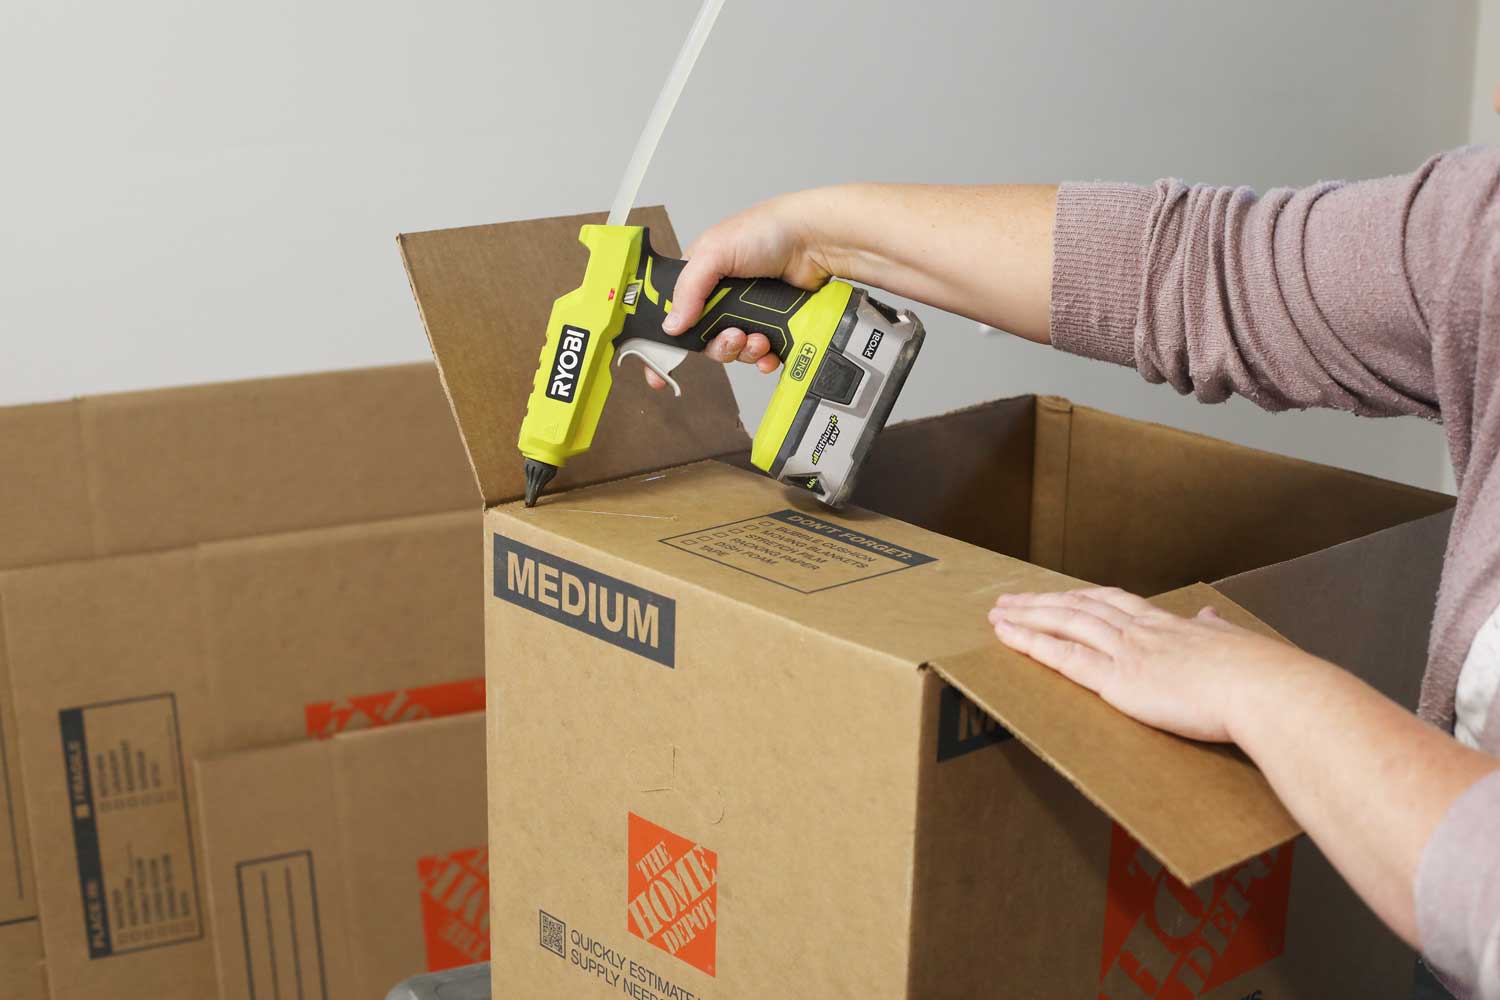
Measure over 2” from the front side flap, measure down 6” on the front corner, and cut between the 2” mark and 6” corner mark. Measure over 3” from each front flap top corner, measure down 6” on the front corner, and cut between the 3” mark and 6” corner mark. Glue the front and side flap diagonal cuts together.
Step 2: Create the Nose
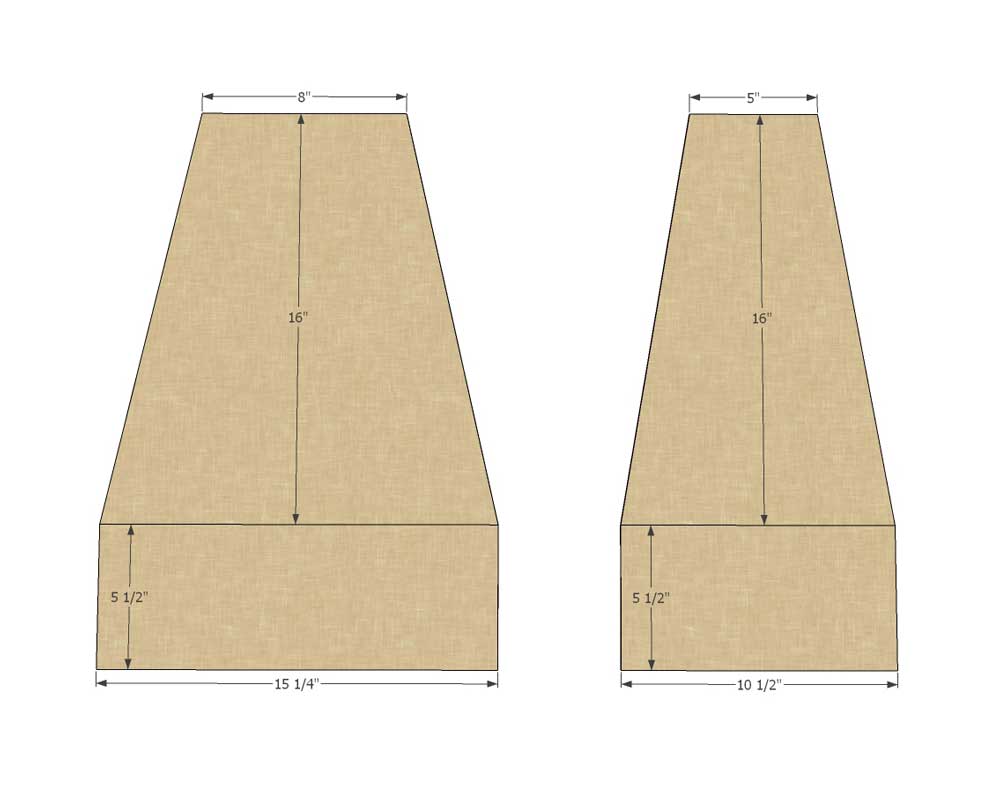
Cut 2 pieces that are 15 ¼” x 21 ½”, mark up 5 ½” from bottom (the 5 ½” can be a flap). On the top, find center and mark 8” a cross. Cut diagonal from 8” top marks down to 5 ½” side marks.
Cut 2 pieces that are 10 ½” x 21 ½”, mark up 5 ½” from bottom (the 5 ½” can be a flap). On the top, find center and mark 5” a cross. Cut diagonal from 5” top marks down to 5 ½” side marks.
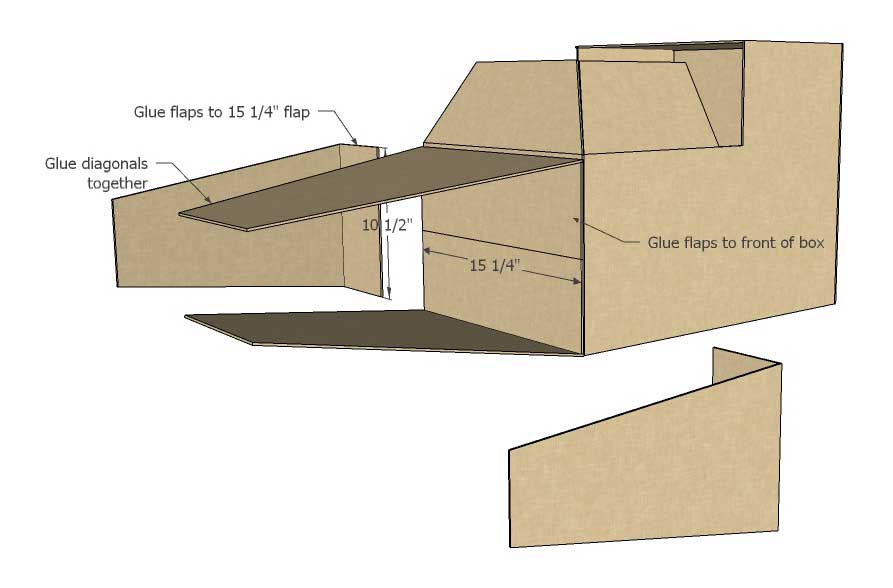
Glue 15 ¼” flaps to front of main box. Glue 10 ½” flaps onto 15 ¼” flaps.
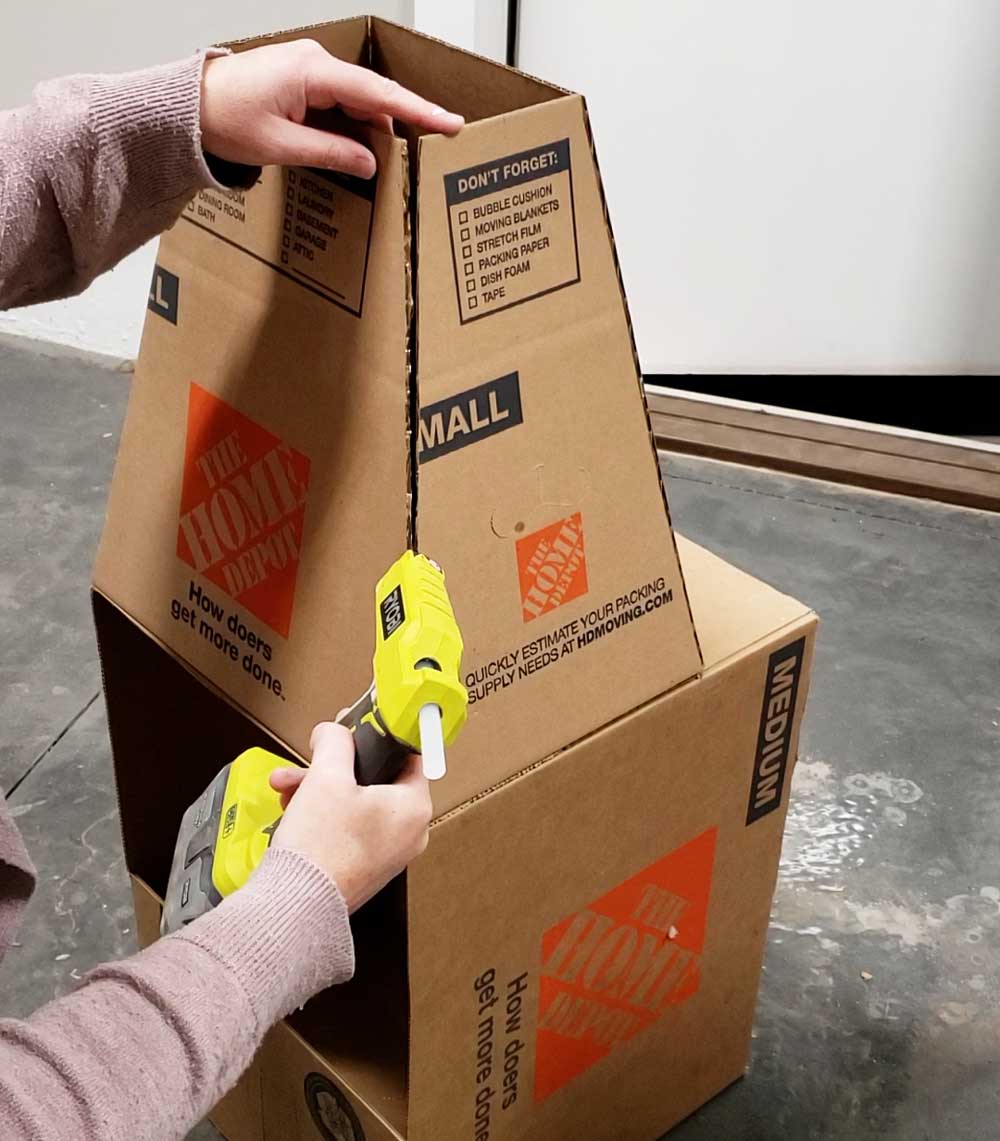
Then glue the diagonals together.
Step 3: Thrusters
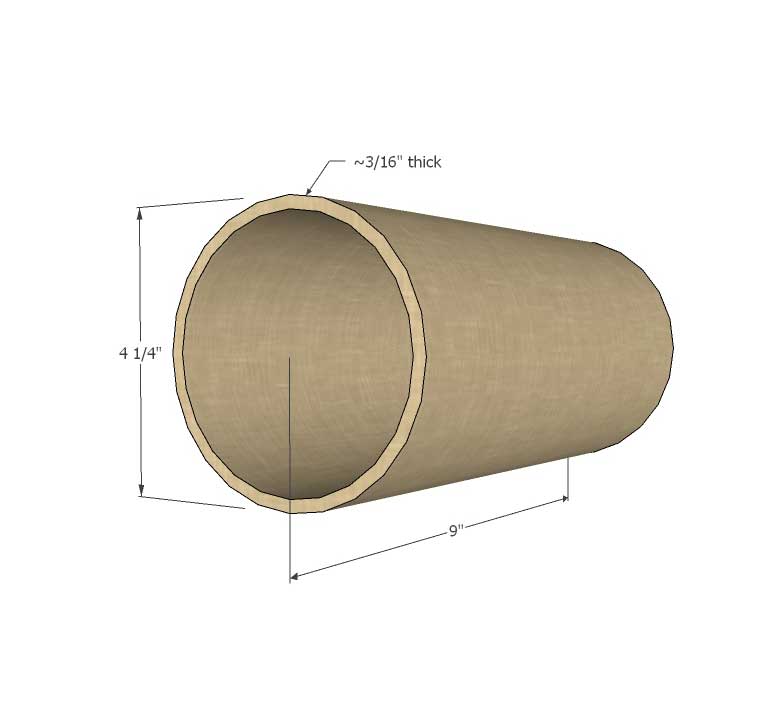
Cut 4 pieces of single face roll 9” x 26 ¼”. Roll up and glue each piece in a cylinder shape that is about 4 ¼” diameter.
Step 4: Make the Wings
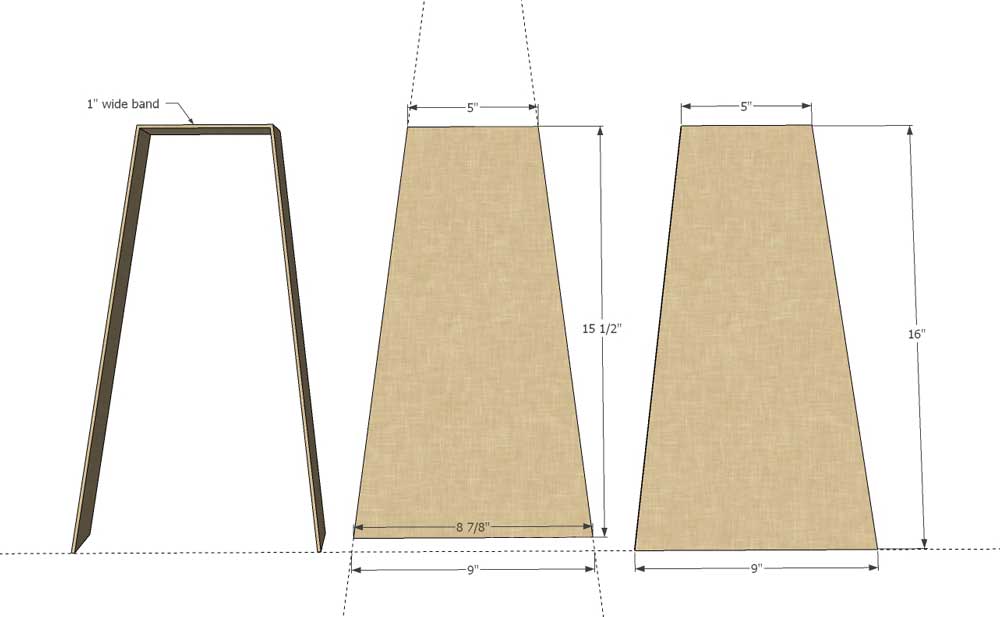
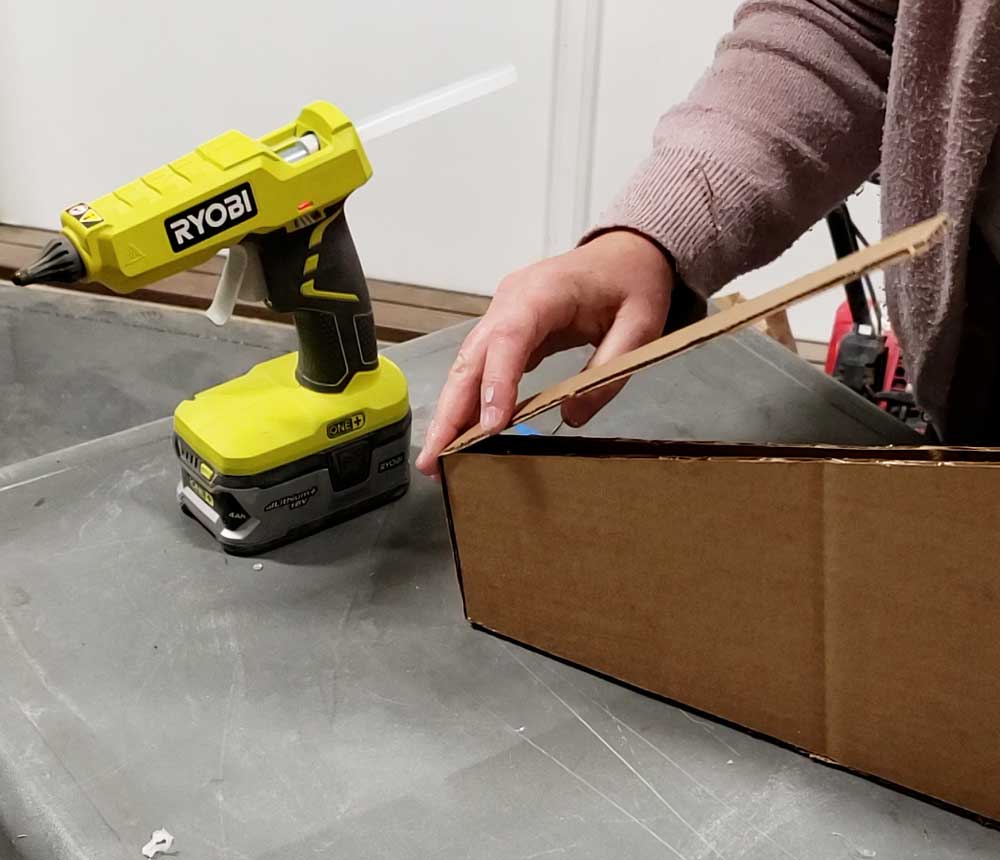
Cut 8 wing pieces that are 9” at the bottom and 5” centered at top and 16” tall. On 4 of the wing pieces, cut ½” off the bottom.
Cut 4 pieces that are 1” x 42” (can be multiple pieces). Separate 16” wing and 15 ½” wing about 1” apart, then glue and wrap the 1” strip around the sides and 5” ends of the wings. Trim the strip ends to match the wing end angle.
Step 5: Attach Wings and Thrusters
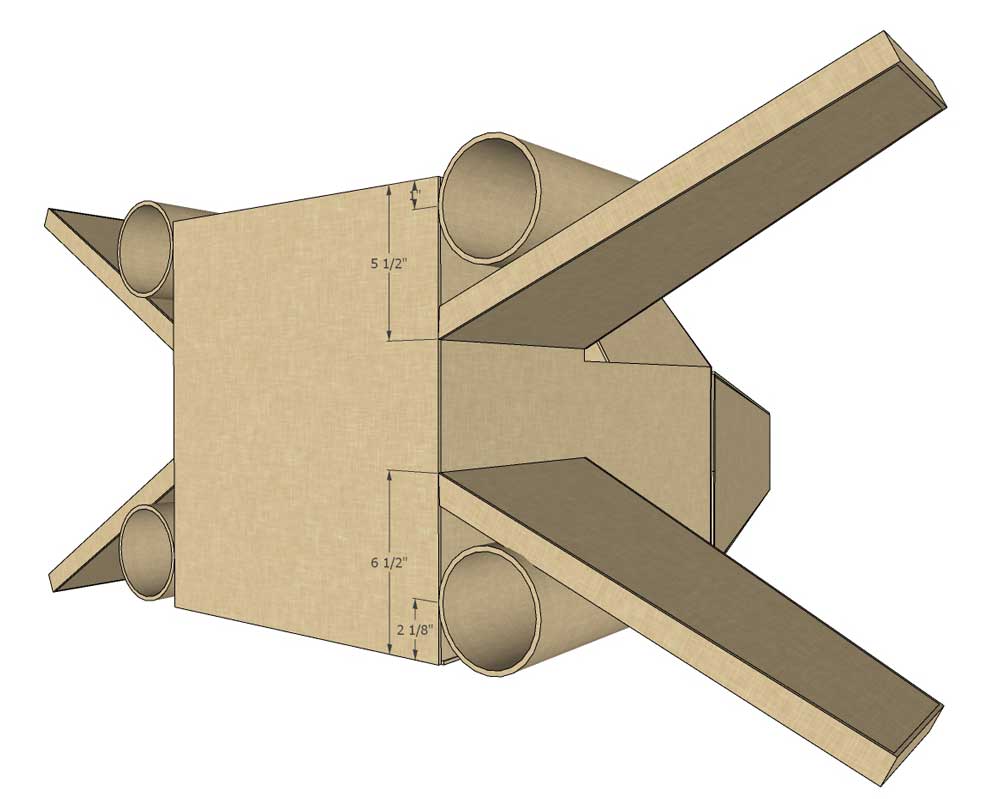
On the back of the main box mark down 1” and 5 ½” from the top. Mark up 2 1/8” and 6 ½” from the bottom of the top. Glue center of thrusters at the 1” and 2 1/8” marks. Glue wings to the box at the 5 ½” marks and 6 ½” marks.
Step 6: Nose Cone
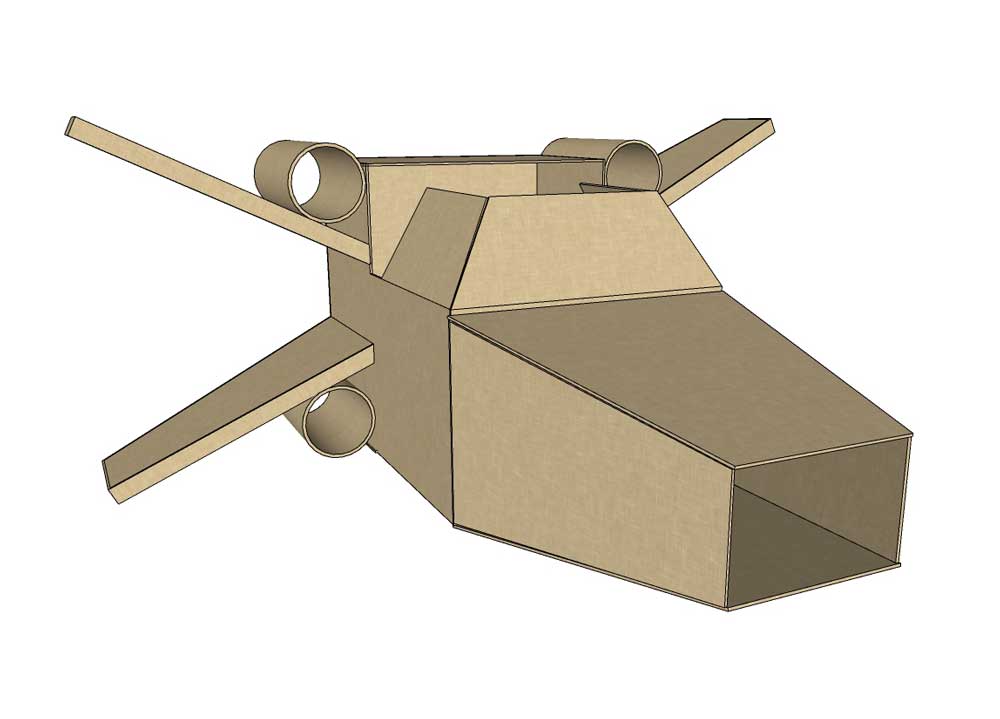
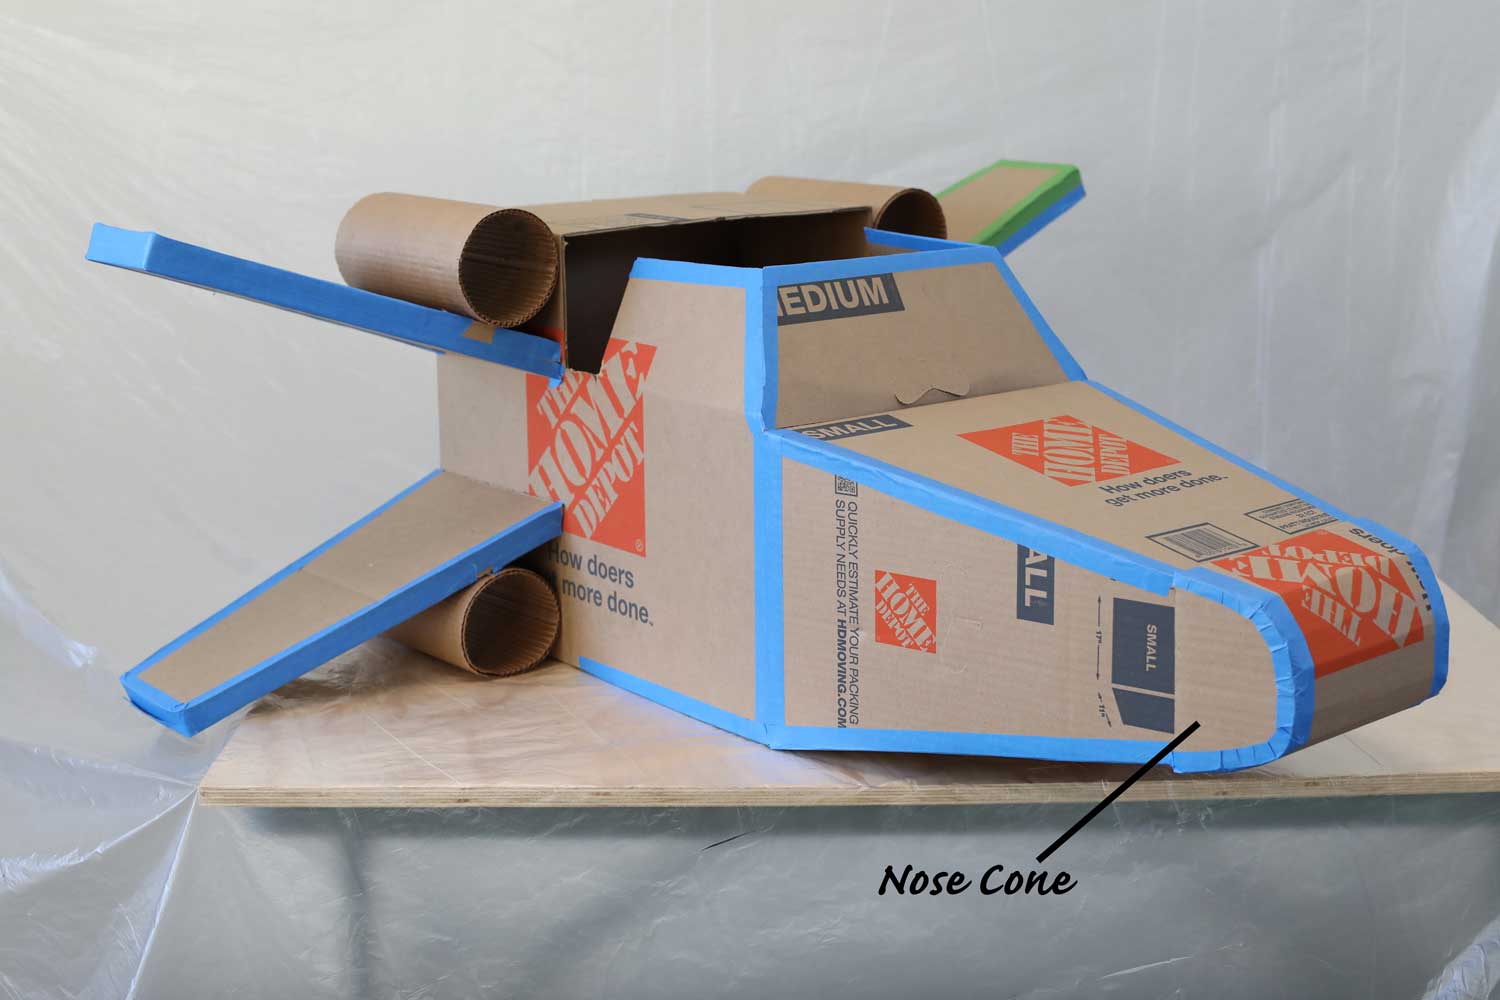
Cut the nose cone to fit on the end of the nose and glue in place.
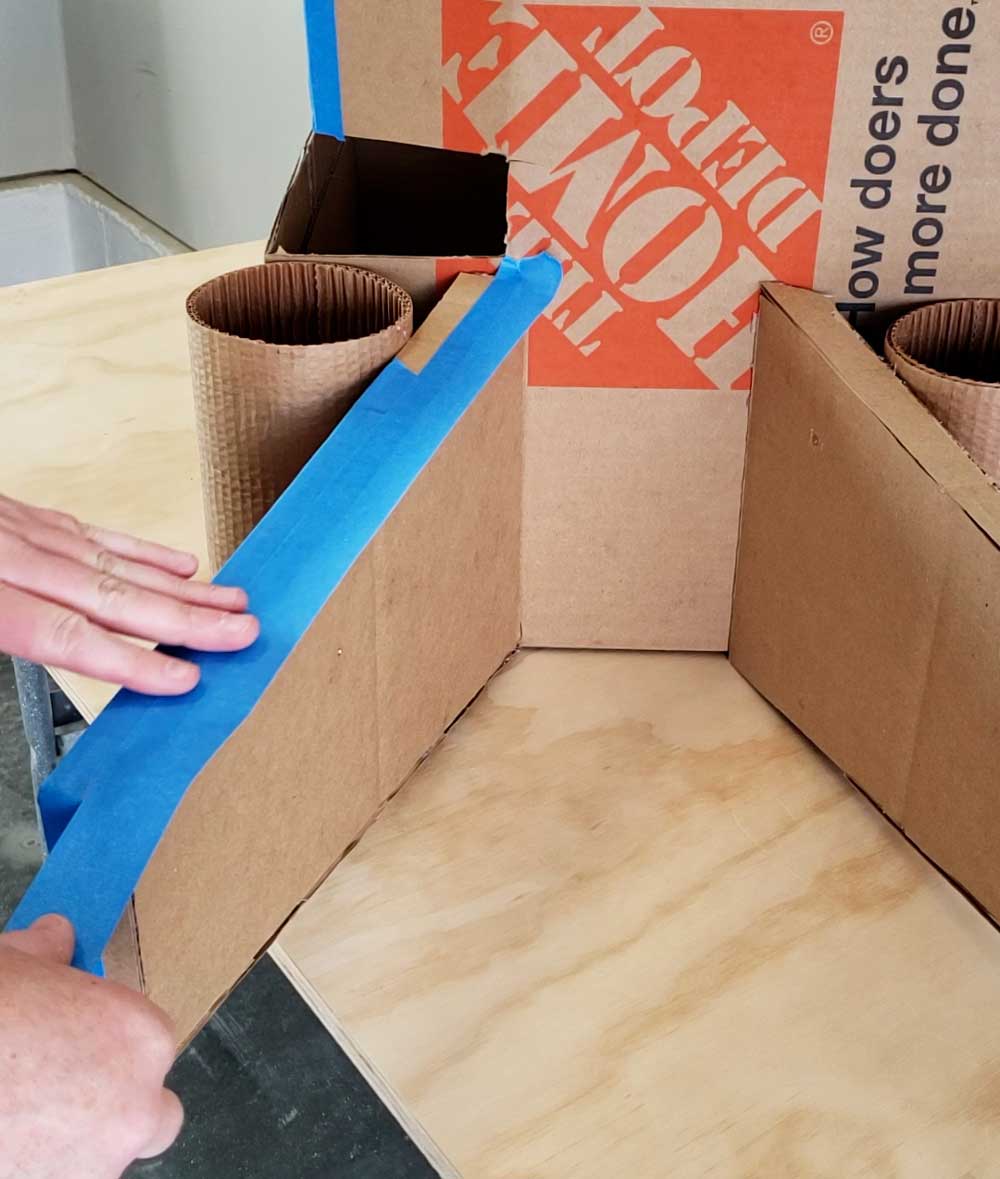
I used painter’s tape to cover the cardboard edges and seams.
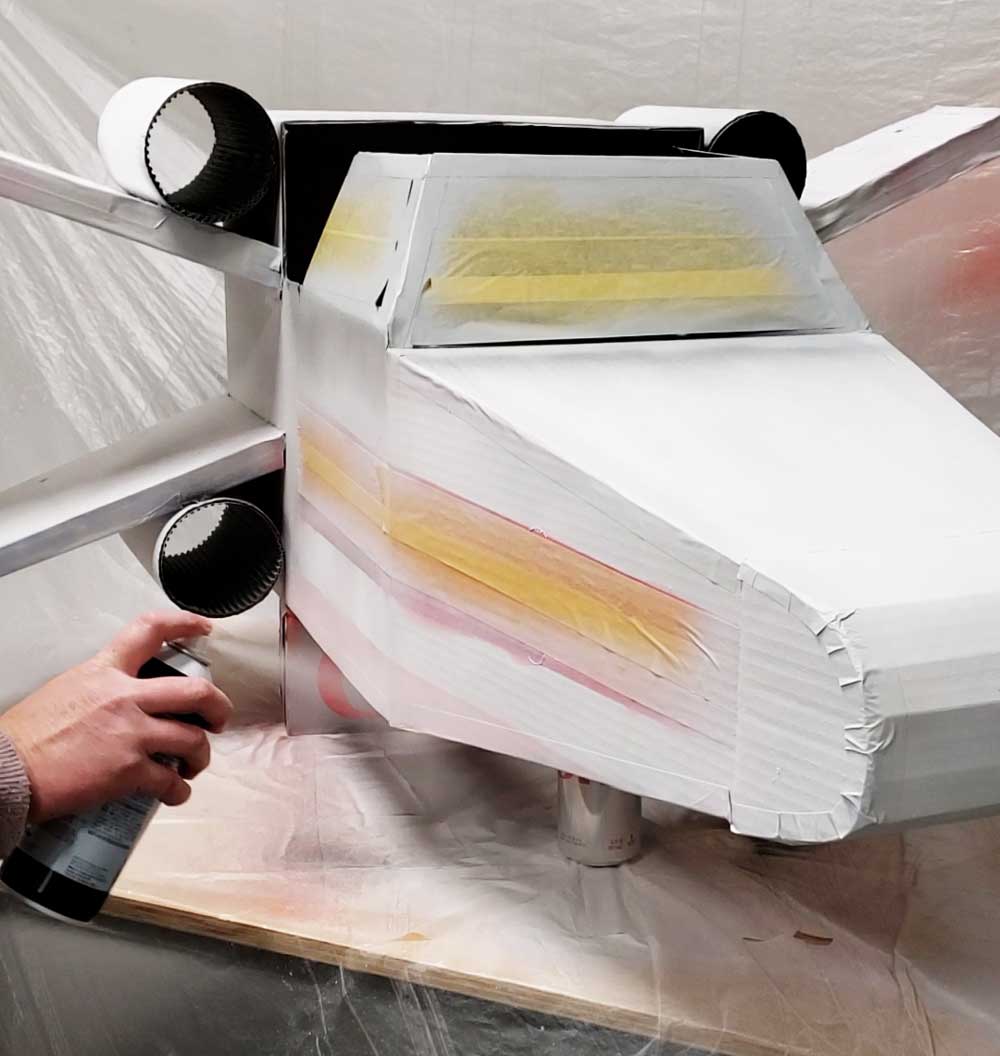
Then I used spray paint primer to paint the costume.
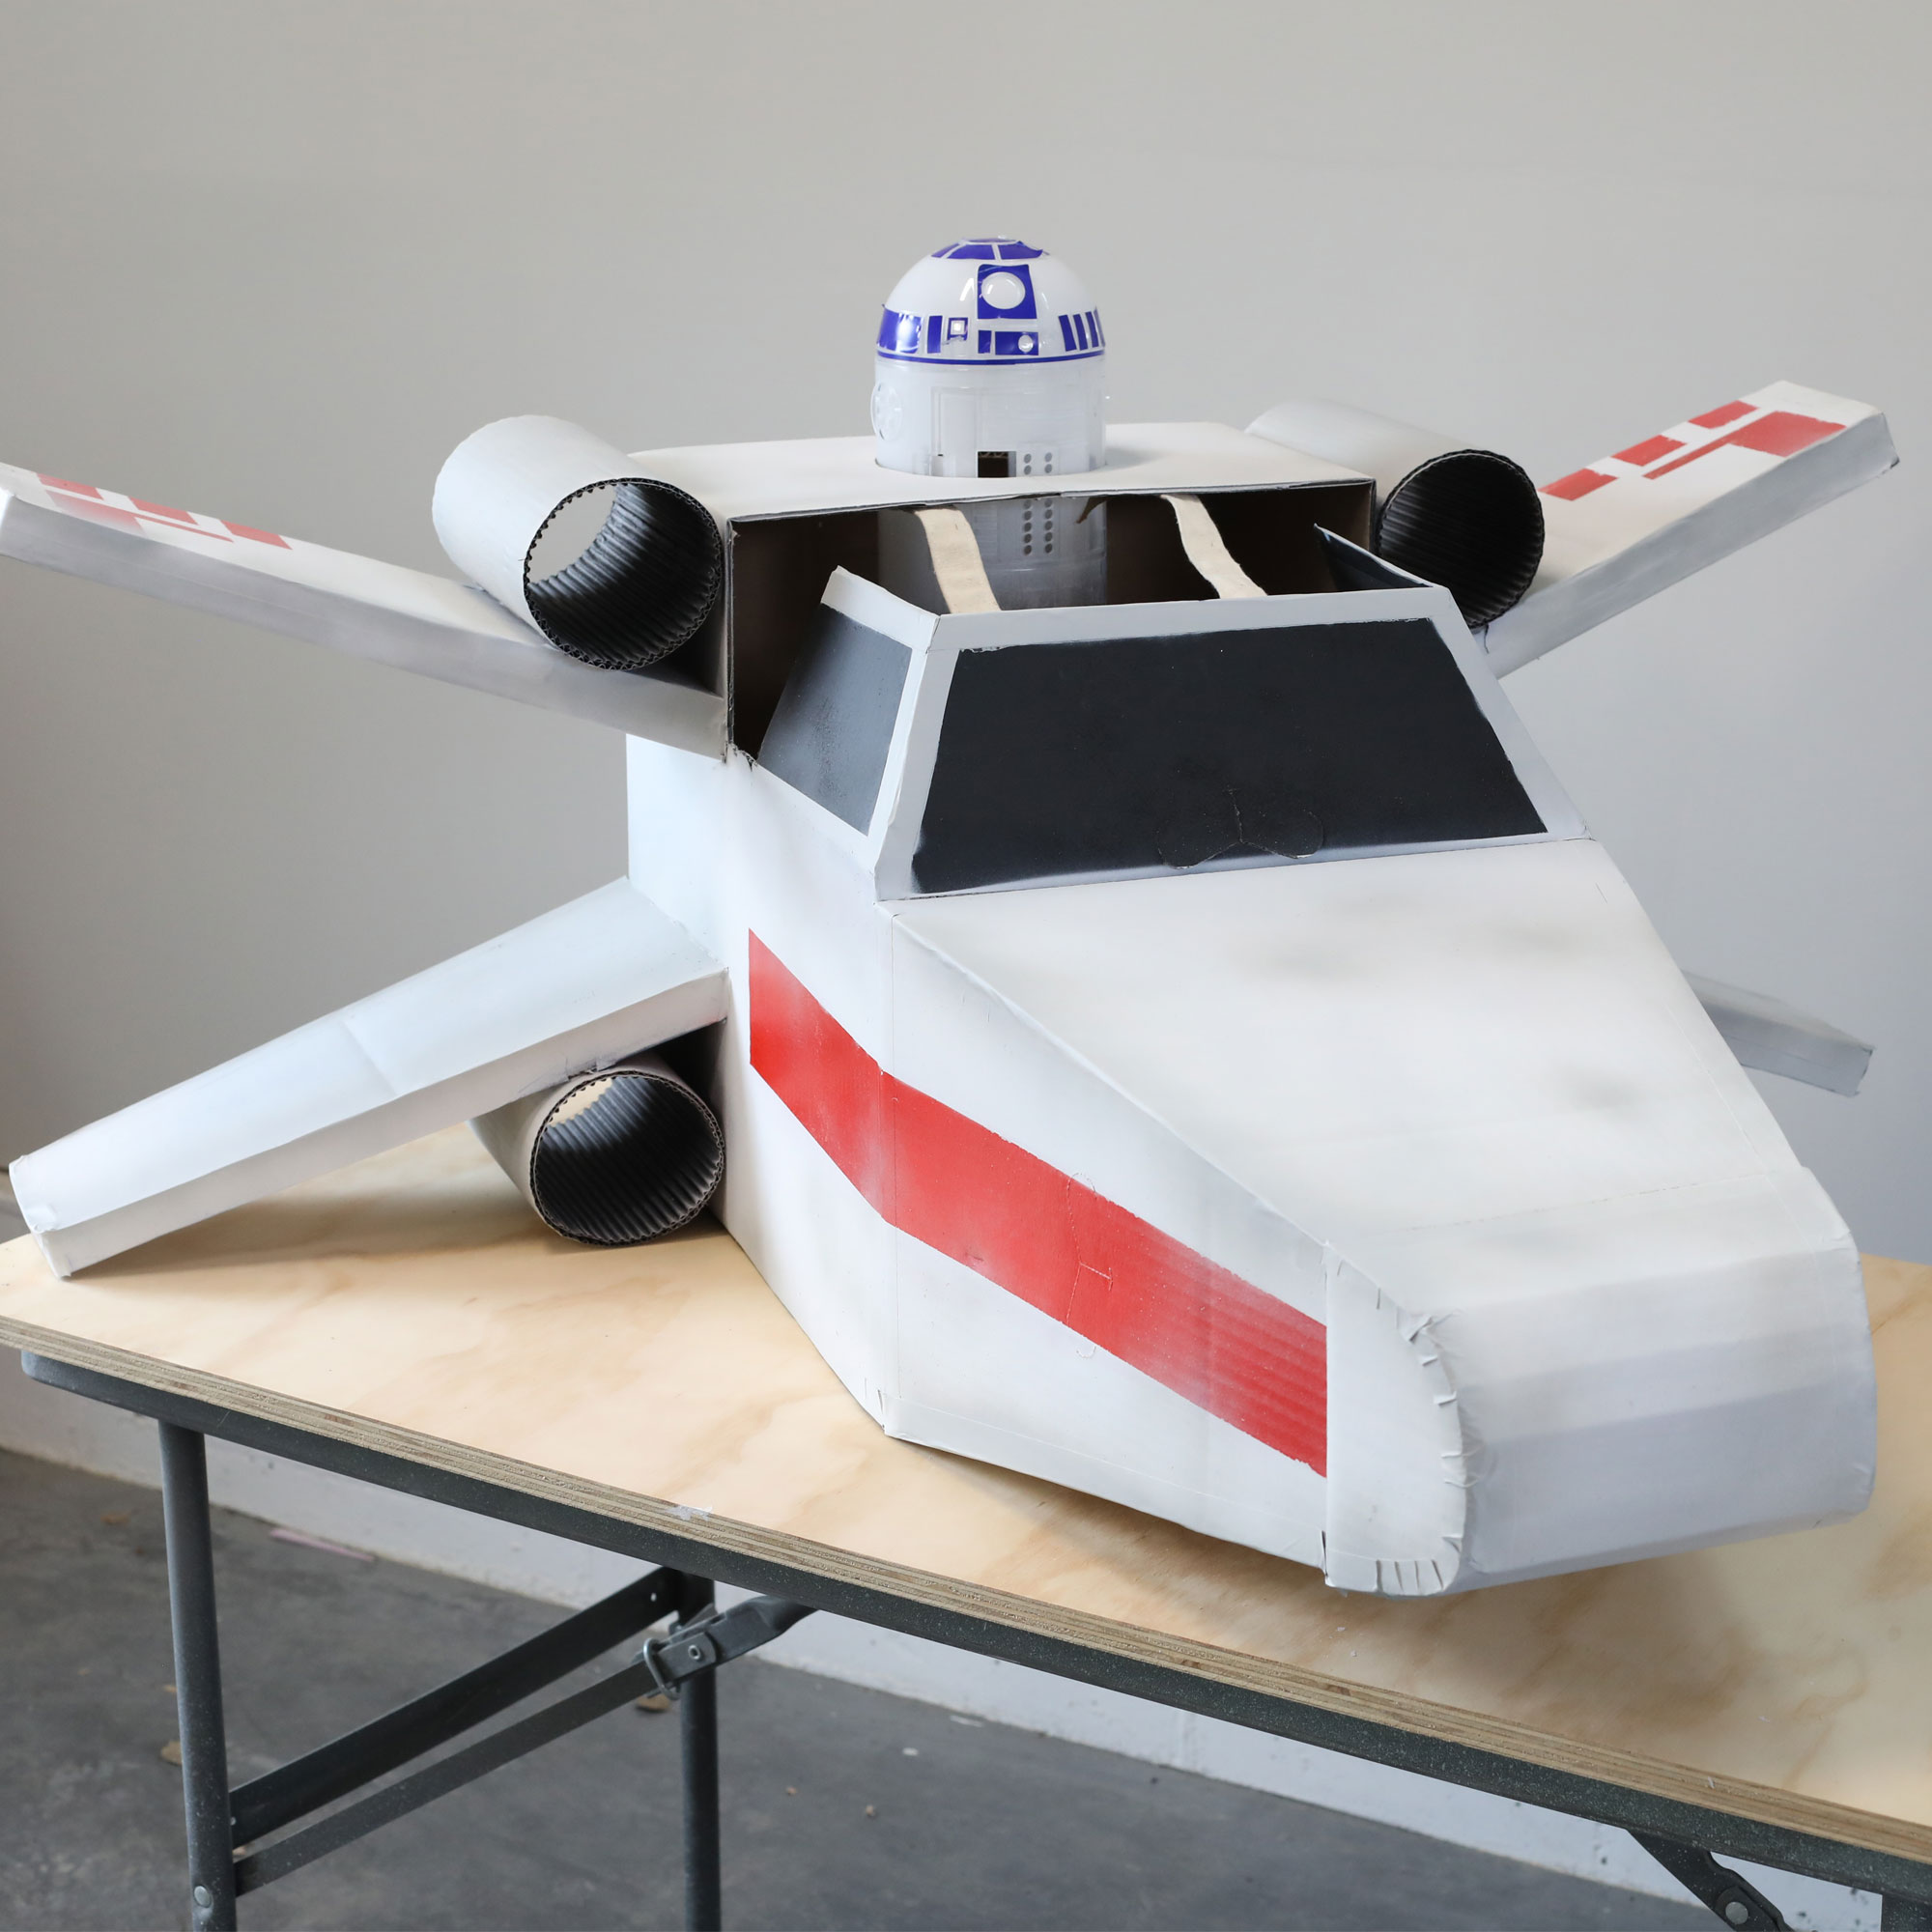
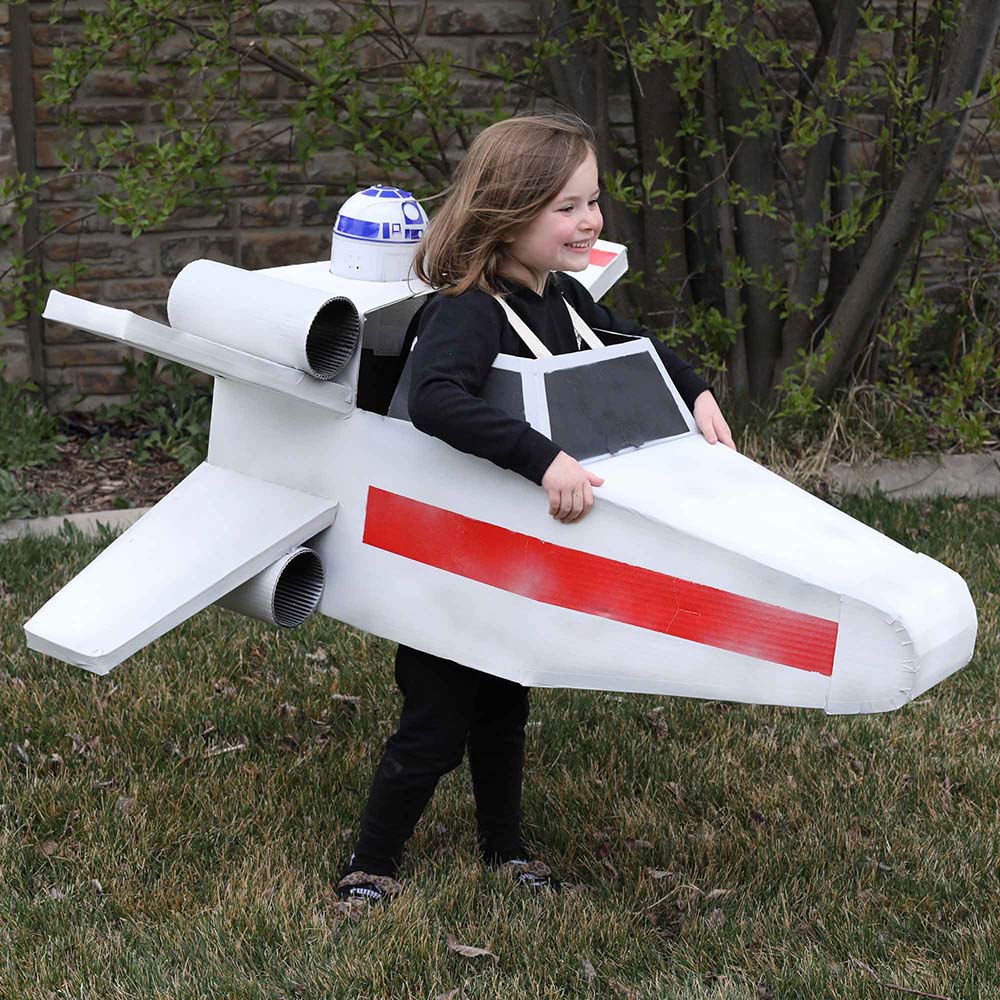
The body of the fighter ship is painted white. The windshield is painted black and the inside of the thrusters. A 3” wide strip is painted red along the nose and some accents on the top wings. The thrusters are painted gray and random gray distress paint splotches around the body.
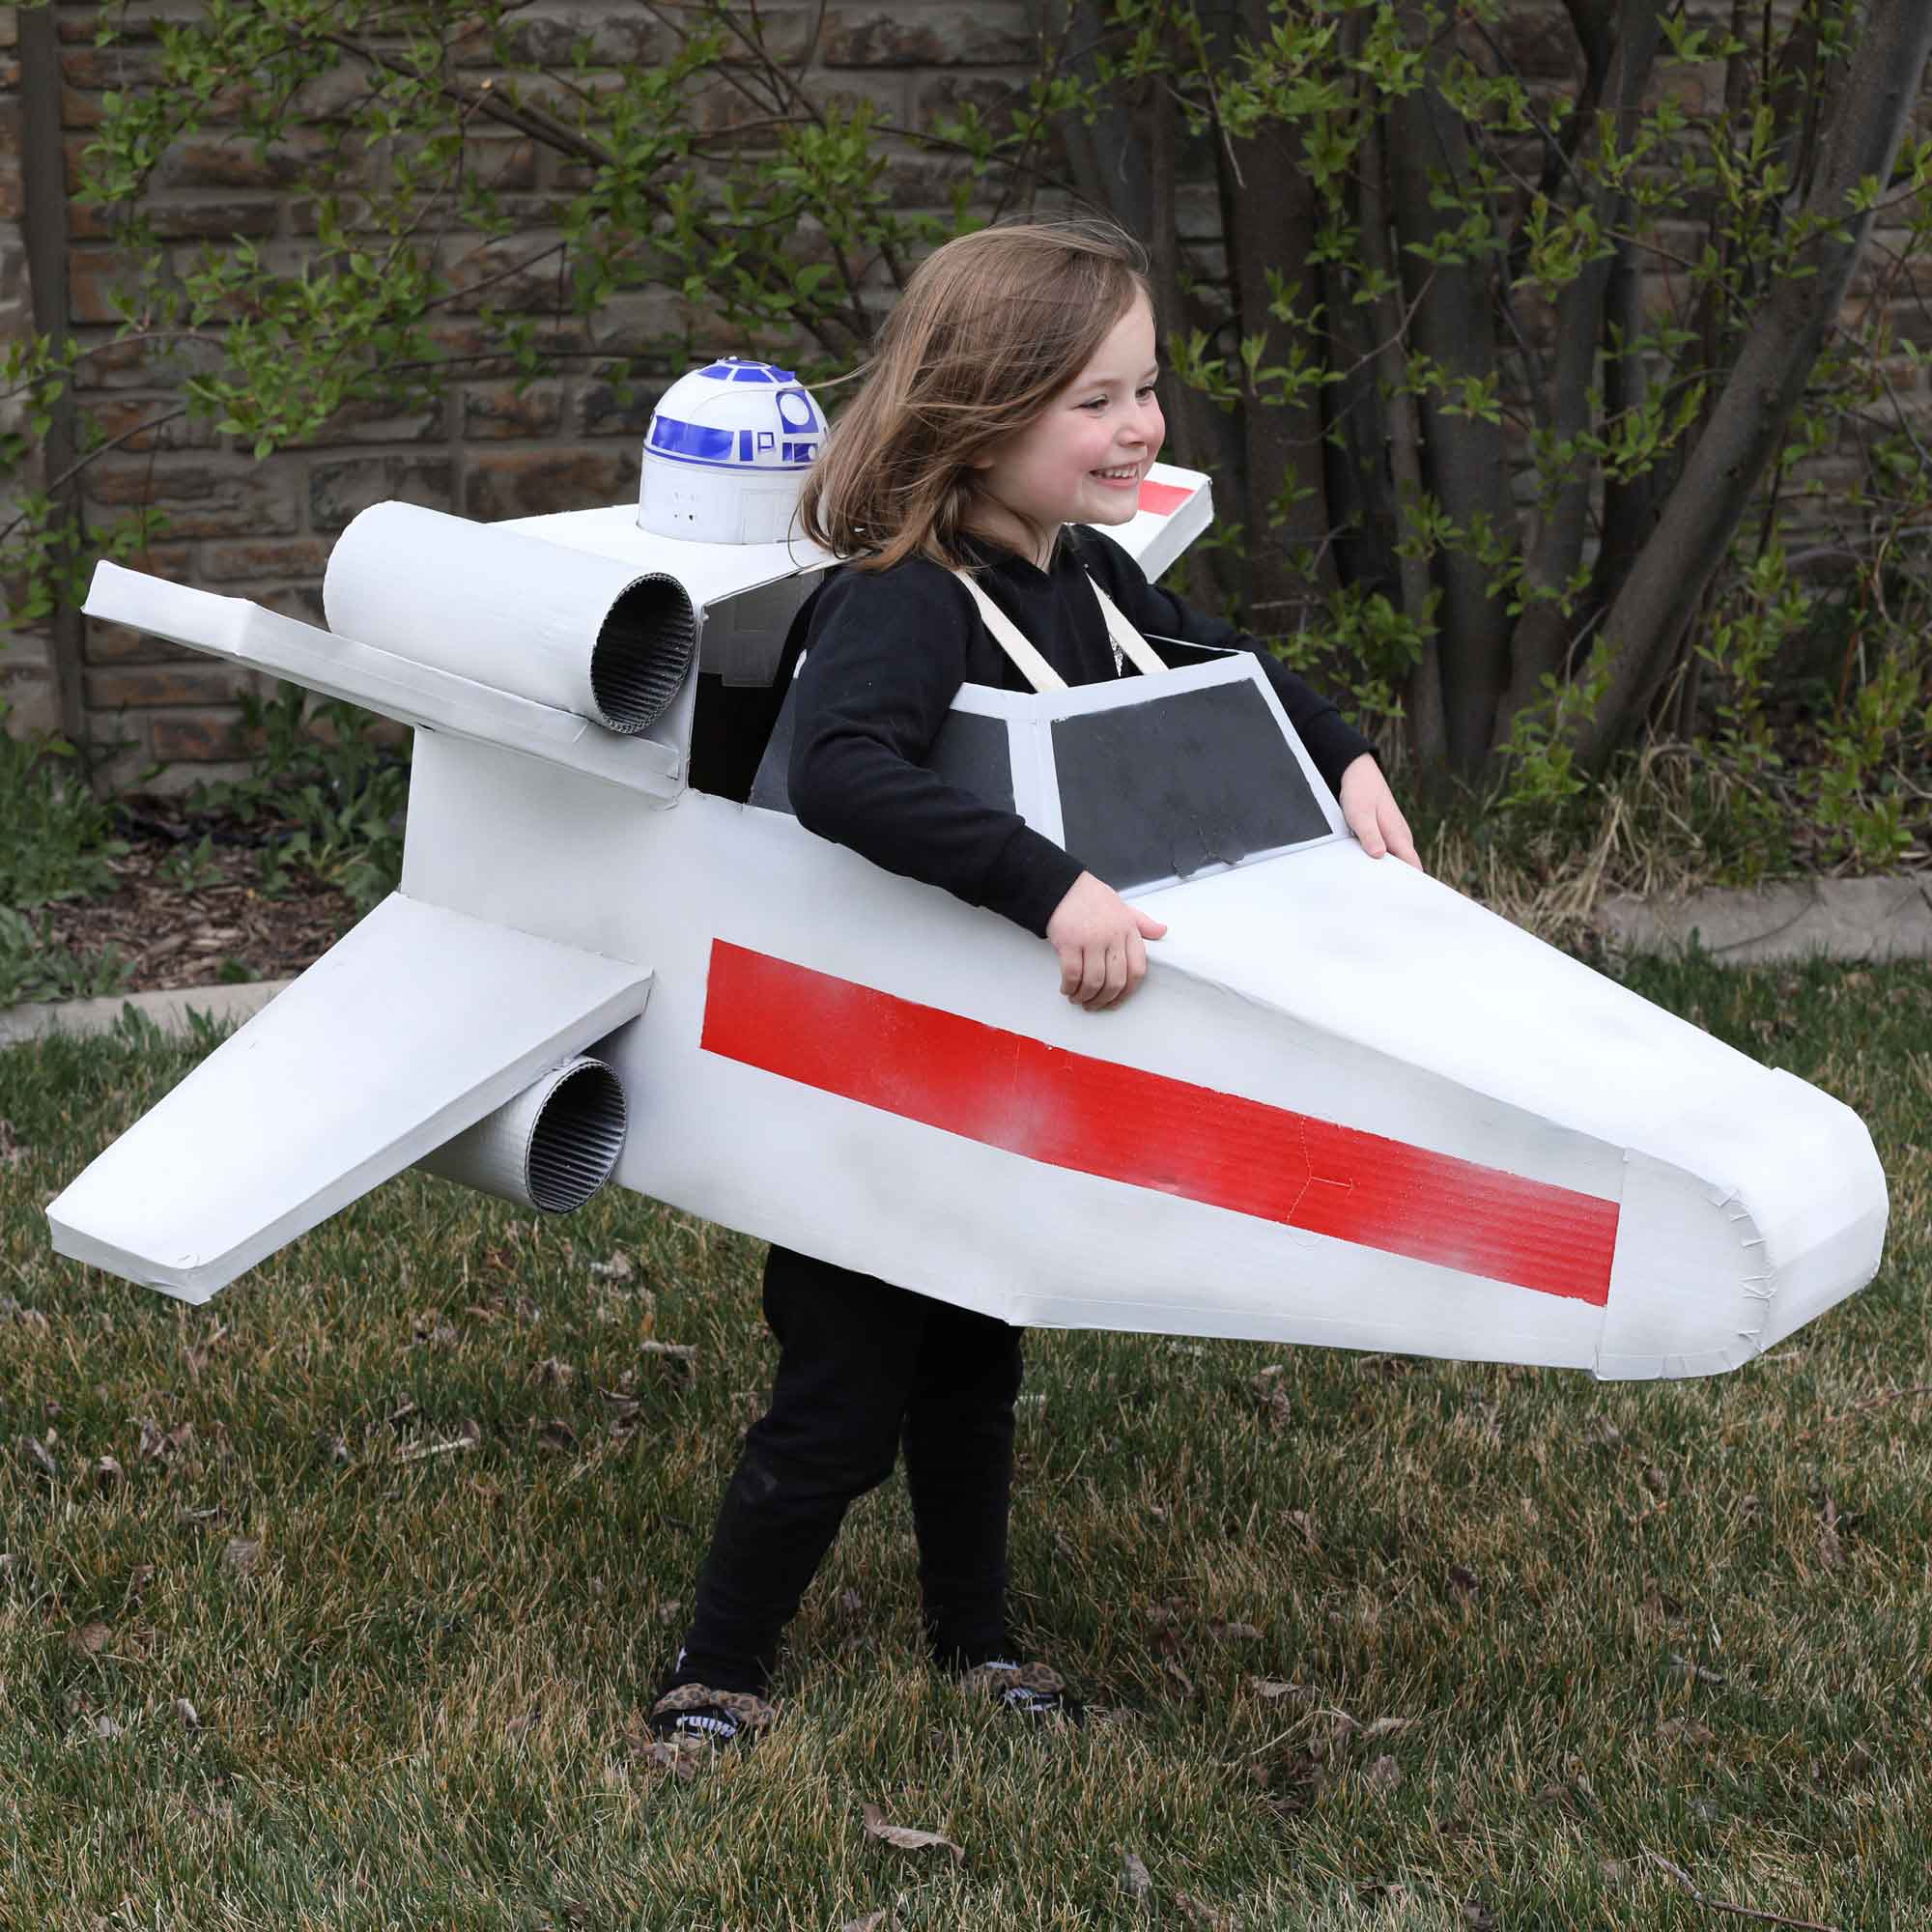
Finally hot glue or tie straps or rope to the underside of the top of the wings to fit the ‘pilot’ wearing the fighter.
This post was created in partnership with The Home Depot. The author may have received compensation for this article and associated images or video, potentially in the form of products and/or services. All expressed opinions and experiences are the author’s own words.


