How to Build a Modern Bed With Storage

Last updated August 21, 2024

Stylist blogger Stacy of Not JUST a Housewife shares her adventures of fixing up her tiny 1938 cottage along with affordable DIYs.
A Note From The Home Depot
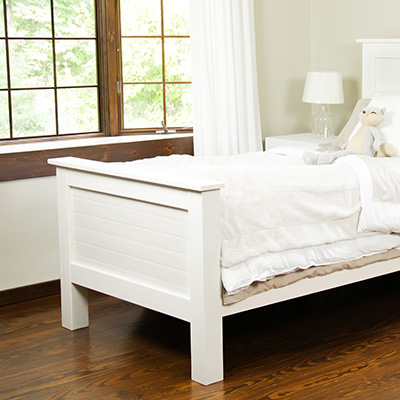
Stacy Risenmay of Not Just A Housewife wanted to come up with a fun bed design for her son’s new room. This DIY modern bed with storage not only looks great in a kid’s room, but it’s also very functional.
Read on to see step-by-step instructions!
Table of Contents
Cut List
Step 1: Cut the Plywood
Step 2: Cover Rough Edges
Step 3: Trim Excess
Step 4: Stain the Wood
Step 5: Add Cubby Slats

When he was younger, my son had a bed with drawers and he really liked the extra storage. When planning his new room, I wanted to come up with a new bed design that also had storage but was a bit more modern.
We are both really happy with the end result!
I have built serval beds in my time and this was by far the simplest one to build.
Cut List
- (2) 40 in. x 76 in. cuts
- (4) 40 in. x 7.875 in. cuts
- (2) 37 ½ in. cuts
- (8) 40 in. cuts
Step 1: Cut the Plywood

I had someone at The Home Depot cut the plywood there in the store, so it would fit in my car better. Plus, it saved me the time of pulling out the table saw at home. The 40 in. x 76 in. pieces will be the top and bottom of the bed. The thin strip will become the center slats that separate the different cubbies. Cut 4 pieces that are 40 in. long. The large scrap piece is extra. You can save it for a future project.
Step 2: Cover Rough Edges

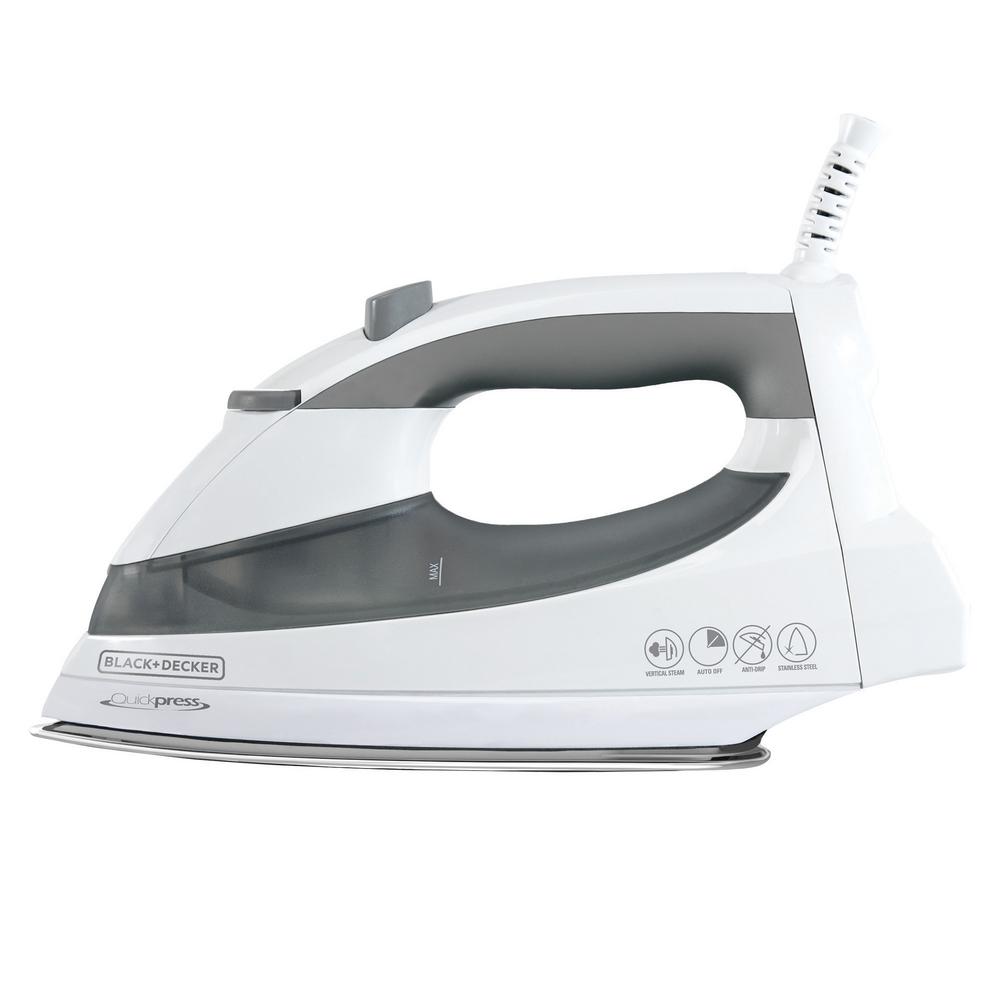
Once the plywood pieces are all cut, use banding to cover the rough edges. Use an iron and follow the directions on the package.
Step 3: Trim Excess

Once all the banding it on, trim any excess with a razorblade knife.
Step 4: Stain the Wood

It is easier to stain the pieces before assembling them.
Step 5: Add Cubby Slats

Measure and decide where you want the slat to go. You can have some cubbies smaller or they can all be the same size. It is up to you.

I drilled pocket holes along the slats in order to screw them onto the top and bottom of the bed. Make sure to stain the inside of the pocket holes as well so they are less noticeable. I do not fill them in case we ever need to disassemble the bed to move it.
Step 6: Install the Headboard

The 1 x 4 boards that are 37.5 in. long get screwed into the back of the bed vertically. These will be what the 40 in. 1 x 4 boards headboard slat get attached to. I screwed from the back, so they were not visible.

I used pennies as spacers in between each slat.

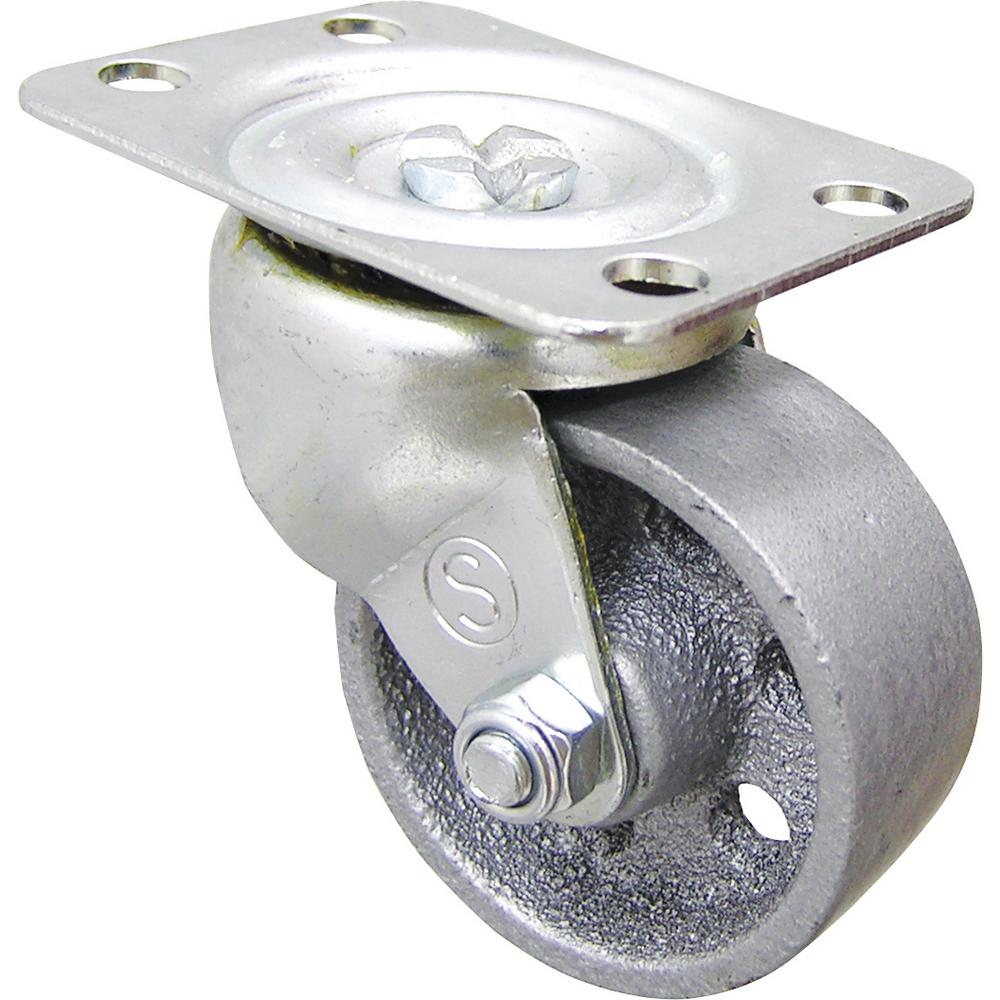
To give it a bit more height, and to make it easier to access the cubbies on the other side, I added 2 in. all metal casters. One on each corner and two in the middle.
Final Reveal

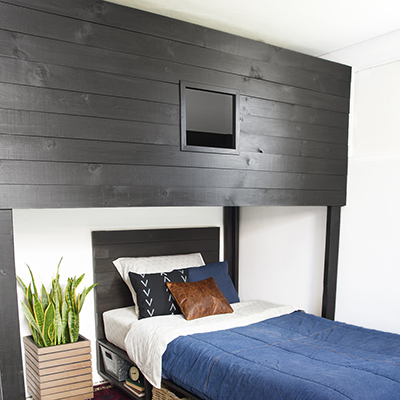
I think it is safe to say that this teenager is happy with his bedroom upgrade!

And this bed fits perfectly with the bed I built for my other son.
Shop lumber and building materials to build your own DIY modern bed with storage at The Home Depot.
This post was created in partnership with The Home Depot. The author may have received compensation for this article and associated images or video, potentially in the form of products and/or services. All expressed opinions and experiences are the author’s own words.