How to Install Landscape Lighting

Last updated August 21, 2024

Hi, I'm George the content creator behind The DIY Warrior. I served in the United States Marine Corps and after my service I decided to go from a military warrior to The DIY Warrior. My last duty station was on the coast of NC, and I absolutely loved it, so much so, I went back to NY grabbed my high school sweetheart (Jessica), married her and now we call the beautiful coast of NC home with our two daughters and two Chocolate Labrador Retrievers. Living here has been an incredible experience and we take advantage of all that it has to offer.
I've been DIYing for over a decade now and what started out of necessity, quickly developed into a passion. When my wife and I moved out of our 800 sq/ft downtown loft apartment and into our first single family home we quickly realized that we needed more furniture. As we browsed the internet looking for furniture, we quickly went into sticker shock. Having not touched a single power tool in my life, I had an idea and all that I needed to do was convince Jessica that it was a great one... it didn't take much convincing because my wife is my biggest cheerleader! What we decided was that she would find beautiful furniture that she loved, we would sketch a concept and I would build it from scratch. I have vivid memories of nervously driving home from the local tool supply store armed with my "DIY Starter Kit" which consisted of a drill, miter saw, brad nailer and small compressor not knowing what I was doing but determined to figure it out... Over the next few years, we executed on our vision... Jessica would come to me with a furniture piece that she loved priced in the several thousands, and I would build it for a few hundred dollars. We did that until our entire home was furnished and we couldn't have been prouder of ourselves.
Fast forward to today, we've taken on much larger projects, have built two custom homes and have completed 100's of DIY projects ranging in size and budget. Over the years Jessica and I have developed a shared love for all things home and design. I have become the DIY junkie and Jess is the mastermind behind everything you see design and decor! Jessica has the eye and the ability to transform spaces giving them a unique, inviting, and intentional feel.
Our mission is to be a resource for those looking to create value in their home and give you the confidence that you can do it! Whether it's building barn doors, trimming out an accent wall, installing hardwood flooring, building a high-end piece of furniture for a fraction of the cost, or decorating a room from top to bottom, don't worry, you've come to the right spot. We're always working on something and hope that we can provide you with meaningful and inspiring content.
Towards the end of 2021, we moved into our latest custom build. We are so excited to bring you along the journey as we make this house into our home! We hope you enjoy our blog be sure to follow along on Instagram @thediywarrior to watch it all unfold...
Here's to building beautiful spaces together!
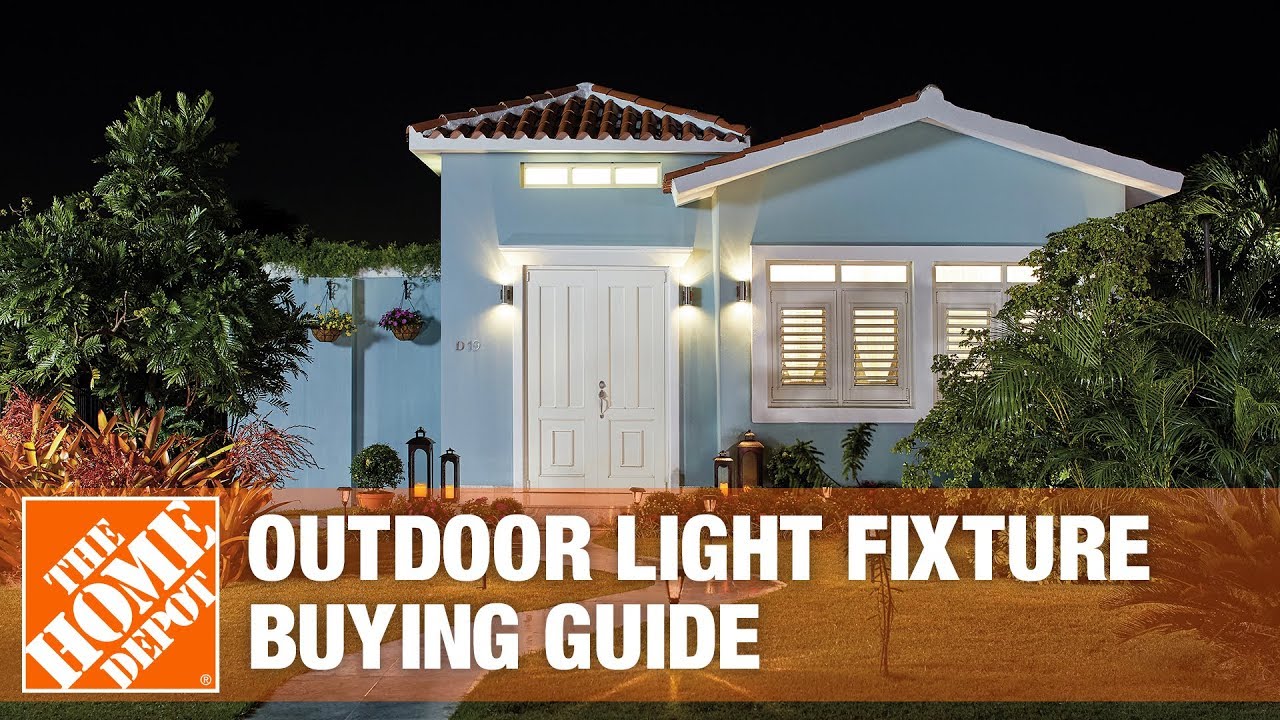
A Note From The Home Depot
Want to know a simple way you can improve the curb appeal of your home while creating a safer nighttime space? Follow along as George Olivero of The DIY Warrior takes you through the steps of installing landscape lighting.
Table of Contents
How To Install Landscape Lighting
Introduction:
Types of Landscape Lighting:
Spotlights:
Pathway Lights:
Wall Wash Lights:
How To Install Landscape Lighting
Introduction:
The installation of home landscape lighting is not only a simple project, but one that can change the overall look of your home, provide extra security, and ultimately enhance its curb appeal by highlighting areas and features that are not normally seen at night. This Step-by-Step guide will take you through the entire process from planning to the moment you turn your lights on for the first time.
Types of Landscape Lighting:
There are many different types of landscape lighting available, and each have unique features depending on what you are trying to accomplish. Below is an overview of the different types of lights and a brief description of each.
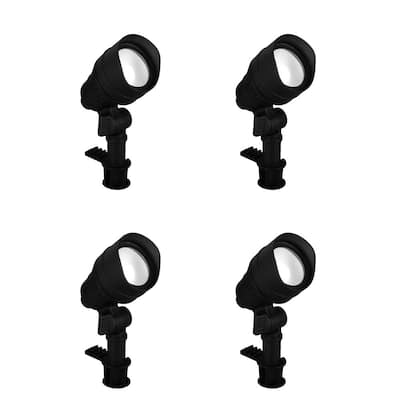
Spotlights:
Spotlights are one of the most common types of landscape lights installed and rightfully so as they can have many uses. They can be used to point upward, providing illumination for trees and taller shrubs. This technique is referred to as up lighting. They can also be used to illuminate a specific structure or features on a property; this technique is referred to as highlighting. Additional uses of spotlights include shadowing, silhouetting, and spotlighting.
Pathway Lights:
Pathway Lights project light downward and to the side. They do a great job of lighting pathways, walkways and can even be used in landscape bed applications to accent low lying plants and shrubs.
Wall Wash Lights:
Wall Wash Lights are designed to evenly distribute light by providing indirect and uniform illumination across a large vertical surface. Wall wash lights are commonly used to illuminate the side of a home to showcase architectural features.
Well Lights:
A Well Light is installed even with grade, are concealed, and provide up lighting in order to highlight a specific object such as a tree or a hardscape structure. Well Lights are commonly used in areas that are regularly mowed to avoid having to remove a fixture during each mow.
Additional Lighting Includes The Following:
Down Lighting- These are fixtures that can be placed in trees and aimed to project light downward.
Deck Lighting- Deck Lights are typically installed on the sides of deck or fence posts.
Step Lighting- Step Lights are typically mounted to either the tread (flat/horizontal part you step on) or riser (vertical part) to illuminate your staircase.
Safety Tips:
Call 611. Although low voltage wiring does not need to be buried deep, it is always a good practice to call 611 and get existing lines marked anytime you are digging in your yard.
Planning Tips
Lighting Location:
Prior to starting your lighting project, determining where you will place each light is important. To do this, there are a couple ways for you to see what the lighting will look like prior to final installation. You can either use a flashlight, or you can cut the wires of a light and attach the wires to a 9V battery. The second is my preferred method because every light is different in terms of its brightness, its focus, the shroud that surrounds it, etc. With the second method you’re getting an exact view of what the light will actually look like once powered and see what will look best. If you end up using the second method, be sure to pick up a bag of waterproof wire nuts so you’re able to rewire the light fixture during installation. As you move throughout the yard and determine where lighting will be placed you can use ground flags or place the fixture on the ground.


Wire Run:
After lighting location is determined the next step in planning is to ensure that you have enough low voltage wire. An easy way to do this is to measure. It’s always better to have too much wire and leaving a little bit of slack (12”-18”) between each fixture will provide you with some flexibility to move the light as you are fine tuning its final location.

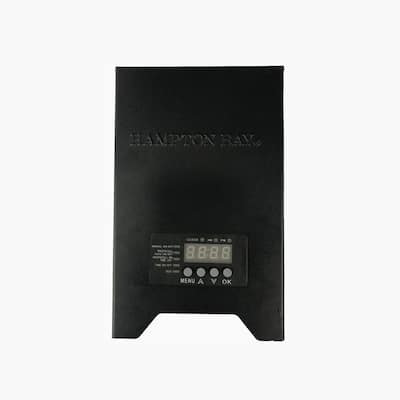
Transformer Sizing:
One of the most important aspects of the planning phase is selecting the right size transformer. You will want to purchase a transformer that is above the total watts of each light. As an example, for my lighting project I used (32) 4W spotlights and (1) 9W spotlight bringing the total wattage to 137W. Adding 20% (27.4W, in our example) is recommended to handle any inefficiencies, so for my project, a transformer greater than 165W would be the smallest recommended transformer. Additionally, you will also want to consider your desire to add additional lighting at a later date, so be sure to get a transformer that meets your current and future needs to avoid having to buy another transformer down the road. I am installing a 300W transformer to give myself the option to add additional lighting in the future.

Transformer Location:
You will want to make sure that the location of the transformer is close to a GCFI outlet. Additionally, some systems are equipped with a photocell sensor so you will also want to ensure the transformer is installed such that the photocell sensor is in the daylight. We will discuss this next as we go through the installation steps.
Step 1: Installing The Transformer and Photocell Sensor
Transformers should be mounted according to the manufacturer’s instructions and close to a GCFI outlet. Additionally, your transformer may be equipped with a photocell sensor. Photocell sensors let the system know when the sun has set and automatically turn the system on. If your transformer has this feature, you will also want to make sure the transformer is located in a place where the photosensor is exposed to daylight and can properly operate.

Step 2: Assemble and Place The Lighting Fixtures
The first step is to assemble the light fixtures. This typically includes screwing the base (which is a ground stake design) to the light. Simply place each light in the general location where it will be staked, but its recommended to not stake it just yet. I typically leave the staking until the end to ensure that I am getting each fixture exactly where I want it.
Step 3: Run The Low Voltage Wire
The next step is to run your wire. As a general rule of thumb, you can never have enough wire! To do this, start at the furthest fixture away from the transformer and lay wire down next to each fixture leaving some slack 12”-18” to allow for final adjustment of fixture. There should be a continuous line from the furthest fixture all the way to the transformer.

Step 4: Wire The Transformer
There are a few different ways to wire the transformer to the lights.
For a single run, simply strip the wire ends and install them into the terminals.
For multiple runs or zones, you will have to marry or combine the wire ends prior to connecting them to the terminals.
Be sure to read your manufacturer's instruction prior to performing this step.

Step 5: Wire The Lighting Fixtures
It’s time to install the low voltage lighting fixtures. The fixtures that I am using have a quick connect that utilizes a snap that pierces the wire to create the connection. Another option is to cut the wire and utilize waterproof wire nuts for longevity.

Step 6: Power The System and Check for Proper Installation
Plug in the transformer to the GCFI Outlet and turn on the system.
Be sure to check each fixture for proper installation. If a fixture is not operating, check the connection or rewire.
Once everything is in working order, you can then install each fixture in its final position. Performing this step around dusk can be helpful and ensure that you line up the light exactly where you want it.
Step 7: Burying The Wire
Once all of the fixtures are installed and working correctly, it’s time to bury the wire. Low voltage wiring does not have to be buried deep, however in areas where lawn maintenance such as aerating is performed, it may be best to go a little deeper with the wire to avoid hitting it with equipment.

Now that all the work has been done, it’s time to wait for the sun to set so you can see how transformative this project will be. I hope that this step-by-step guide will give you the confidence to take on this project yourself. Low voltage landscape lighting is a great project for any and all skill levels and can make a huge impact to a property.


This post was created in partnership with The Home Depot. The author may have received compensation for this article and associated images or video, potentially in the form of products and/or services. All expressed opinions and experiences are the author’s own words.