How to Make a Plant Bookcase Herb Garden

Last updated August 21, 2024

Cara Newhart of Never Skip Brunch is a DIY enthusiast who lives in Houston, TX. She has a passion for empowering women to dive deep into the "masculine" world of DIY and home improvement. Her creativity has been featured in publications like PEOPLE StyleWatch, Denver Style Magazine, and she's the 2019 Home Depot Orange Tank Pitch Competition winner. Head over to her blog to see more of her chic DIY projects and tutorials.
A Note From The Home Depot
Want to organize your herbs to make watering easier? Take your plants to new heights with Cara Newhart from Never Skip Brunch as she creates a plant bookcase that is perfect for any porch or patio.
Keep reading to see how she did it with some help from The Home Depot!
Table of Contents
How to Make a Plant Bookcase Herb Garden
STEP 01: Cut Deck Boards
STEP 02: Drill Kreg Holes
STEP 03: Assemble Frame
STEP 04: Add Shelves
STEP 05: Cut Aluminum Bars & Drill Holes
How to Make a Plant Bookcase Herb Garden
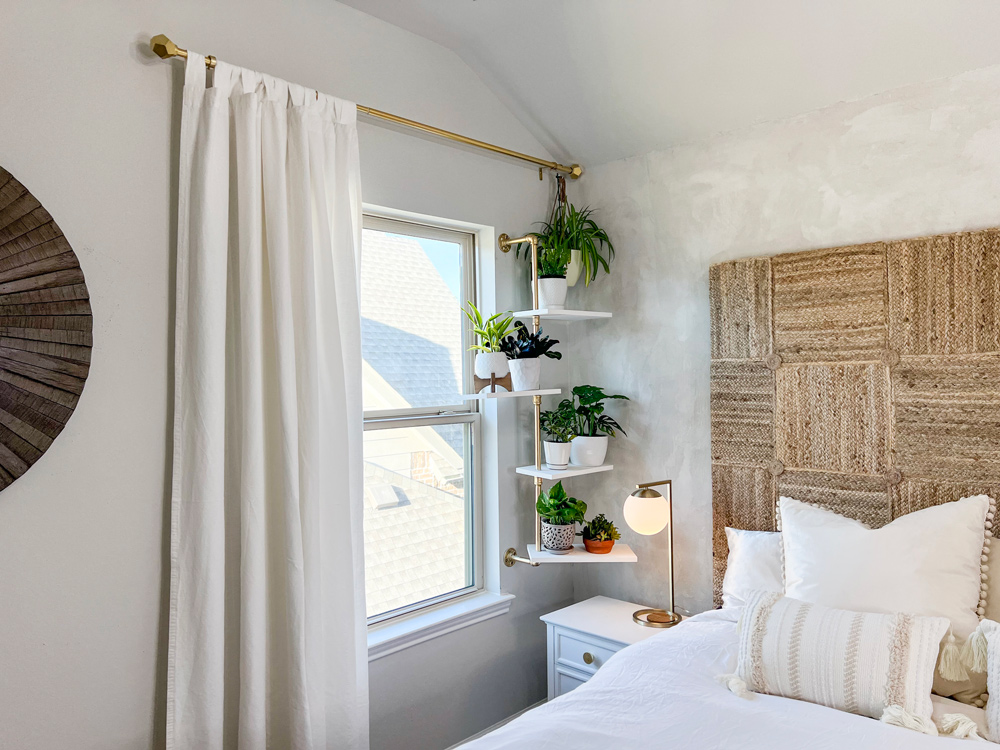
Plants might just be the perfect patio decor — they add texture, color, and liven up any outdoor space! You can incorporate your favorite blooms or herbs into your patio decor with this beginner-friendly plant bookshelf.
This shelf is perfect for both large and small spaces — leveraging vertical space to showcase your favorite plants. The design is easy to customize to perfectly fit your space: just change the length of the side boards to add height or cut longer shelves for a wider plant bookcase.
You could even utilize this plant bookshelf as a dual-purpose privacy wall — adding decor, greenery, and creating a more private space all in one project.
STEP 01: Cut Deck Boards
For this project, I’m using pressure treated decking boards since they’re a perfect size and come ready to withstand the elements.
Start by cutting two boards to size to be the sides of the plant bookshelf — I opted for 75” long sides, since my shelf is sitting under an outdoor ceiling that’s 8 ft tall.

PRO TIP: cut the very end of the board off before you measure, so you’re starting with a clean-cut edge that is straight and square. Don’t forget to wear safety gear and follow instructions carefully when operating your power tools.

Once the ends are cut, begin cutting the shelves with a miter saw. I created 5 shelves that are 24” long, but again you can customize the length to fit your space. I’d recommend keeping shelves under 36” and adding additional bookcases side by side if you want to go larger.
You’ll also need to cut one top piece that is the same length as your shelves. In total, my cutlist was 6 boards cut down to 2 ft long.
STEP 02: Drill Kreg Holes
To attach the frame and shelves together, I used a combination of wood screws and pocket hole screws. Pocket holes help eliminate visible screw holes and are a great beginner woodworking technique.
Note: you can create this project without using pocket holes, find assembly instructions in the next step.

I drilled two pocket holes into each end of my shelf boards and the top board using the kreg pocket hole jig. Spacing for these holes was about 1-1½“ in from each edge.
Make sure to drill all 4 pocket holes on the same face side of the board — this side will be the bottom of the shelf so that the pocket holes are not visible.
STEP 03: Assemble Frame
To assemble the frame, start by lining up the top board and one of the side boards to form a 90 degree angle, with the top board butting up against the side of the longer board. Make sure the pocket holes are facing down toward the long end of the board.

To ensure everything is square,clamp the boards in place using a speed square. This will help hold things together while you drive the pocket hole screws.
For more security, you can also add wood glue to the wood where the joint meets before screwing the pieces together.
Drive pocket hole screws into each of the pre-drilled pocket holes.
Note: If you’re not using pocket holes — simply drive 2½“ wood screws into the top board, starting outside on the long board and driving the screws through the outer board and into the end of the top board.
Remove the clamps and speed square, and attach the other long board to the other side of the top board. Your boards will form a U shape with the open ends as the bottom of your shelf unit.


STEP 04: Add Shelves
Measure out your desired shelf placement on the frame of the bookshelf. I started about 6” up from the bottom and measured out a shelf about every 13 inches. You can customize the number and placement of your shelves depending on your space and the type of plants you want to grow, ensuring they have plenty of room to grow.
For this plant bookshelf, the shelves are installed at a slight angle so that the plants can angle outwards and up with plenty of space to grow.
First, create an angled wedge using a scrap wood board to help install the shelves evenly at the same angle each time. I cut a 1X6 piece of scrap wood to a 30 degree angle using my miter saw to create my wedge.

Clamp the wedge to the inside of the frame of your plant bookshelf. Line up your shelf against the wedge, pressing it flush against the angle.
Once your shelf is in position, drive pocket hole screws through the pre-drilled pocket holes to attach. You can add wood glue before attaching for a more secure hold.
Note: If you’re not using pocket holes — drive a wood screw through the outside of the frame and into the shelf to secure.


STEP 05: Cut Aluminum Bars & Drill Holes
Since the shelves are slanted, we’ll add aluminum bars to the front of the bookshelf to hold the planter pots in place and add a decorative element.
For this, I’m using two different widths of flat aluminum bars for a modern look. Start by measuring the aluminum bars on the front of the shelf and marking them flush with the outside edges of the shelf.

These can be cut easily with a miter saw — be sure to hold the bar firmly in place against the saw’s fence and cut slowly with a sharp blade.

Once the bars are cut to size, line them up in the face of the bookshelf and mark the middle of the frame board — we’ll drill a hole here so we can attach the bar to the bookshelf using a screw.

To drill the hole, use a drill and a drill bit that’s made for metal. Clamp the bar in place on a work table with a scrap board underneath it. Drill one hole in both ends of each aluminum bar.

STEP 06: Paint Shelf Frame
If you like the wood-look of the pressure treated wood, you can leave it as is. If you want to customize your space, you can paint it using a deck paint or a waterproofing sealer.
I went with a tint-able sealer from Behr that can be customized to match your favorite paint color. This was the existing color used to paint the deck, so it was perfect for giving the bookshelf a seamless look.

Pro tip — you want to make sure the pressure treated lumber is fully dry before you paint it. Pick pieces that are as dry as possible if you’re buying in-store, or let your bookshelf sit outside in the sun for a few days to weeks to dry fully before you paint.
Give the plant bookshelf 1-2 coats and let dry fully in between.

STEP 07: Paint Aluminum Bars
For a chrome look, you can keep the aluminum bars as-is and seal them with a gloss polyurethane to protect them from rust. I chose to paint them gold for a more modern look.

The first step is to prime with a clean metal primer — this will ensure the spray paint sticks to the smooth metal bars. After cleaning the metal bars, apply in even motions with the can about 8 in from the metal bar. Let dry completely.

Once the primer is dry, spray paint the bars withgold spray paint.
Pro tip — add a coat of gloss polyurethane to seal and prevent the gold spray paint finish from getting water spots.

STEP 08: Add Bars to Frame
Attach the bars to the frame using 1¼ - 1½“ wood screws. I lined up the bars starting with the larger bar about 1” from the top of the shelf, then the smaller bar about ½“ above it.
Drive a screw into each hole to secure the bar to the frame.

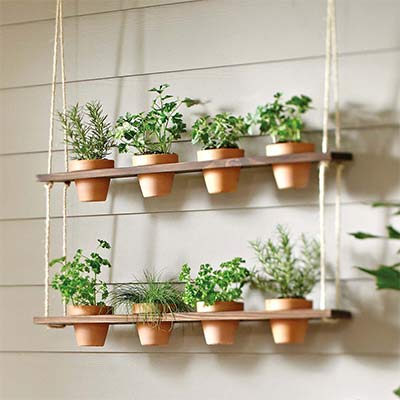
Once attached, the bars should look like this:

It’s best to anchor the shelf to the wall and/or the floor of the deck to keep it secure in the wind and prevent tipping.
I put the shelf in place and located a stud in the outside wall.
For a concealed anchor, I bent a corner brace — with the help of a clamp — to a 30 degree angle. I’ll attach one side to the wall and the other underneath one of the shelves so it's out of sight.

I attached both sides of the brackets underneath the middle shelf using exterior wood screws.

STEP 10: Add Plants
To add plants, select some planter pots for the shelves. You can choose pots that all match for a cohesive looking shelf or add variety and personality with mixed sizes, textures, and colors of pots.

Be sure to pick pots that fit well on the shelf — you want to be sure the base fits on the shelf depth and that the pot is well supported with the attached aluminum bars.

Plant your favorite herbs or flowers in the pots you selected.

Once planted, arrange the pots on the plant bookshelf. You can style them with varying color and height options or position them more practically based on watering needs and lighting.

STEP 11: Water & Enjoy!
Give your plants water as needed and enjoy the greenery, color, and texture you added to your outdoor space with your new plant bookshelf!


This post was created in partnership with The Home Depot. The author may have received compensation for this article and associated images or video, potentially in the form of products and/or services. All expressed opinions and experiences are the author’s own words.