How to Make an Amphibious Military Vehicle with Cardboard
Last updated August 21, 2024

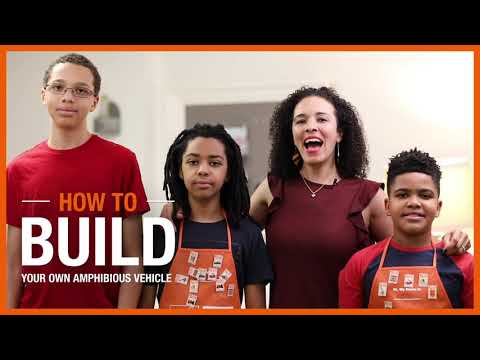
Serena Appiah is a blogger, entrepreneur, artist, thrifter, wife, and mother of three young sons. She had been named the 2016 Home + Garden Trendsetter of the Year, which won her the opportunity to speak at home shows nationally. Since 2012, she's been inspiring readers at ThriftDiving.com to decorate, improve, and maintain their home on a DIY budget. Thrift stores, power tools, and paint brushes have helped Serena and her readers transform their homes, one project at a time.
A Note From The Home Depot
Nothing is more nostalgic than a toy car - even better, one that’s amphibious!
Read below for the step-by-step instructions on how Serena Appiah of Thrift Diving
created this fun DIY and eco-friendly amphibious military vehicle!
Table of Contents
How to Make an Amphibious Military Vehicle with Cardboard
Materials
Tools
Print out the free downloadable templates
STEP 2: Trace the Patterns onto Cardboard
STEP 3: Fold Each Cardboard Cut-out and Secure With Glue
How to Make an Amphibious Military Vehicle with Cardboard
Kids love cars, boats, and water! So what do you get when you put all of those three things together? You get an amphibious vehicle! This project is a lot of fun because instead of tossing empty cardboard boxes into the recycling bin, you can make a fun project that can be done with the kids on the weekends! Let’s jump into how to make this amphibious military vehicle!

Materials
- 2 - 3 cardboard cereal boxes
- Downloadable PDF printable pattern pieces that you can print from your home printer for free. click here to download them for free
- Paint (Colors include Garnish, Kindling, Dash of Oregano, andd Tangy Green)
- Coins, buttons, or anything around the house that can be used to trace wheels
Tools
- Hot glue gun
- Scissors
- Pencil
- Paint brushes
- Pencil

Print out the free downloadable templates
Some cardboard crafts are easier to make than others. When making vehicles out of cardboard, they typically have more pieces. In that case, it’s easier to make them when you’re provided an easy-to-use pattern. To download the set of templates to print from your home computer, just click here to download them for.
Cut out each pattern piece. You’ll notice that some of the pieces have orange tabs. These taps are the folded areas that will be hot glued to hold the boxed pieces together neatly.

After cutting out each pattern piece, fold and press each pattern along the black lines.
STEP 2: Trace the Patterns onto Cardboard
Cereal boxes are preferred when making cardboard crafts that have to be folded because the cardboard folds much more easily than stiff shipping boxes.

Cut the cereal boxes open flat, place the template pieces onto the cardboard, and trace them out. Be sure to trace the fold lines, as well, onto the cardboard.

STEP 3: Fold Each Cardboard Cut-out and Secure With Glue
Using your fingernail, score the lines of the template so that the cardboard will bend more easily. Bend each piece of cardboard at the fold lines. Using your hot glue gun, glue to the designated “orange” tabs area, creating the folded box shapes of the amphibious vehicle. Fold and glue each vehicle piece.


STEP 4: Attach the Bed with Hot Glue
Stand up the caterpillar tracks and add a bead of hot glue to the top of the tracks, and place the bed on top of the caterpillar tracks.


STEP 5: Glue the Supports in Place
Turn the body over and glue the two support pieces to the underside of the body, between the caterpillar tracks. Be sure that the folded areas of the boxes are turned inwards so that the clean edges are facing outwards.

STEP 6: Attach the cab and back to the bed
Using hot glue, attach the bottom cab piece to the back. In the front, attach the bottom cab piece. The top cab should be glued to the top of the cab to complete the cab.


STEP 7: Glue the sides
Hot glue the sides to the side of the amphibious vehicle. Use scissors to trim the sides to fit the vehicle, if necessary.

STEP 8: Paint and decorate!
When painting a military-style vehicle, use a few shades of green to create a camouflage pattern. There’s no right or wrong way to do a pattern; just vary your shades of greens, yellows, and browns. (You can get creative here, but I used Garnish, Kindling, Dash of Oregano, and Tangy Green. Add Windows to the vehicle, as well.

To create the wheels, if you’d like to keep them tidy, use a quarter and a dime, or buttons, to draw and decorate the wheels.

This project will turn out fabulous and will be a hit with kids!

The Home Depot offers amphibious vehicle kits as part of The Home Depot Kids Workshop Kits, but they’re in limited quantities. No worries, though! This cardboard version with materials found around the home will provide an hour of fun for kids!</

Check out more crafts like this!
If you enjoyed this fun amphibious military vehicle, be sure to also check out other engaging DIY Kids Workshop activities, including a Kids Ladder Truck,
a fun Soccer Game, and a creative Toy Crane.

This post was created in partnership with The Home Depot. The author may have received compensation for this article and associated images or video, potentially in the form of products and/or services. All expressed opinions and experiences are the author’s own words.


