Parking Pad to Private Patio Oasis

Last updated August 21, 2024

Alex D'Alessio of @realiferenovation on Instagram & TikTok, started his DIY journey in 2020 when he and his wife took a risk on buying a fixer upper as their very first home. Without any prior DIY skills/knowledge, it didn't make sense. But that didn't stop Alex from trying. He grabbed his first set of tools from The Home Depot and went to work immediately by taking on his laundry room renovation. From his first successful project, his confidence grew and he soon aimed to inspire others in similar shoes to find the confidence to tackle projects in their homes too. And so, Real Life Renovation was born where Alex empowers homeowners everywhere by sharing his raw & authentic amateur DIY home renovation journey.
A Note From The Home Depot
Are you looking for new ideas to transform your empty parking space? Join Alex of Real Life Renovation as he takes you through the process of taking an empty parking pad to a private patio oasis that’s both functional and beautiful.
Table of Contents
The Game Plan
The Main Event
Furniture & Decor
Creating Privacy
Finishing Touches
Game Time!
The Game Plan
As the owner’s of a city row home for a few years now, we find ourselves longing for an outdoor space to entertain & hang out with friends and family. Unfortunately, our home didn't come with a backyard, or as a lot of city rowhomes have, a rooftop deck. What we do have is an ugly concrete parking pad in the rear of our row home.

And as the weather warms, my wife’s desire for a summer outdoor space has increased (she’s a 2nd grade teacher). So I decided to take matters into my own hands and transform our parking pad into a cozy, functional patio in only 8 hours as a surprise for my wife when she comes home from work.

The first step was to measure the space and come up with a plan for how I wanted it to look, searching on homedepot.com for inspiration. I ordered all of the products from their website and had them delivered to her grandparent’s house (to keep it a secret from my wife). The delivery was free, even for the heavy, bulkier items! The dining table and fire pit cocktail table needed assembly, so I took care of that prior to the big day.
When the day came for the transformation, my mother-in-law, sister-in-law, and I rented a Home Depot box truck to pick up all the items from her grandparent’s garage to drive them to my house. Now it’s gametime and the clock is TICKING.

The Main Event
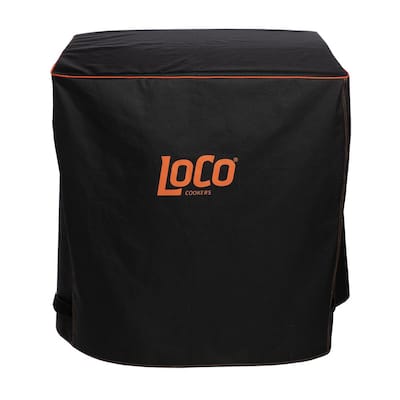
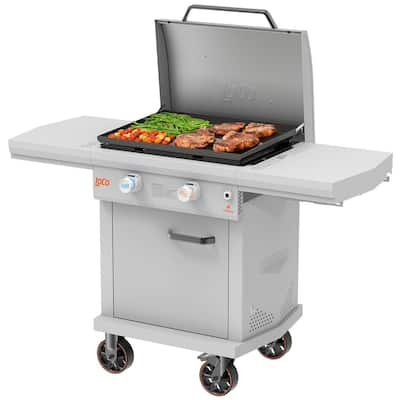
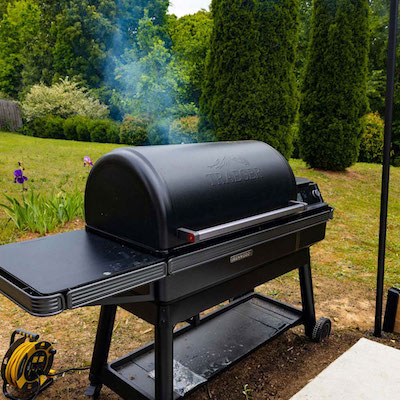
First up is the thing I’m most excited for: A Loco Griddle/Grill.

We already have a traditional gas grill, but we’ve been longing for a griddle grill for a LONG time and I know my wife is gonna freak out when she sees it. My wheels are already turning on what meal I’m gonna surprise her with later (see recipes at the bottom of this page)!
Furniture & Decor
You know the saying “you can’t put lipstick on a pig”? Well our concrete parking pad is the pig and we’re about to bring in a whole lot of lipstick via Home Depot to see if we can bring the “oasis” vibes to our drab space. With that in mind, we went with a fun, colorful Outdoor Rug to start it off!

Everything else is gonna have to play off these vibrant rug colors and with so many options at Home Depot to choose from - I think we nailed it. Now let’s see if we can put it all together…
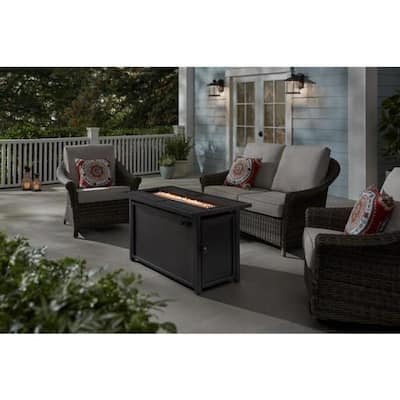
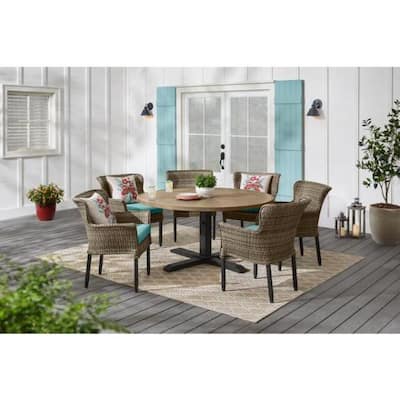
We love to entertain friends & family, so it was important to have enough seating for everyone. I decided on this stunning faux-metal wood, Round Dining Table Set that can accommodate six people. It comes with comfortable, aqua-colored cushioned chairs that pop the blue in the rug PERFECTLY.

It’s coming along nicely in terms of functionality, but I will admit that there was a problem when I started designing this space to fit our lifestyle. We like to entertain a lot at night, but that’s kinda hard to do at this table without any overhead lighting. Well guess what? I got this Gymax Solar-Powered Umbrella with lights underneath and it’s perfect to light up the table for some late night dining & cards, and I can’t wait to see it in action later tonight!
Did I mention that we like to entertain at night? I did? Well you know what people did before they had lights? Fire. This Hampton Bay Electric-Etarter Propane Fire Pit is a glorified transformer because not only is it a fire pit… but it also doubles as a table! The cover goes right over top of the glass rocks and it might just be the best invention since sliced bread.

Creating Privacy
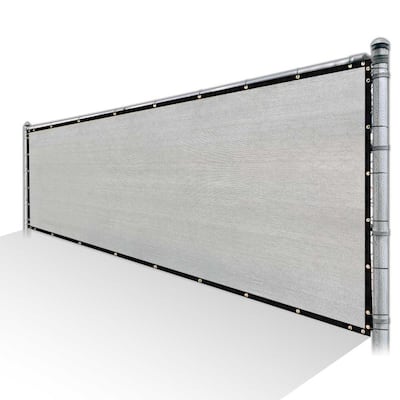
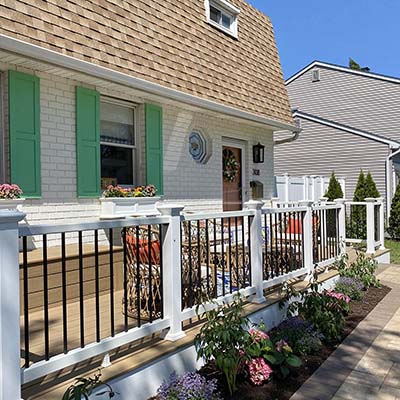
It’s really coming along, but the biggest obstacle in this whole mission is that this patio can’t be dubbed a “private oasis” if it’s not well… private. I needed to come up with a non-permanent way to create privacy by enclosing the rear opening. The non-permanent is vital so that we can turn this back into a parking pad during the colder months. I decided on a Privacy Fence Screen because it can be easily removed.

The screen can be purchased in a bunch of lengths, but 15 feet was perfect for our space and it helped to block out any unwanted views from neighboring row homes. This was a nice touch, as it allows us to feel like we have our own private oasis right in the middle of the city.
Finishing Touches
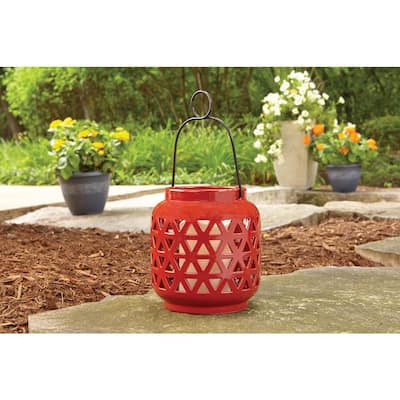
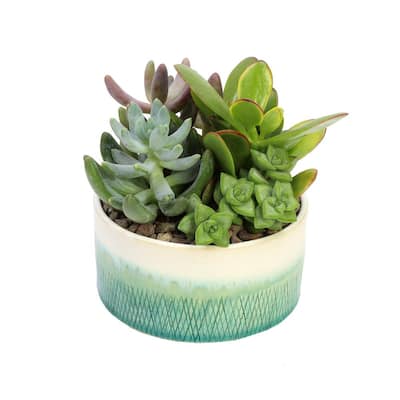
This space needs to be less “city” and more “oasis” so I wanted to add some greenery to the space. But to be honest, I had to be selective because we struggle to keep plants alive! So we went with an Artificial Palm Tree and some Succulent Plants since they are low maintenance.
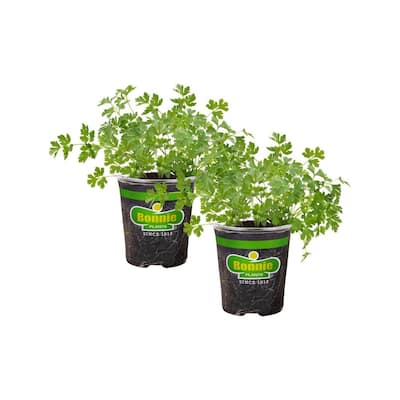
I also decided to get some fresh Herb Plants to use in recipes on our new griddle grill. And since rodents are unfortunately so common in the city, we planted our fresh herbs in these Hanging Pots and hung them on our existing privacy fencing.


Now we’re ready for my wife!
Game Time!
We did it. Just in time. My wife’s entire family is now here waiting to surprise her and she’ll be here any minute!

At 4 p.m. on the dot, she’s back home and we pulled off such an amazing surprise for her!

It’s only day one and we’re already making memories that will last forever out here. If you ever feel like you don’t have the outdoor space to entertain guests, I hope you take inspiration from this. Get creative, go to the Home Depot, and make memories with your loved ones. It’s so worth it.


Griddle Grill Smash Tacos Recipe

Smash Tacos Ingredients
- Soft tortillas
- Ground chuck or chicken
- Dry taco seasoning
- Liquid taco seasoning
- Shredded Mexican blend cheese
- Pico de gallo
- Shredded lettuce
- Fresh Cilantro
- Guacamole
Smash Tacos Directions
Heat griddle to 400 degrees and coat with olive oil
Mix ground meat with some dry taco seasoning (I eyeball all my seasonings when cooking)
Roll ground meat into balls (tennis ball size)
Place meat “balls” onto pre-heated & oiled griddle surface
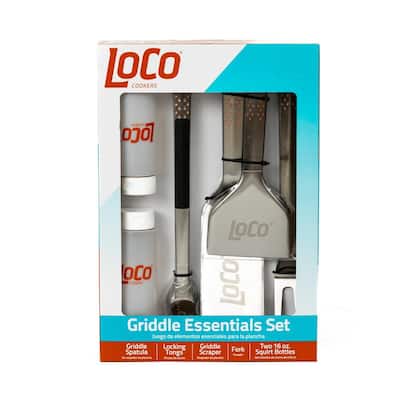
Smash down with burger press [322732541] to resemble a pancake
When meat appears to be browning, flip meat patty over to cook other side
Drizzle meat patty with liquid taco/mexican seasoning
Place soft tortilla on top of meat patty & press with a clean spatula
Once meat is fully cooked, flip over so the tortilla side is down (allowing it to toast on the griddle)
Add additional liquid taco/mexican seasoning to the cooked meat patty if desired
Add shredded cheese, pico de gallo, shredded lettuce & fresh cilantro (from the garden)
Fold the taco in half, allowing it to cook long enough to melt the cheese
Remove from grill, add guacamole/toppings if desired and enjoy!!
Griddle Grill Bruschetta Recipe

Bruschetta Ingredients
- French bread loaf, sliced in ¼” slices
- Fresh mozzarella, sliced to desired thickness
- Fresh tomatoes, sliced to desired thickness
- Italian seasoning
- Fresh Basil
- Fresh Garlic
- Olive oil
Bruschetta Directions
Heat griddle to 400 degrees and coat with olive oil.
Arrange sliced french bread slices on a tray.
Brush olive oil on both sides of the bread slices.
Rub fresh garlic on both sides of the bread slices.
Place the bread slices on the griddle grill and cook until toasted.
Turn the bread slices over to toast the other side of the bread.
Remove the toasted bread slices from the grill and arrange on a serving tray.
Place a fresh mozzarella slice on top of each piece of bread.
Season sliced tomatoes with italian seasoning.
Place seasoned tomato slices on top of mozzarella slices.
Top each slice with fresh basil and enjoy!!
This post was created in partnership with The Home Depot. The author may have received compensation for this article and associated images or video, potentially in the form of products and/or services. All expressed opinions and experiences are the author’s own words.